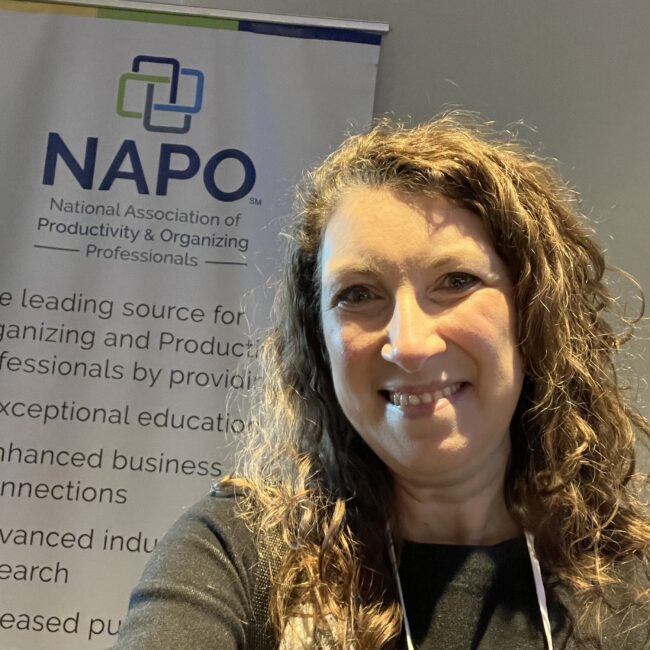
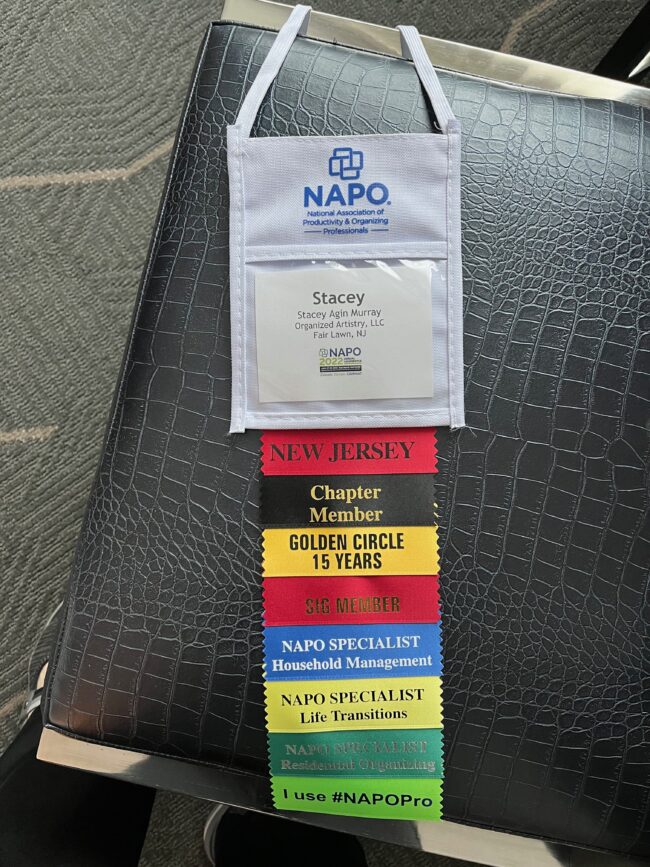
A few weeks ago, I returned from the 2022 NAPO Conference in Baltimore, Maryland. It is the 12th conference I’ve gone to since joining NAPO back in 2002. It’s a time to learn, a time to connect with colleagues and make new connections, and a time to disconnect for a few days from a sometimes hectic #momlife.
It’s been three years since NAPO gathered in person for a conference. I had the privilege of attending in Dallas/Fort Worth in 2019. And in the short time I was there, I observed that yes–everything is bigger in Texas…
Then we all know what happened.
Just as I was getting psyched to join my organizing colleagues in the ‘Happiest Place on Earth’–ORLANDO in 2020, the world shut down and our conference was cancelled.
In 2021, our NAPO Conference Committee did an extraordinary job of creating and executing a virtual conference. Some of the benefits of the virtual conference were that you didn’t have to spend time and money traveling and you only had to look professional from the waist up (thank you, yoga pants). Some of the drawbacks of the virtual conference were not being able to connect in person with colleagues and the challenges of reminding my family that although I was physically in our house–please pretend that I’m not unless absolutely necessary…
The big question was–would we be able to safely hold a conference in 2022 and where would it be? The answer turned out to be YES and the location–drum roll, please–was Baltimore, Maryland. I got very excited–I can easily drive there from New Jersey! I did it when the conference was hosted there in 2012 (the only conferences I’ve been close enough to drive to).
Now, truth be told, I was a little nervous about going to the conference. I had spent the last two years in my house and wearing a mask when out in public. I had only eaten in a restaurant twice and I had not been in a client’s home since March 2020 (three cheers for Virtual Organizing!). I was definitely stepping waaaaay out of my two-year-long comfort zone.
I decided to play it safe by driving (avoiding public transportation), packing a few masks (I bought a purple one to match my Organized Artistry purple brand color) and wearing them except for when eating. I’m so glad I did and I’m so glad I went. I came home healthy and filled with organizing knowledge!
There are usually six workshops (in addition to other learning opportunities) throughout the three day conference with five choices in each time slot–something for everyone!
Here are the workshops I selected and my biggest takeaway(s) from each one:
How to Diversify and Increase Your Income with Ten Different Revenue Streams
The speaker for this workshop was Cassandra Aarssen of HGTV’s Hot Mess House. It was a packed room and her workshop was jam-packed with ideas for creating passive income based on our skills, interests, and how much time we wished to spend on it.
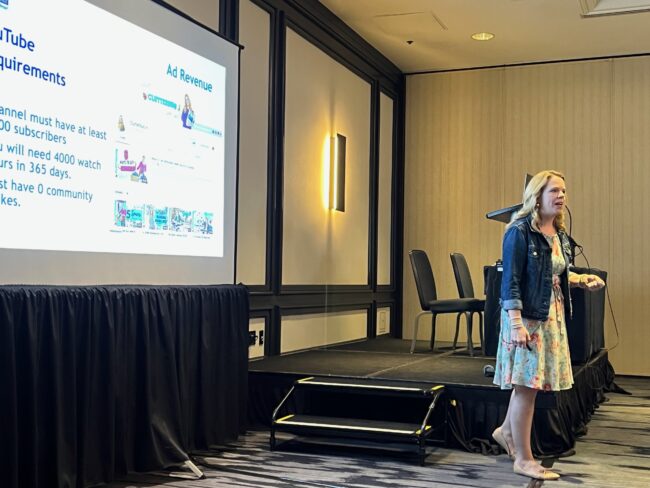
Biggest Takeaway: Cas advised us to think about the different income streams she presented. Which one or ones resonated with us? Devote yourself to trying them one at a time and add each revenue stream like ‘bricks.’ That’s how you ‘build’ passive income…
The Proven Formula for Using Free Webinars to Build Your Business
Alan P. Brown is a productivity/business coach and TEDx Talk speaker who shared everything we needed to know for conceiving, creating, and marketing a webinar to grow our businesses. Developing a webinar for my business is on my list of things to consider for the future so I thought I’d check out his workshop. I’m not sure I stopped taking notes for the entire ninety-minutes. All I’ll have to do is apply some thought to his Webinar Formula and the gobs of easy-to-follow information, tips, and advice he gave us and I’ll have a bouncing baby webinar in no time!
Biggest Takeaway: The title and subtitle of your webinar is critical to attracting people to sign up for it. Put time and thought into formulating it–use ‘pain and gain’ points to elicit emotion. And, thanks for the *freebie* bonuses, Alan!
Learn to Love Linkedin
NAPO member, Kathy Vines took us on a guided journey through Linkedin and how we can enjoy the platform and become efficient power users. Not only did she do that, she also gave us tips and helpful hints for ‘beefing up’ our profile and connecting on the platform. I had been neglecting Linkedin for a while, but this class inspired me to carve out some time in the early morning after my kids have left for school to become more active on the platform.
Biggest Takeaway: The best days and times to post on Linkedin? Tuesday, Thursday and Saturday between 8am-10am. Don’t ‘post and ghost!’ Stay on the platform and engage.
Power Up with Facebook Groups
I am a member of a few Facebook groups and love what they’ve had to offer. On my ‘work’ bucket list is to think about creating a Facebook Group for readers of my book, The Organized Bride’s Thank You Note Handbook. It’s barely in the ‘idea’ phase but I thought taking this class would give me some insight as to what is involved in creating and maintaining a Facebook Group. NAPO member, Melynda Weiland broke it down into easily digestible and manageable chunks of information (that’s what organizers do!) so any one of us could start a Facebook Group without pulling our hair out from frustration…
Biggest Takeaway: Facebook loves GROUPS more than it loves PAGES! Someone with a Facebook Page and a Facebook Group gets more visibility via the algorithm.
Profitable Marketing
I’ve been in business almost twenty years but could always use a refresher course when it comes to marketing. Our speaker, Victoria Cook is no stranger to NAPO conferences–I’ve heard her speak on the topic of marketing before. She offered us a process for building a marketing machine for our businesses that attracts new prospects and keeps clients engaged with our products and services.
Biggest Takeaway: The Golden Triangle of Marketing (I call it the 3M’s): Market (Who is your market?) Message (How will you let them know you have the solution to their problem?) and Media (Where will you put your message so they can see it?).
Keys to Confident Growth: How to Create a Business that Stands Out
It’s never easy to be a speaker in the last workshop time slot of a conference. Most attendees are a bit tired and half of us have checked out of our hotel rooms and are babysitting our luggage during the session. The very energetic Ken Olan, co-founder of ExactMade and a NAPO Strategic Business Partner gave us the framework and the motivation to reach for the idea of ‘Continuous Improvement’ in our businesses.
Biggest Takeaway(s): 1) Consistent effort will move you forward 2) Don’t underestimate the value of what we bring to our clients 3) Patience + Action = Perseverance
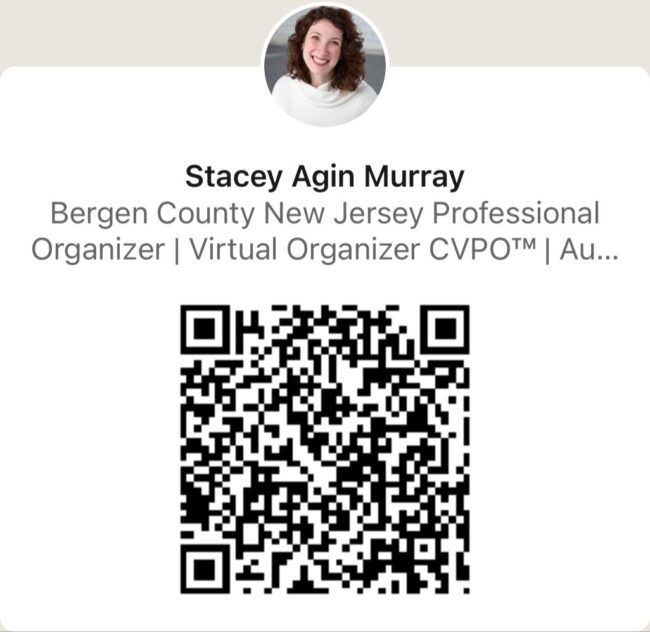
And during our Opening Keynote address, I learned how to create a QR Code for my Linkedin profile! Go ahead–use your phone to scan it and let’s connect!
I got to meet members of my Authorship and Publishing Special Interest Group in person. We’ve been speaking to each other for years via conference call and recently via Zoom. We had a lovely gathering–it was wonderful to spend time with a group of people who enjoy writing as much as I do.
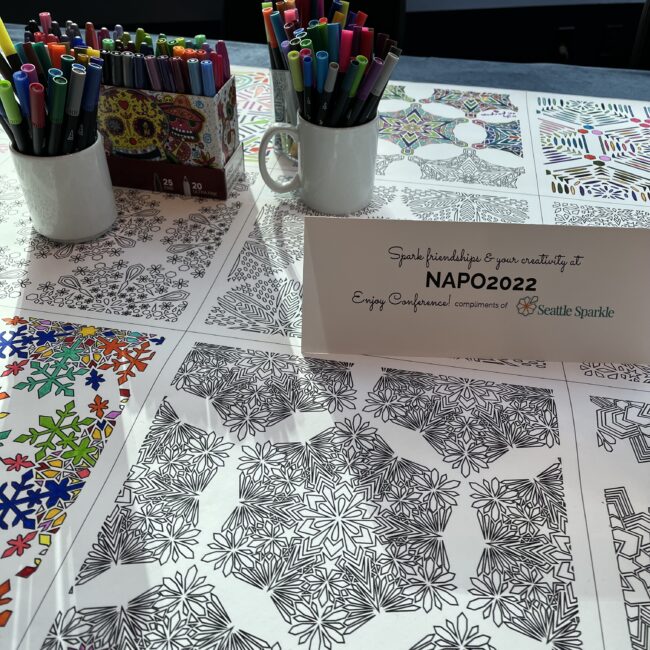
I think it was the NAPO Conference in Pittsburgh where a tradition of setting up a community coloring table first started. It’s a coloring party and everyone is invited! I’ve indulged in the allure of the paper and magic markers at past conferences but for some reason, I never made it to the one in Baltimore. It’s a wonderful way to meet other organizers and chat them up while coloring any stress you may have away. I must make the coloring table a priority at the next conference I attend!
At the Closing Event & NAPO 2023 Kick-Off, we found out that next year’s conference will be in LAS VEGAS! I’m not sure if I’ll attend–it’s a big year of milestone events for my kids occurring around the same time of the conference. And, I’m not great with jet-lag either. I’ve only been to one NAPO Conference out west–Los Angeles in 2015. We’ll see how the year goes. Maybe I’ll roll the dice and take a chance on NAPO 2023!
Want to stay current and connected to Organized Artistry? Follow us on Facebook, Pinterest, YouTube, LinkedIn, Instagram, and Goodreads!

Even as a kid, I could spot an organizing product from a mile away…
I have a clear memory from my childhood of walking into a Chinese restaurant and noticing in the back corner–a sizable round table with a small, round piece of wood on top of it. While my family ate, a large group of people were seated at that table and what happened next made my ten-year-old eyes go wide.
The patrons ordered. The waiters brought out platters of food and placed them all on the round piece of wood. Then, that round piece of wood started moving. And people started serving themselves from it. Holy-moly–it spins!
I went home after dinner and wrote in my diary:
Dear Diary, Tonight at dinner I got a really disappointing fortune cookie BUT, I saw the coolest thing at the Chinese restaurant. I MUST someday sit at one of those tables with the spinny-thing on it. It was too cool for school. But I’m going to have to find nine other people to join me at the table because they won’t seat me there by myself…
As an adult, I eventually found nine other people who enjoyed Chinese food and were equally intrigued with the spinning table top. And, yes–it was a fun time. Childhood life goal fulfilled!
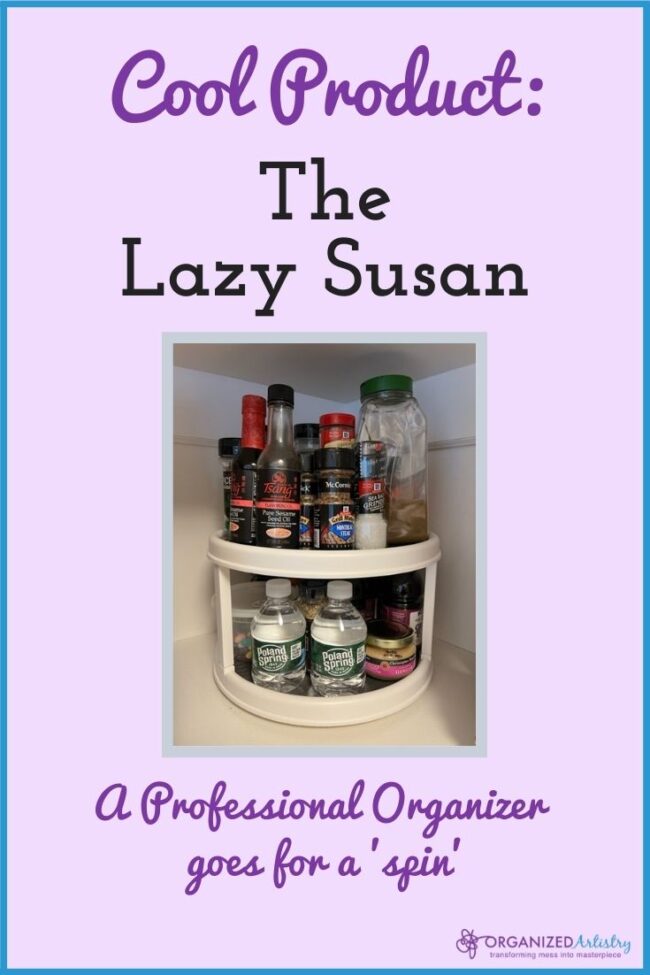
When it comes to writing about cool organizing products, I often focus on a singular item. This time, I’ve chosen to declare a category of organizing products as today’s ‘Cool Product.’ If you haven’t guessed already, I’m talking about the Lazy Susan.
I know–you have the same question I do. Why is it called a Lazy Susan?
I went looking for a definitive answer and came up with a bunch of educated guesses from educated people…
In my research and reading, I found that no one really knows for sure where the term ‘Lazy Susan’ comes from. There are more myths and conflicting reports than fact.
Here are a few facts and a few theories about the Lazy Susan:
• It dates back to 13th century China and 18th century England and was probably created to replace household help.
• Some historians say that Thomas Jefferson and Thomas Edison both had daughters named Susan and both had a hand in it’s invention (not at the same time in history, of course). There is no credible proof of that theory.
• In 1891, Elizabeth Howell was granted a patent for improvements to the ‘self-waiting table’ that included making the moveable portion less noisy and preventing crumbs from getting between the table and the revolving part.
• The Lazy Susan first appeared in an advertisement in Vanity Fair magazine in 1917.
• The phrase ‘Lazy Susan’ was added to the Webster’s Dictionary in 1933.
• It found it’s way into Chinese restaurants in the 1960’s–referred to as a ‘hygienic dining tray.’
• It found it’s way into Lechter’s (who remembers the former kitchen-supply store?), The Container Store, Target, Bed Bath and Beyond, HomeGoods, and other stores many years later!
The Lazy Susan has evolved over time and has recently become a staple organizing product in many homes–and not just for use on the dining room table.
Benefits to using a Lazy Susan and why it’s such a ‘cool product.’
• A Lazy Susan offers easy access to hard-to-reach spaces
• A Lazy Susan creates storage space in awkward spaces
• A Lazy Susan easily bring items from the back of a space to the front
They come in plastic with rubber grip material, clear plastic (oh, so popular now), metal, wood, marble–so many styles, colors, and sizes. They’re flat, they have raised edges, high-sides, they have compartments. Something for everyone!
And let’s be real. Objects that spin have novelty (who doesn’t love to spin around in a chair???). And in the case of the Lazy Susan, novelty = fun. We’re more likely to use an organizing product if it does something fun–like SPIN! Just another reason why I’m declaring it a ‘Cool Product.’
Where to use a Lazy Susan?
Refrigerator
A Lazy Susan works well in a refrigerator that is deep so items don’t disappear and die in the back of your fridge. Stick your hand in, spin it, and easily retrieve what you need. Less wasted food = less wasted money and less time spent running to the supermarket.
Upper and Lower Cabinets
If you’ve ever searched for a can of soup or a box of macaroni and cheese on the top shelf of an upper cabinet, you know the struggle is real. You can’t install a pull-out drawer in most upper cabinets so how do you easily reach what you need? Install–you guessed it–a Lazy Susan. This will provide an easy-to-access rotating storage system that will allow you to access anything that would otherwise cling to the back wall of the cabinet. Similarly, install one in a lower cabinet in a kitchen or bathroom in lieu of a pull-out drawer or basket.
Corners
Corners can be difficult to access but there’s no reason why we can’t use this awkward space more efficiently. Make the most of a corner where two shelves meet or a blind corner in a lower L-shaped corner cabinet by adding a Lazy Susan. And if you have the height, consider using one with multiple tiers. I always say, “If you have run out of room to organize outward, then organize upward!”
Homework/Art Station
The ladies of The Home Edit really know how to make a Lazy Susan look fab. But don’t despair if the contents of your Lazy Susan are not arranged in rainbow order (thank you Mr. ROY G. BIV). Make homework and art-time more fun with a Lazy Susan filled with pencils, crayons, scissors, glue sticks, etc. Yes, a ‘spinny thing’ can motivate your kids to do their homework and channel their inner Picasso. Whatever works–right, parents?
I use a few Lazy Susans in my own home. I currently have one in a corner of my pantry closet for small items such as extra spices, cans of ginger ale, and small bottles of infrequently used condiments (it’s the one in the photo above). I also use two in a narrow upper kitchen cabinet to group all of my family’s vitamins in one location.
In thinking about it, the memory in the Chinese restaurant was not my first encounter with a Lazy Susan. It was one in my mother’s kitchen. It was a lovely 1970’s gold (who remembers THAT?). It lived in a cabinet close to the cooktop and held a variety of spices. It’s probably the first Lazy Susan I ever saw but did not pay much attention to it until I was old enough to start cooking.
That Lazy Susan worked in our kitchen for close to FORTY YEARS! I recently asked my mother about it and she told me it unfortunately broke some time ago and had to be replaced by a newer 2-tiered version–NOT in gold.
So, if you’re having trouble reaching items in your closets, cabinets, or pantry OR the thought of using an organizing product that *spins* makes you giddy, give the Lazy Susan a try.
If you are the proud owner of at least one Lazy Susan in your home, share in the comments how you’re using it and how it makes your life easier. I’d love to know!
Want to stay current and connected to Organized Artistry? Follow us on Facebook, Pinterest, YouTube, LinkedIn, Instagram, and Goodreads!
As a Professional Organizer, mom of two, and former first grade teacher, I have spent much time organizing kids.
Guess which age range has the most stuff that needs organizing?
The smallest of children! For little people, they sure have a lot of things to organize!
And because they’re ‘tiny tots,’ (a name I adopted from my son’s former preschool class) they’re not as independent as a teen, tween, or even eight year old would be.
If you’re responsible for one or more of those tiny tots, you’re probably very busy. And tired. Mmmmm…more like exhausted. You have very little time or energy to keep their lives organized. When you have tiny tots, it’s rare that you have more than ten minutes to spare–especially if you have more than one child!
In the interest of saving you time, money, space, and stress (and your sanity?!?), here are 10 ten-minute tasks to tackle for organizing your teeniest of tiny tots:
10 Ten-Minute Tasks
• Purge photos from your smartphone. I KNOW you have a ton of pics of your tiny tots on your phone. I did, too (and still do…)! Take ten minutes a week to delete any blurry, red-eye, duplicate photos. You don’t want to run out of digital space and not be able to capture future milestones and adorable moments.
• Gather and carve out a small space (a lower cabinet, drawer, or basket) for kid-friendly dishes, bowls, and cups. Taking ten minutes to set this up will save you hours in the future. Creating a space for a child to retrieve a bowl or cup by themselves (and put it back after being washed) encourages independence and teaches them beginner organizing skills.
• Organize food storage containers. Purge out containers with missing lids or those that have gone through the dishwasher one too many times. With a little direction, some children as young as two or three can help match lids to bottoms and group similar-shaped containers together.
*This task is especially important if you pack your child a lunch every day for day care or preschool.
• Before heading to the market or placing an online order, take inventory of baby food, formula, and diapers. Depending upon how many kids you have, this should take you less than ten minutes but save you a lot of time, energy, and grief.
• Scan your kid’s play area for sticky, broken, or infrequently used toys and take a few moments to wash them, repair or toss them, or donate them.
• Using strips of low-tack blue tape, create ‘parking spots’ in your play space or garage for large toy trucks, doll carriages, or ride-on toys. This designates a ‘home’ for these bigger toys and just like you park your car in a lot, on the street, or in a driveway your child will park their toy in these designated spots. And if they don’t, you can play a game I like to call, ‘Mommy Meter Maid…’
(For some of my other toy organizing ideas for your tiny tots, read more here.)
• Create a ‘home’ for your kid’s favorite bedtime books. When bedtime isn’t going as smoothly as you’d like, at least you’ll know where their ‘sleepy-time stories’ are!
• Grab diapers, cream, wipes, and a mat and set up a ‘satellite’ diaper changing station in an area you spend the most time in with your tiny tots. Doing this will save you time from having to run to your changing table, from having to clean up a blowout (you know what I’m talking about…), and then having to do some messy laundry.
*Spend less than ten minutes a week refilling both diaper changing stations with more ‘supplies.’
• Similarly, use a ten minute pocket of time to take note of and re-stock the contents of your tiny tot’s diaper bag. Jot down a checklist of must-have and nice-to-have items and keep it in the pocket of the bag for reference–a real time and brain-space saver! It’s important to have a diaper bag prepared for when you want to leave the house, when you have to leave the house, or in an emergency situation.
• Take ten minutes to brainstorm more ideas for organizing your tiny tots in under ten minutes. I would say, “Take ten minutes on Pinterest to to look up more kid organizing ideas but let’s be honest–who can be on Pinterest for only ten minutes?!? So, instead please–take ten minutes to yourself. Organizing your tiny tots is important but so is self-care. And if Pinterest is part of your self-care routine–take at least fifteen if you’re able to…
Little kids are unpredictable–be realistic with your ten minutes. If you have a task you think will only take ten minutes but it really takes more, split the task in two parts and tackle them at different times of the day. And if you don’t have ten minutes one day, you’ll have it tomorrow or over the weekend. Keep these tasks as simple as possible and enlist help from a friend, family member, or kid-loving teenager.
Put these 10 ten-minute tasks into practice to make parenting ever-so-slightly easier. You’re on your way to modeling and teaching your tiny tot the how-to’s and benefits of being organized.
Want to stay current and connected to Organized Artistry? Follow us on Facebook, Pinterest, YouTube, LinkedIn, Instagram, and Goodreads!
You know how some kids wait by the mailbox for the Target/Amazon (former Toys R Us) holiday catalog to arrive? For me, it’s the Container Store Stocking Stuffers catalog. I know the holiday season has begun when it appears in my mailbox nestled between bills, requests for donations, and holiday-themed junk mail.
My usual reaction to it’s arrival is to jump up and down with excitement, run to get a pen, and plop myself down in a comfy spot to peruse the pages (I consider this routine to be an act of self-care…). After flipping through the pages once or twice, I then take that pen and start circling the items I may want to talk about in my annual I ‘Heart’ Container Store Stocking Stuffers post. I also draw a big star next to the few items I’ll consider purchasing for myself.
For the past five years (plus one post in 2013), I have done the jumping, the running, the plopping, flipping, circling, and starr-ing. and the writing of the I ‘Heart’ Container Store Stocking Stuffers post.
This year, except for the writing, none of the above occurred. Like Charlie Brown checking his mailbox for a valentine, I checked my mail pile every day for a Stocking Stuffers catalog. In the past, it usually arrived in the middle of November but as I prepped for Thanksgiving, it never showed.
Sadness.
Maybe it got lost in the mail?
Maybe The Container Store chose to be ecologically responsible and didn’t print the catalog this year?
Maybe The Container Store decided NOT to curate a stocking stuffer collection for the holiday season?
FORGET I even SAID that!
Maybe all the stocking stuffer items fell victim to ‘supply chain-itis!’
I’m not crying–you’re crying!
OK, it wasn’t really that dramatic but I was still concerned about the stocking stuffers.
I decided to ask Google to take me to the Container Store website. Stocking stuffer page, please–and step on it!
And then, it took about 2.3 seconds for my fears to disappear. There were the stocking stuffers–all six pages of them. No circling items on my iPad or putting stars next to the ones I thought I might buy. I plopped on the couch, clicked instead of flipped, took notes on a scratch pad, and drew a big star next to the few items I considered purchasing for myself.
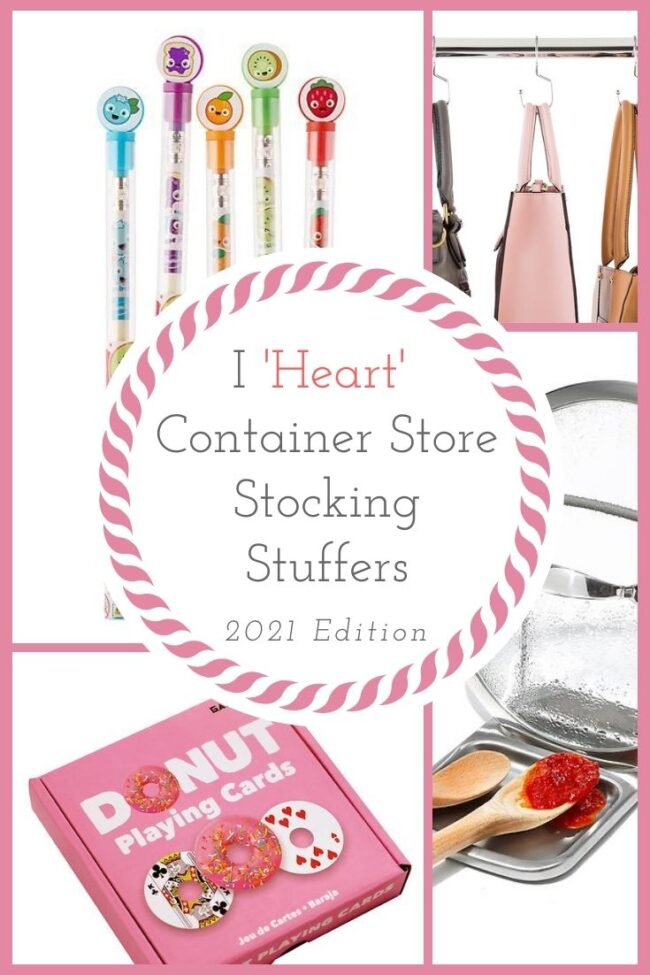
After all that drama, here is a list of some of my favorite Container Store Stocking Stuffers. They’re useful, great for organizing, perfect for the kitchen or kids of all ages, cute and fun, and one is an improvement over last year’s choice:
Organizing
Chrome Metal Purse Hanger
$9.99 pkg/6
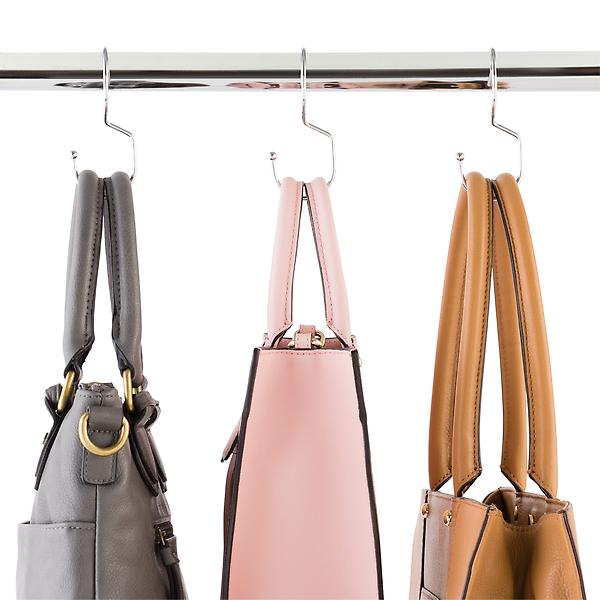
If you own handbags and have the room to hang them in a closet, this product would be worth a try. They’re similar to an ‘S’ hook but the bottom half can twist, offering great flexibility. And they’re not just for handbags! People who have purchased this product posted pictures of the hooks being used for holding kitchen utensils, boots, and holiday decor.
OXO Spoon Rest with Lid Holder
$20.99
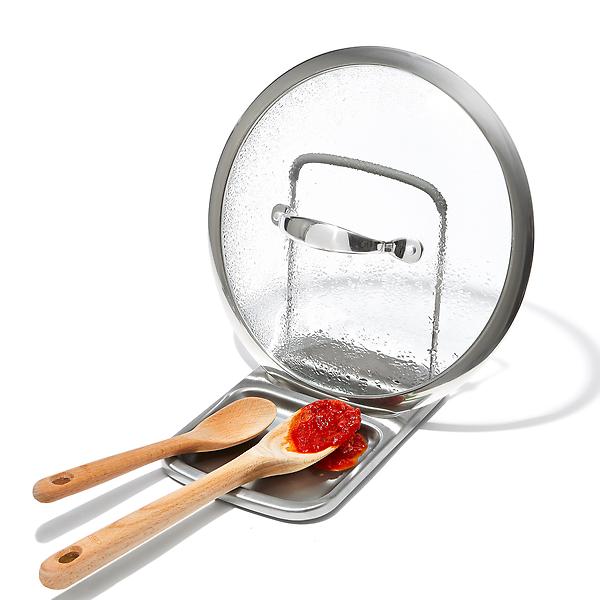
I am a big fan of OXO products. They are thoughtfully crafted and designed with the user in mind. To me, this product screams, ‘Necessity is the mother of invention.’ I can imagine that someone working at OXO had the experience of cooking a big meal with many pots and nowhere to place the lids while tasting, stirring, or sautéing. They came into work the next day and said to their boss, “I have an idea for a new product!”
I know that I am often looking for a place to put my pot lids–especially when I have four or five burners going at once. It’s a little pricey, but I may have to try this. And bonus–it folds flat for easy storage. Thank you OXO!
Kikkerland Wood Hammer Multi-Tool
$19.99
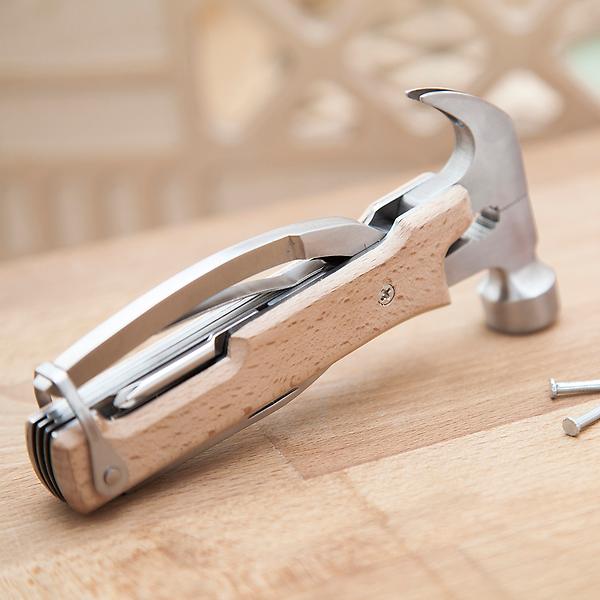
Every apartment dweller or homeowner should own a tool box filled with basic tools. This 10-in-1 multi-tool fits the bill for someone who may not have room for a tool box or the resources (or desire) to fill one. Includes a hammer, wire cutter, pliers, flat and Phillips head screwdrivers, knife blade, file, saw blade, reamer and bottle opener.
At a bit over eight inches long, it’s portable enough to carry to a friend or family member’s house to assist them with a basic repair. And, you’re the hero!
Otherwise, Useful
Vlogging Mini Tripod
$9.99
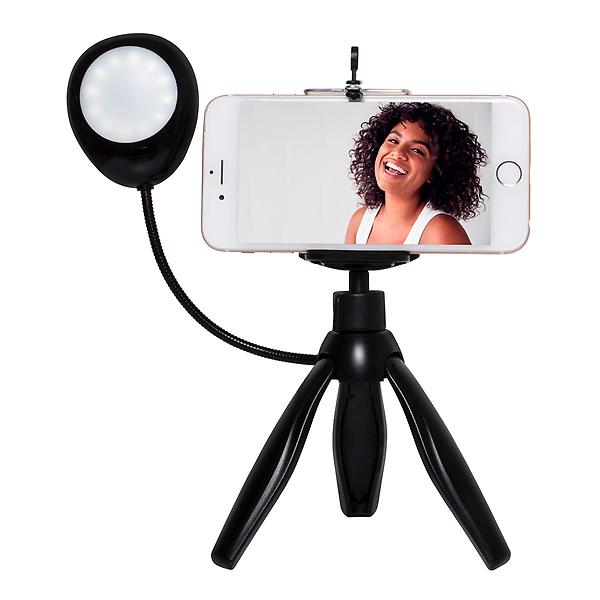
Unless you live in a cave with no wifi, it’s most likely you’ve spent the better part of the last eighteen months using your phone to communicate via video. And after all that time, if you haven’t invested in a product to create a hands-free spot for your phone, this could be the time to make a small investment.
No more leaning your phone against a tissue box or precariously placing it on a shelf. Something as small as a tripod can offer big rewards in terms of keeping your phone from falling and allowing you to move freely while on video. And–a bonus ring light!
Thumb Scraper
$4.99
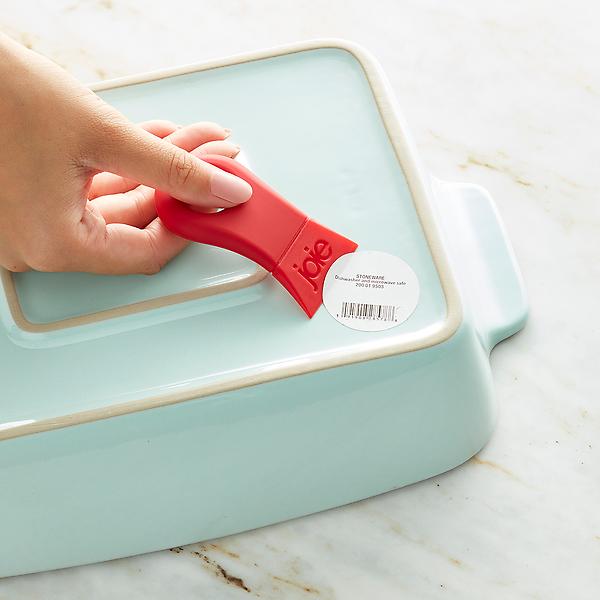
This type of product piqued my interest when I profiled the Thumb Scraper Tool in last year’s Stocking Stuffer post. Although I haven’t had a manicure in a while, I still don’t enjoy chipping a fingernail while removing a price tag. I bought this to have in my home to try and view it as a small, yet worthwhile investment. I think it will come in handy whether I’ve painted my nails or not!
Kitchen
Rainbow Scrub Sponge
$6.99
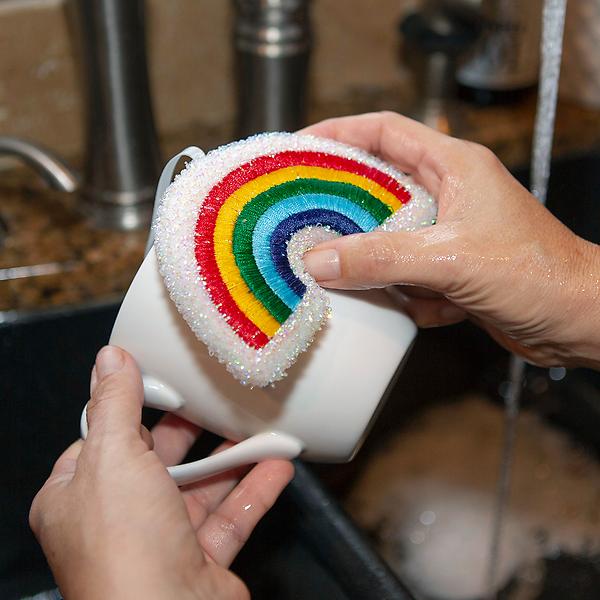
I am not the biggest fan of washing dishes. But, if I had to stand and scrub a bunch of dirty pots, I think this brightly-colored sponge would make the task a little less distasteful and a whole lot more joyful. It comes in a two-pack and it’s safe to use on non-stick cookware. They even have a loop at the top so you can hang them to dry easily.
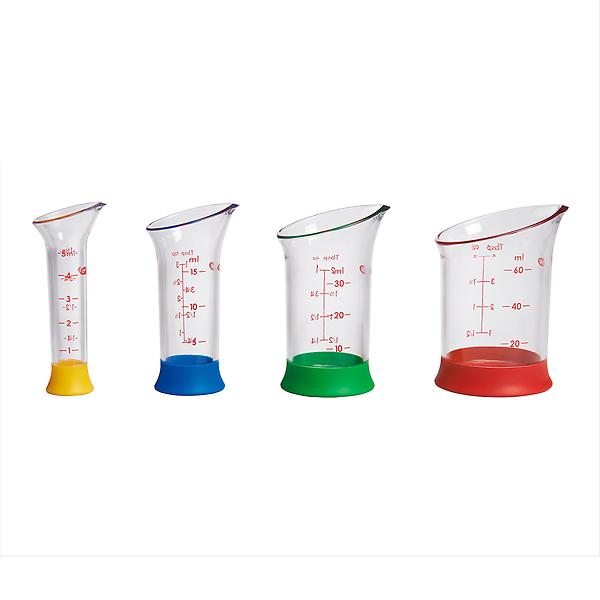
OXO 4-Piece Mini Measuring Beaker
$10.99
 As I wrote earlier, I am a big fan of OXO products. I have a bunch in my kitchen such as spatulas, tongs, peelers, and one of my faves–OXO POP containers. They have all lasted for years and make the cooking part of my life more manageable and less energy-sucking.
When I saw these, I thought, ‘Do I need them? Because, they sure are cute!” Cooking for a family of four (with a teen and tween boy) doesn’t usually lend itself to such small measurements so I passed on purchasing them. But, aren’t they adorable? And they nest, too! Even when they’re next to each other, they barely take up much space.
Each set includes 2-oz, 1-oz, 1-Tbsp and 1-tsp measuring beakers and they’re dishwasher safe (top rack). And colorful! And, they match perfectly with the Rainbow Sponges! Ok, maybe I need to take a ride to The Container Store…
Rocket Dog Bites Baking Tray
$13.99
 Raise your hand if you love pigs-in-blankets! (Ooooh, me me me!)
In 2018, I profiled a similar product called ‘Little Pigs in Blanket Mold.’ The Rocket Dog Bites Tray appears to be a comparable product–insert rocket ships instead of pigs.
Yes, you can buy pre-made pigs-in-blankets (or as they’re called in my household:’ little hot dogs’) but you might have a blast (off) making your own rocket ship-dogs. Looks like a fun product to use with kids to teach early cooking (and cleaning up) skills. It’s oven-safe and made of easy-to-clean silicone. So easy-to-clean, you probably don’t even need the above Rainbow Sponge…
For Kids Big & Small
Balloon Animals Kit
$4.99
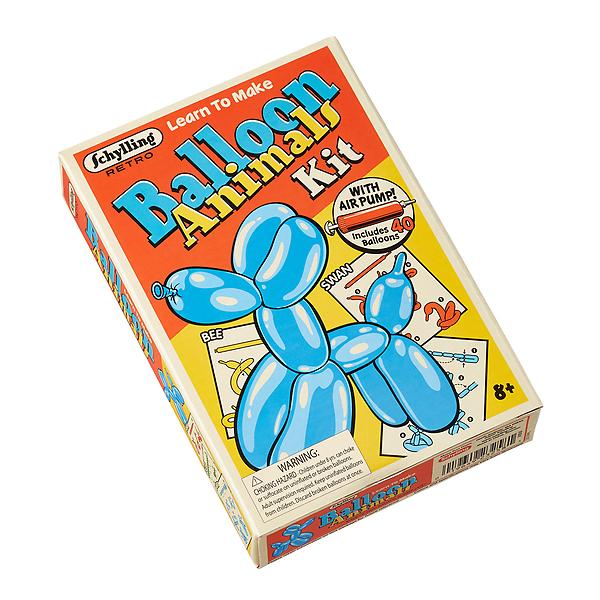
No time to enroll in Clown School? Here’s the next best thing!
It’s amazing how much joy a balloon animal can bring to a child (and many adults, too!). Learn to make six different animals. This kit includes 20 balloons, an air pump and an 80-page instruction book with photos. With this kit, your days of only being able to create a balloon snake are over!
Smencils
$6.99
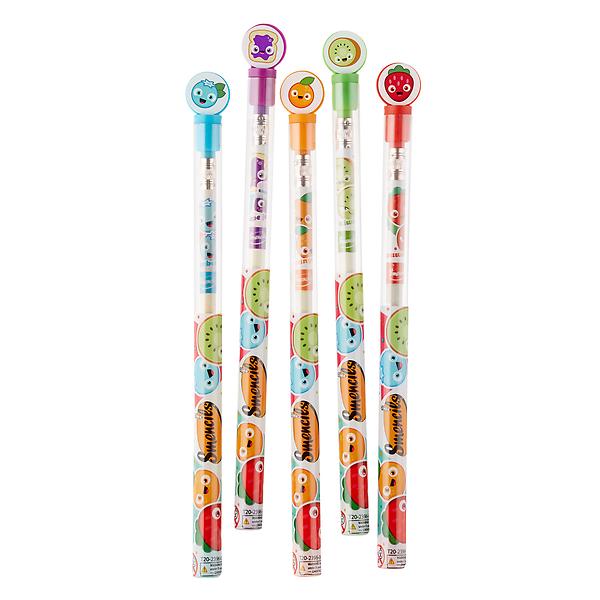
Just looking at these brought me back to my childhood. There was always one kid in my class who had fruity-smelling magic markers and didn’t mind sharing them. I loved sniffing them (admit it–you know you did, too…)!
Now, there are sweet-smelling pencils! Made from recycled newspaper, they’re packaged in their own recyclable tube and topped by a cute character cap. The set of five color-coded scents include grape jelly, orange, kiwi, blueberry and strawberry. If your kid shudders at the thought of eating fruit, using these pencils may bring them one step closer to tasting the real thing…
Cute & Fun
Donut Playing Cards
$9.99
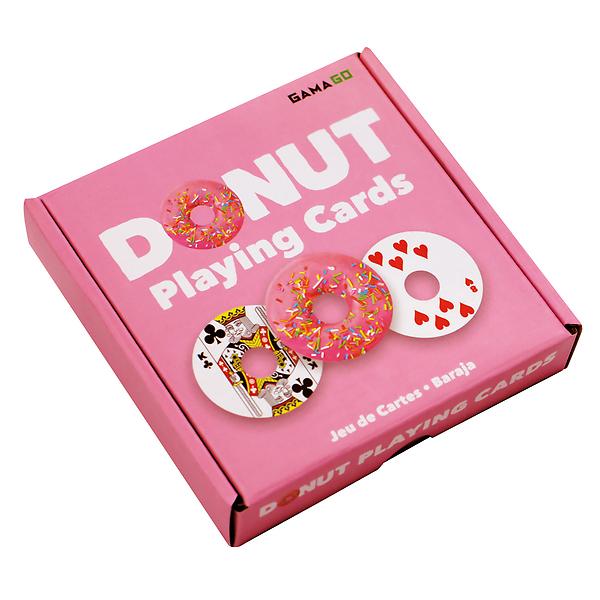
Would you care for some sprinkles with those poker chips?
Perfect for when a boring rectangular-shaped deck of cards just won’t do. Goes well with a cup of coffee!
Fred & Friends Ramen Sticky Notes
$8.99
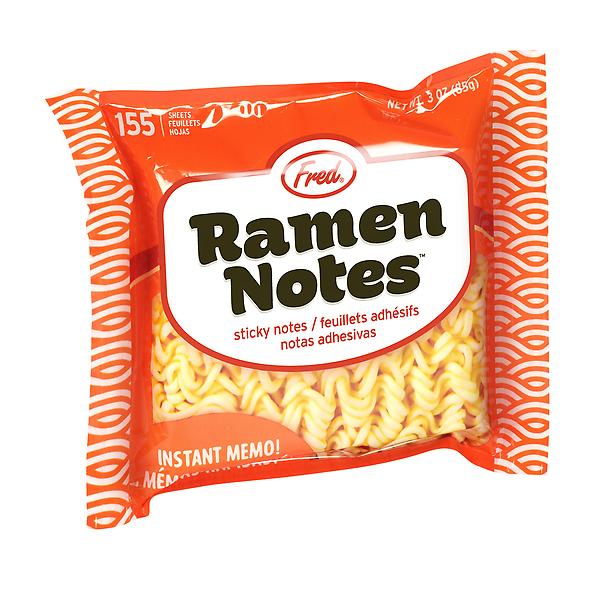
I’m not a fan of ramen noodles, but I looooove post-its. And I love the fun and whimsical products made by the Fred & Friends company. It’s the post-it note with the most amount of sodium I’ve ever seen!
If you have a friend or family member who enjoys ramen noodles, this would be a cool stocking stuffer for them. The pad has 155 sticky notes and comes in a resealable zipper storage bag. A great addition to one’s kitchen counter or desk.
Better, But Still Not a Winner in My Book…
Shoe Pourri
$9.99
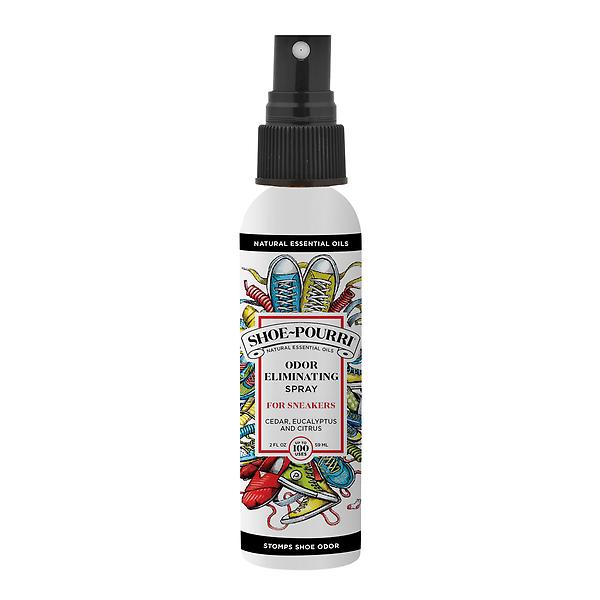
WHY is this a STOCKING STUFFER??? Is it just me or does anyone else feel that this is just NOT appropriate to give as a ‘gift?’
Doesn’t this kinda ‘reek’ of telling someone that their feet smell? “Hey! Here’s some Shoe Pourri–and Happy Holidays to you, too!”
If you must, try gifting this to the active spouse or teen in your life. Just make sure they won’t be offended by it. The last thing you want during a holiday celebration is a surly teen or horrified family member. #howtoruinaholiday
Interested in seeing the rest of The Container Store Stocking Stuffer Collection. They’re all right here!
If you received a Container Store Stocking Stuffer catalog this year, please let me know in the comments section below!
Want to stay current and connected to Organized Artistry? Follow us on Facebook, Pinterest, YouTube, LinkedIn, Instagram, and Goodreads!

Twelve years of blogging! Could that really be true?
It feels like only yesterday when I attended the 2009 NAPO Conference in Orlando and signed up for a workshop called, “Become a Blogging and Podcasting Genius.’ I had no desire to start a podcast but a blog–yup, that was right up my alley.
I’ve always enjoyed expressing myself through the written word. I found writing to be an enjoyable creative outlet–writing about organizing was going to be FUN (and it still is…)!
Who would have thought there would be so much to write about on the topic of organizing?!? It’s twelve years later and I still haven’t run out of ideas. In fact, I keep a list of ideas in a file in one of my favorite productivity apps, Evernote. I’ll be checking my list over the next few weeks to plan out my blog post topics for 2022.
Happy blogiversary to me! As part of my blogiversary celebration, I set goals for my blog for the year ahead and I look back to see if I met the goals I set for myself the previous year. Here’s how I did…
Goals I had set for 2020-2021
Continue to Blog 1x a Month
I got off to a great start! Beginning with October of 2020, I published a blog post consistently every month and lined a guest blogger up for the month of March. Around that time, both of my parents became ill within a few weeks of each other. When a crisis occurs, it’s vital to focus on what’s most important and put non-essential tasks aside until the crisis passes and that’s what I did. They’re doing much better now and I started blogging again over the summer.
I also took time to complete three NAPO Specialist Certificates and a program that certifies me as a Certified Virtual Professional Organizer ( CVPO™ ). The timing was right so I put blogging aside to fulfill the requirements. Now that I’ve completed them all, I can focus more of my time on my blog. I’m looking forward to publishing my annual I ‘Heart’ Container Store Stocking Stuffer post next month!
Consider Using Tailwind
Due to the circumstances of the past year, I barely got to spend any time on Pinterest (insert sad face here). Thus, I didn’t even begin to think about Tailwind. It’s not totally off the table–it’s just not a priority. I’ll keep it on my to-do list and put a reminder in my calendar to learn more about it.
Create Canva Images for Older Posts
Started! I began blogging on the Blogger platform before I even had a WordPress website. WAAAAY back when, blog posts were more about the writing than the photos. Now, I’m starting to add images to some of those ‘vintage’ posts. Years ago, my website designer helped me migrate the old posts over to my new WordPress website. They have good SEO juice–they’re just not pretty enough yet for ‘prime time’ (Pinterest, Instagram, Facebook).
Continue to Tweak Content on Older Blog Posts to Make More Evergreen
Every so often, I’ll scroll through my blog posts to see if they need updating. I’ve made some tweaks along the way to ensure their status as ‘evergreen.’ In fact, the last one I tweaked was a roundup post I curated for Halloween.
Create a Second Blog Post Showcasing ‘Ted Talks’ on the Topic of Organizing
I did not get to write it this year, but I have been curating a list of Ted Talks on the topic of organizing that would work nicely for a second similar blog post. My first blog post titled, 3 Thought-Provoking Ted Talks That Will Inspire You to Get Organized was and still is very popular on Pinterest. It’s on my to-do list to create that second Ted Talk blog post for Winter or Spring of 2022.
Goals I’m setting for 2021-2022
Create a Round-Up Blog Post
I love reading ’round-up’ posts–so many creative and ingenious ideas all in one spot for the reader. I’m considering creating one for my blog in 2022–topic: To Be Decided…
Create Downloadable Printables for My Most Popular Blog Posts
My ‘Ted Talk’ blog post blew up on Pinterest and until a short while ago, it was my most ‘pinned’ post. Then, about nine months ago I started seeing a constant stream of people pinning my ‘Tales of a Town-Wide Garage Sale’ post. It seemed as if half the world wanted to read about my garage sale experience and use my garage sale tips. I get Pinterest notifications on our family iPad and at least a few times a week my son yells out, “Mom! More people pinned your ‘Garage Sale’ post today!”
In an attempt to gather more email addresses for my email list, I thought I’d create a *freebie* downloadable printable for this post. I recently created the printable and now I’m working on figuring out the technology part to make it downloadable and how to collect the email addresses. I hope to report in my next blogiversary post that I was successful!
Invite Guest Bloggers to Share their Posts
In the past, I used to invite guest bloggers to share their knowledge and ideas on my blog–usually around the times of the year when I’d be most busy with my kids (school holidays/summer vacation). I don’t recall why I stopped doing this, but I’d like to get back to it–perhaps having guest bloggers offering tips and advice on topics that are not my specialty. I had a very positive experience hosting a guest blogger in March–I think I’ll try it again this year.
Thanks for joining me on my adventures in blogging–onward to year thirteen!

What? It’s time to send the kids back to school? Already?
Are you sure? Because I’m still enjoying the warm weather and not having to pack lunch boxes–how about you?
OK. Time for a reality check. School starts this week for my kids. Others across the country began weeks ago and have already submitted their ‘What I Did Over Summer Vacation’ assignment.
As we all know, it’s important to start the school year off on the right foot. Freshly sharpened pencils, a positive mindset, and solid sleep habits are first-rate ways to get the year in motion. An apple for the teacher couldn’t hurt…
If you’re feeling stressed just thinking about everything you need to do to keep you and your kids organized throughout the school year, take a deep breath. There are basic organizing principles that can help you simplify and streamline what needs to get done and help you and your kids get an A+ in ‘Organization’ for the school year.
One of these basic organizing principles is known as ‘Give Everything A Home.’
Everything that comes into your home and already exists in your home needs a place to ‘live.’ The concept may sound overwhelming, but if you think about it–most of what you own already has logical homes. For example, your clothes live in a closet, your toothbrushes live in the bathroom, and your wallet lives in your handbag.
Establishing ‘homes’ for your belongings helps you to easily locate them when you need them. As the back to school season begins and as the school year progresses, you and your kids are going to need to find and access school-related items quickly, efficiently, and sometimes (for the kids) independently.
Here are some tips and solutions for giving everything ‘back to school’ a ‘home’ in your home:
What needs a home: Papers
Create a Home for School-Related Papers
Since my eldest started kindergarten a decade ago, the amount of paper that comes home from school has been drastically reduced. But, even with schools using email, texting, and the Remind app to communicate with parents and reduce paper usage, papers still come home and still have to be read, filled out, and dealt with. Beware! Papers like to multiply like rabbits when left on a kitchen counter or dining room table!
Solutions:
• Designate a ‘home’ for papers that parents need to review and designate a ‘home’ for papers dedicated to each child. This could be a shelf, a set of stacking inbox trays, plastic drawers, or shoeboxes–whatever works for your space and budget.
When they come home from school, have each child place papers to be reviewed in the ‘parent’ spot and when the parent is finished processing the papers (permission slips/book orders/money collection) they are then placed in the ‘child’ spot. The child then takes those completed papers and puts them in their folder/book bag to take back to school.
Bonus tip: For papers that need to be referenced often during the course of a school year (school holiday schedule, class lists, etc.), consider placing them in a binder or folder and designate an easy-to-access ‘home’ for the binder or folder to live in.
What needs a home: Kid’s Artwork
Create a Home for Artwork
First, it’s scribbles on paper. Then, finger paints and leaf rubbings. Soon, the artwork becomes 3-D and it’s living on your dining room table. And in the entrance way. And all over the floor in your kid’s room.
Solutions:
• Determine where your children’s artwork will ‘live’ before it even starts coming through your door. What space works best? Your child’s room? The refrigerator? A mudroom or hallway space? Knowing in advance where the artwork will ‘live,’ makes it less likely for it to take up residence across your dining room table. Decide where the artwork will live and reserve that space for that purpose.
• Create space limits for displaying and keeping artwork. Will it be displayed on the front of the fridge? An eye-level shelf in the family room? Will it be stored in a portfolio folder? A clear bin in your attic? Let the size of the space determine the amount of artwork you can display and store.
Too much artwork and not enough space to put it on display? Have the kids select what they want to keep–this improves decision making skills. Photograph much-loved 2-D and 3-D pieces and create a small printed or digital photo album of their work.
• Create time limits for displaying and keeping artwork. This can be determined by how much artwork is coming through your door multiplied by the number of children you have. Work with your child(ren) to figure out how long they would like their art displayed before giving up the space to another work of art or another person’s work of art. A week? A month? Until the next piece of art comes home?
• Create an ‘exit strategy’ for the art (you parents of preschoolers know what I mean….). Will it be photographed and kept? Mailed to Grandma? Will it be photographed and tossed? Yes–your trash receptacle may at some point become a permanent ‘home’ for your children’s artwork.
Bonus tip–Don’t throw artwork away in front of your budding artist!
What needs a home: Library Books
Create a Home for Library Books
Raise your hand if you or your kids have accidentally mixed library books in with the books in your home. I’m raising my hand, too! (Yes–it even happens to Professional Organizers).
Solutions:
• Create a specific home just for library books–a simple way to prevent school and town library books from accidentally co-habitating with other ‘like’ books in your home. That ‘home’ may be a shelf, a container, a basket or a designated spot in a closet. Wherever that spot is, put a label on it that says ‘Library Books’ so everyone can see it. When books are brought home from the library, place them here first. After reading them, return them to this spot. When they’re ready to be returned, you’ll know exactly where they are.
Speaking of returning books…
* Bonus tip–Make a note in your calendar of the day books are due back to the library. Make another note one week in advance of that date. Knowing the due date means not having to pay a ‘late book’ fee!
What needs a home: School Supplies
Create a Home for School Supplies
Have you gone shopping for school supplies yet? Not just for the supplies the teacher would like for the classroom–I’m talking about the ones you need in your home. Yes–those purple glue sticks, crayons, packages of loose leaf paper, and poly folders–they will need a ‘home,’ too.
Solutions:
• Designate a space in your home for the storing of basic school and office supplies your kids may need for the year. For quick access, this spot should be close to where they do their homework. The supplies can live in one central location or each child can create a ‘home’ for their personal school supplies in their room or close to where they prefer to do their work.
• For small items like erasers and paper clips or items in multiples such as markers and crayons, use containers that act as smaller ‘homes’ to keep these items grouped together in the space, bin, shelf, or drawer designated for school supplies.
Bonus tip – Take inventory of school supplies at the beginning of every month. You’ll still need glue sticks and sharp pencils in May and June!
Give the ‘Give Everything A Home’ principle a try. Soon you’ll begin to see just how manageable the school year can be when you give everything a home. And if it works well for school, just think how well the ‘Give Everything A Home’ principle would work in other areas of your home and life…Hmmmm…
Wishing you and your kids an organized school year!
“I’m overwhelmed!”
“All this clutter is too much for me to handle!”
“I have no idea where to start!”
As a Professional Organizer in business almost nineteen years (!) I have heard the above declarations more times than I can count. I’ve recently coined a phrase I offer to my clients when they feel like it’s all too much:
 Starting ‘small’ is the solution to dealing with clutter. De-cluttering a whole room is overwhelming. Starting small by focusing on one teeny-tiny part of that room is more manageable.
Starting ‘easy’ helps us to build our de-cluttering ‘muscles.’ ‘Easy’ items are usually ones with little-to-no sentimental or monetary value. The decision making process takes barely any brain power when we start with the ‘easy’ stuff. Once we’ve trained our decision-making muscles on the easy items, we’re better equipped to make the tougher decisions later on.
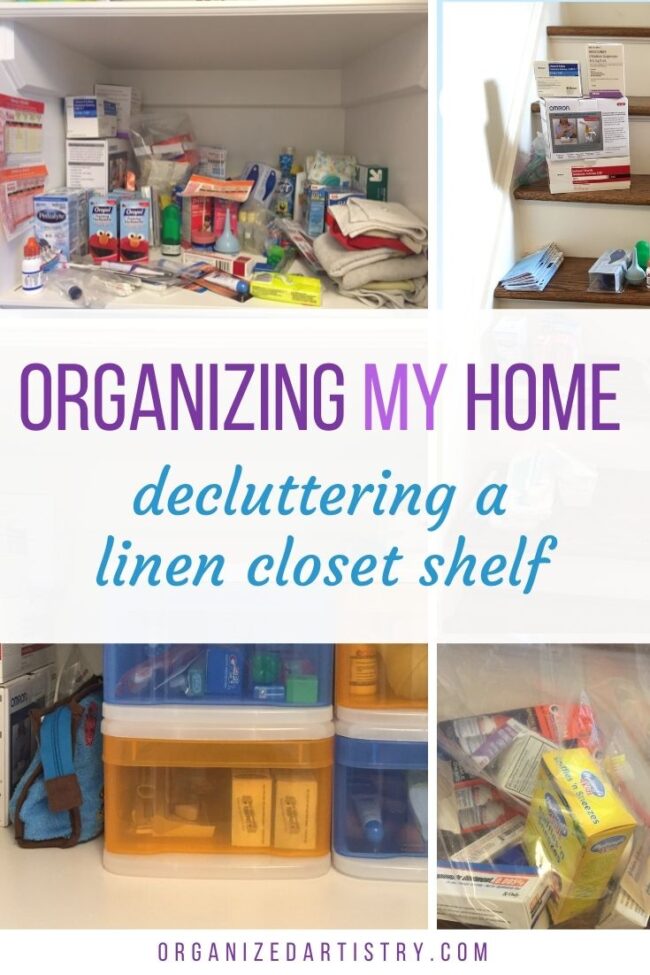
Are you familiar with the phrase, ‘The shoemaker’s son has no shoes?’ Well, sometimes I’m so focused on organizing spaces for others that I don’t focus on organizing my own! Case in point–my kid’s linen closet. OK, really it was one shelf in the linen closet…
I have two kids and they share a linen closet where I store their sheets, towels, extra blankets, and any medicine/first aid items they may need or require. When I only had one child, the shelves in this linen closet weren’t as full. Now that there are two of them, there’s A LOT more stuff.
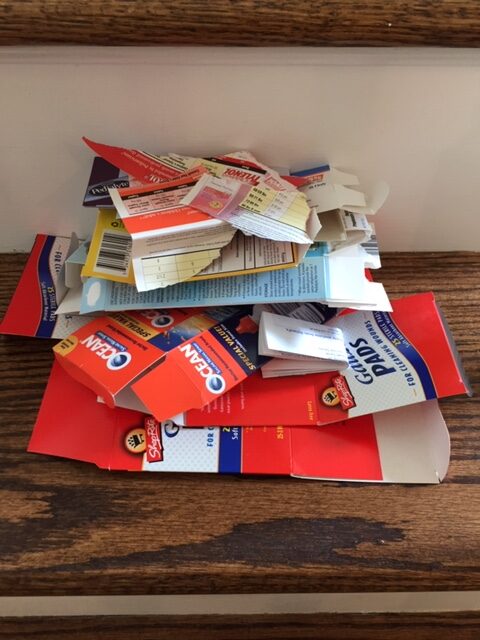
The sheets, towels, and blanket shelves were under control but what was not was the shelf I had dedicated to my kid’s medicine and first aid items. For the first few years, I had a couple of tubes, bottles, and boxes of things that I could find easily. Then after kid number two arrived, the shelf started filling up. I could still find what I was looking for but I would sometimes accidentally knock things over and cause an unwanted ‘domino effect’ resulting in a disorganized mess.
Full disclosure–this is what it looked like:
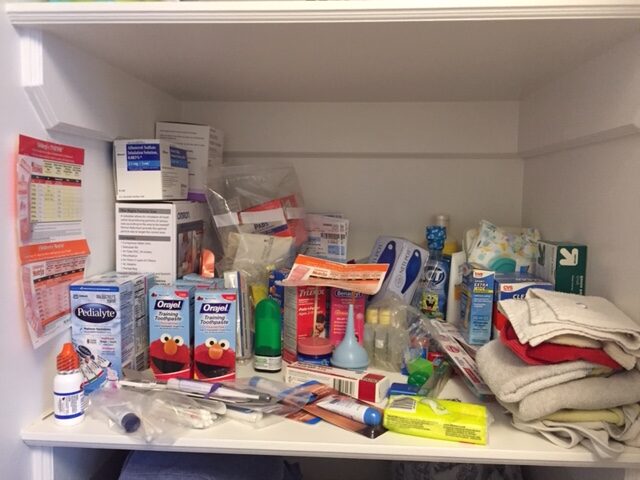
Forget about the fact that it looked cluttered when I opened the door to this closet. Visually, it was unappealing (and appalling!) to me. I needed to block off time in my calendar to organize this spot. I knew decluttering a linen closet shelf wouldn’t take me long–I just had to create a plan and stick to it.
It was time to take my own advice to start small, start easy–just start. And get the job done…
I followed the 5 steps to getting any space in the home organized–created by Professional Organizer Julie Morgenstern in her book, Organizing from the Inside Out. This is the 5 step method I use with my clients when organizing any space in their homes. It works every time!
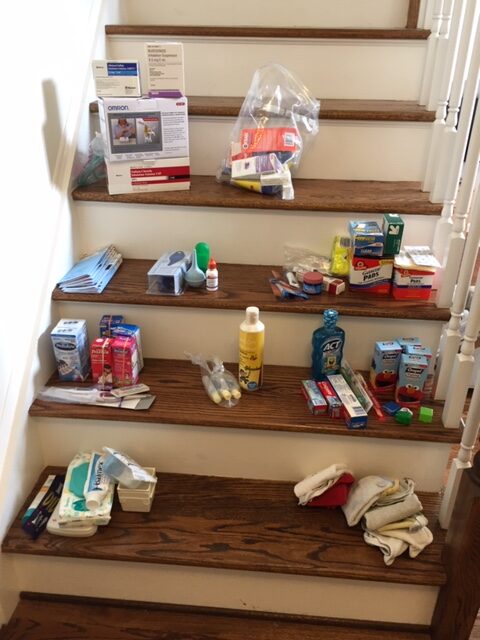
Step 1: The Sort
I took all items off the shelf and placed them on a nearby staircase. I sorted them by type and for the most part found that they fell into four categories: First Aid, Medicine, Nose, and Teeth. I also created a category of ‘Expired’ and ‘No Longer Used.’ to be dealt with during the next step.
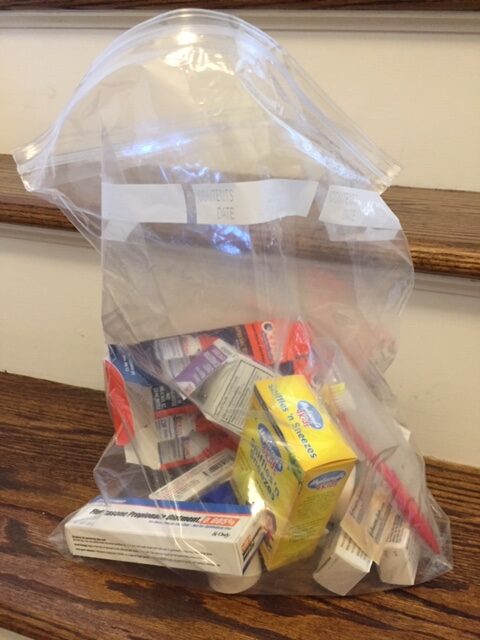
Step 2: The Purge
Once I sorted all the items, it was easy to see what could be purged. Expired medicine was dealt with in an ecologically-friendly manner and boxes were flattened and added to our recycle bin. Papers were filed, garbage was collected and added to our household trash. I was left with only the things my kids presently use or would need in the future.
Step 3: Assign a Home
This step asks the question, ‘Where are the post-purge items all going to live?’ I knew they were going to live on this shelf in the linen closet so this step was pretty easy to breeze through. After the purge, I placed each grouping of the remaining items back onto the shelf by category until I could complete Step 4.
Step 4: Containerize
I was certain I wanted to use some kind of drawer system to store the medical/first aid items. Quick and easy access to meds and first aid supplies is key when your child is wheezing, sneezing, or bleeding! I measured the height, width, and depth of the shelf and took to the internet to locate a product that would work.
A brief search led me to the Small Tint Stackable Storage Drawers from The Container Store. They were colorful and just the right size to fit two-stacked one on top of another on the linen closet shelf. Lucky for me, I live in driving distance of their location in Paramus, NJ so I hopped in my car and set out to get one step closer to completing my small and easy organizing project. I chose blue and orange because my boys like the NY Knicks and tolerate the Mets because their dad is a life-long fan.
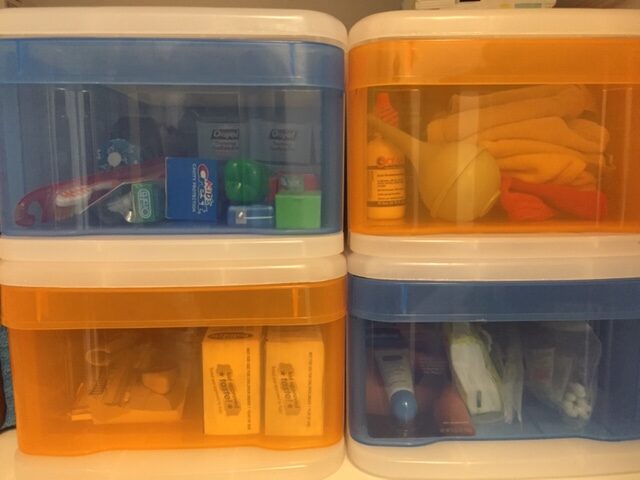
I brought the drawers home, filled each drawer by category, and placed them on the shelf. Organizing success!
Step 5: Equalize
(also known as Maintain)
This is the step that comes after the organizing is done and systems are in place. Every so often, depending upon the how often you use the items, it is necessary to do what’s called ‘maintenance.’
In this case, every few weeks, I peek in the drawers and take inventory on meds, flossers, band-aids, and lip balm. I straighten up other items on the shelf such as shampoo bottles and hand sanitizer and make room for anything new that my kids have started using (deodorant–yikes!). Decluttering a linen closet shelf or any space in your home won’t take long if you keep up with maintaining it!
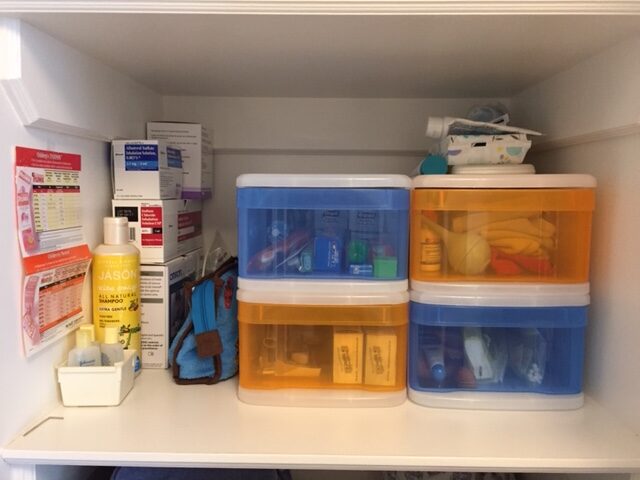
You may notice that I did not add any labels to the outside of the bins. I tossed the idea around but since the drawers are translucent, it’s fairly easy to see their contents without opening the drawer. As my kids become more independent and access the items on their own, I may choose to add labels. But, for now I like how seamless and colorful it looks when I open the linen closet door.
Not every organizing project has to be on a grand scale for it to make a positive impact on your life. Some are as small as a drawer, a shelf, or a corner of your desk. Even organizing your wallet, your car’s glove compartment, or a bucket full of batteries can save you time, money, and space. Regardless of the size of the project, block off time on your calendar, follow the five steps, and start. Start small. Start easy. Just start.
What small and easy organizing project will you start this week?
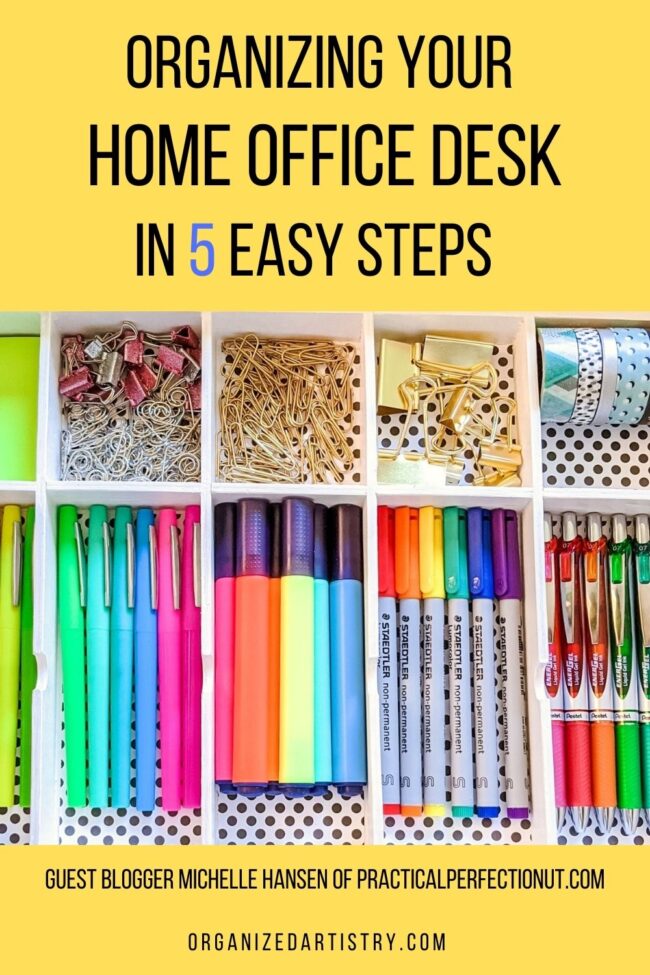
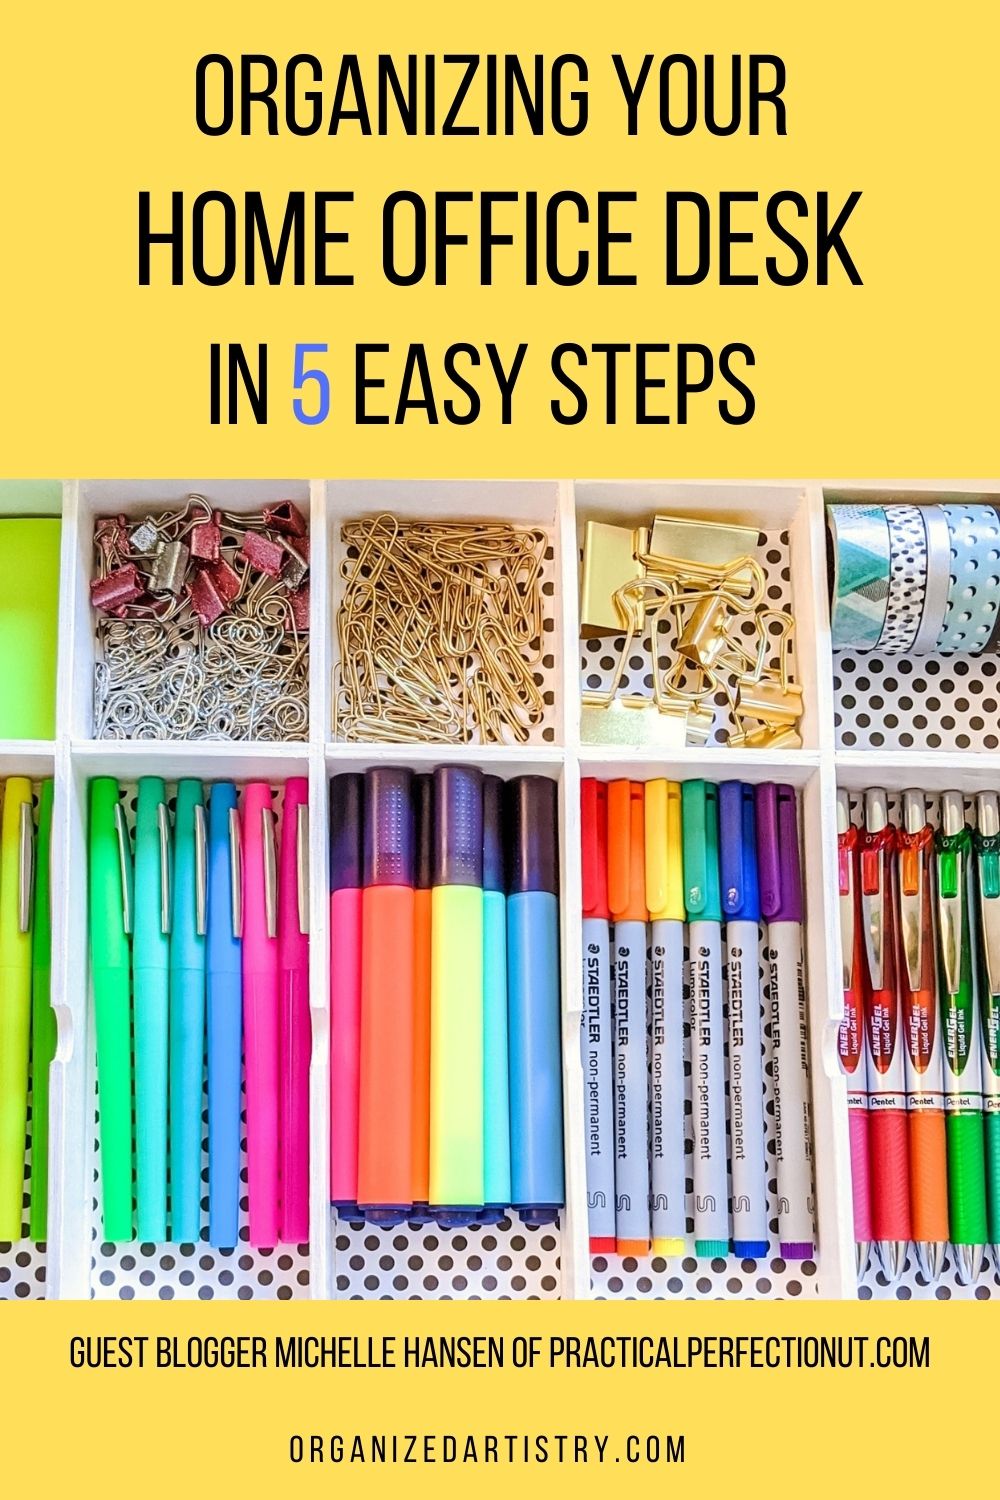
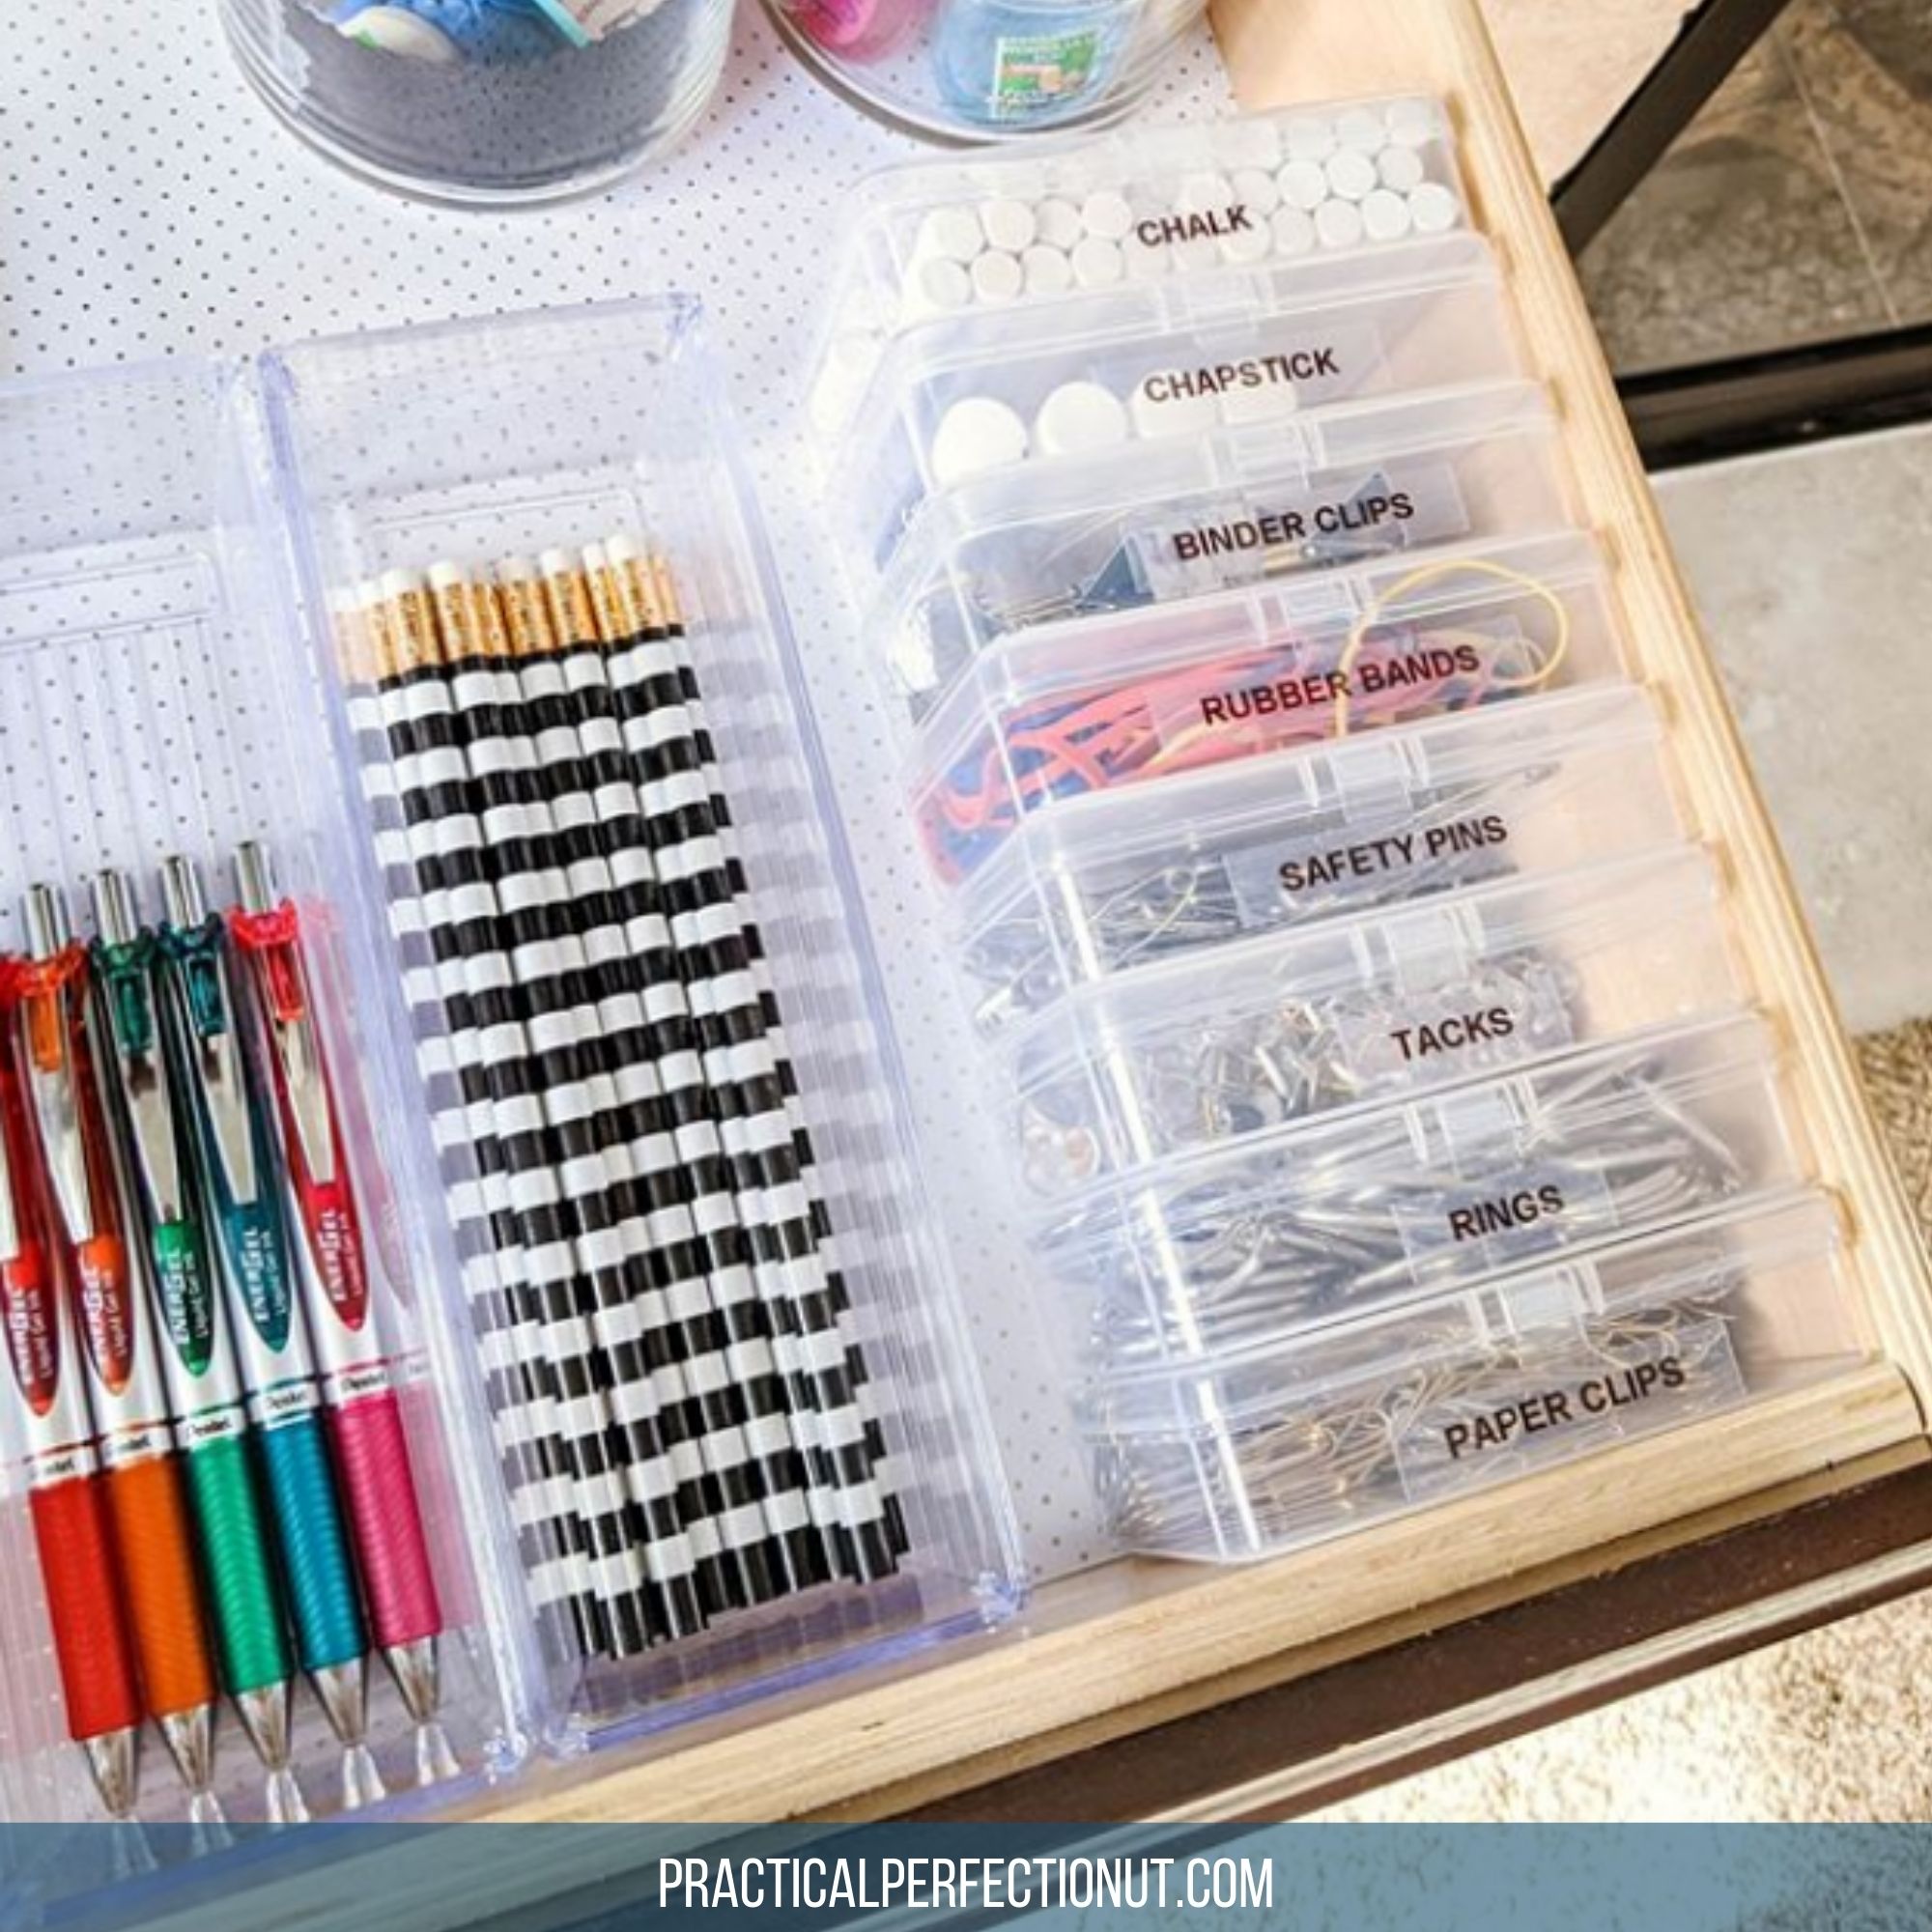
If you’ve been working from home this past year, you know how important your work area is to your productivity. Today, guest blogger, Michelle Hansen of Practical Perfection offers five easy steps to getting your home office desk organized so you can find what you need when you need it whether it be 9-5 Monday – Friday or after hours…
A home office desk sometimes feels like a disaster zone. With piles of untouched papers, a handful of broken pens, and half-used notebooks all crammed inside, it’s easy for your desk to feel untidy and chaotic. Plus, trying to find anything in those messy drawers seems impossible.
If you want to improve your home office experience (or even breathe a little easier at home), conquering that desk is a necessary evil. But, don’t worry, organizing your home office desk can be really simple!
Step 1: Declutter your desk drawers
The first step when you’re organizing anything is to declutter. Working one drawer at a time, go through every single item. With pens, markers, and highlighters, check to see if they even work. You may be surprised how many have dried out!
Be strict as you go through any planners, notebooks, and stationery. Do you have notebooks you never use? If there is any stationery you rarely use, there’s no sense in letting it take up valuable space in your desk. Donate any good notebooks or stationery you’re discarding.
Be realistic as you’re decluttering and only keep what you really use or need. If you have multiples of things like staplers, calculators, or scissors, choose your favorites and donate the rest. You probably don’t need more than 1-2 of each of these items.
Step 2: Separate your supplies into categories
Once you’ve gotten your office supplies whittled down to the ones you actually use, it’s time to separate them into categories.
Start making separate piles on your desk or the floor for writing utensils, loose-leaf paper, notebooks, binders etc. If you find one of your piles is too large, this is a good indication that you might not have decluttered enough, and you might need to reassess your supplies and purge the a bit more.
As you categorize, pay attention to what you use the most. This will help you when you start to put everything back.
Step 3: Organize your drawers strategically
Prioritize your drawer space when you’re putting everything back inside your desk. This is when it’s important to remember what you use the most.
Your top middle drawer is prime real estate, so you want to fill it with things you use all the time. It’s usually thinner than the other drawers, so it limits what you can fit, but it’s perfect for things like pens, pencils, scissors, tape, rubber bands, or paper clips. Any small items you’re always reaching for are made for your top middle drawer.
Be thoughtful as you organize the rest of your drawers. Do you tend to reach to your right side or your left side more? What feels more natural? If you reach for your right-side drawers more often, use the top drawer on that side for things you use the most. Then the drawer beneath that should be filled with your second most-used items, and so on, until you fill the desk!
I would also suggest organizing the inside of your drawer by most-used to least-used as well. In each drawer, decide what items in that category you use frequently and put those at the front. Then work your way back, so the items at the very back of the drawers are the ones you use the least.
Step 4: Use dividers and small bins to keep your supplies contained
I love putting small containers or dividers in my desk drawer. First, it keeps everything tidy. Second, you never lose anything this way! (Unless you have kids who are always stealing the scissors…I’ve been there before.)
Find small, unlidded containers that fit in your desk and use them to separate as many items as you can. I keep sharpies, highlighters, and pens in separate containers, as well as safety pins, paperclips, and post-it notes.
Organizing your home office desk in this way is a game-changer. How often are you rifling through your drawer to find a paperclip or a rubberband? Keeping them in separate, contained areas means you won’t have any small items rolling around in your desk anymore and you’ll always be able to find them.

Step 5: Maintain your new organized desk with a few simple rules
After you’ve spent the afternoon organizing your home office desk, the last thing you want is for it to get untidy again, right?
Focus on maintaining your desk by implementing a few quick rules, like always putting things back where they belong. I know this sounds like common sense, but we often just throw things back in the drawer when we could take a few extra seconds to place it precisely in it’s container or zone.
I’d also suggest that you operate by the “one in, one out” rule when it comes to your desk. Home office desks have limited space, and if you’re bringing home lots of new stationery or pens when you never use the ones you already have, your desk is going to quickly get messy again. So, if you find a new notebook you just have to have, make sure you donate one you already have in your desk.
If you make it a rule to donate or discard items you already have when bringing home new items, it will either stop you from even buying that extra (and often unnecessary) stationery, or it will ensure that your desk stays organized no matter how much you buy.
Now, in five easy steps, you have an organized home office desk! All you have to do now is focus on step five, and you’ll never dread working from home again.
 Michelle Hansen is a Wife, Mom of 3, and Professional Organizer. She has a passion for showing others how being organized can transform their lives for the better on her blog, Practical Perfection.
Want to stay current and connected to Organized Artistry? Follow us on Facebook, Pinterest, YouTube, LinkedIn, Instagram, and Goodreads!
Click here to sign up for Organized Artistry’s motivating newsletter.
Good morning, class! Welcome to Label Maker Hacks 101. I’m Professor Murray and in today’s lesson we’re going to be discovering 3 label maker hacks to save you time, money, and stress.
Please take out your label maker, place it on the desk in front of you, and make sure the batteries are working. We’ll start off with some fingertip exercises, a quick review of the QWERTY keyboard, and then move on to today’s lesson.
If you have walked into my lecture hall by mistake but wish to stay and learn, please refer to my blog post: 5 Reasons Why You Should Own a Label Maker. It is required reading for the Label Maker Hacks 101 course…
No need to take any notes–I have all the label maker hack details outlined for you below. Let the learning begin!
Todays Lesson: 3 Label Maker Hacks to Save You Time, Money, and Stress
Hack #1: How to Save Tape
If you do not own a label maker you may not be aware of the fact that although a new label maker often comes with one ‘starter’ tape cartridge, in order to print more labels, you must purchase more tape cartridges. They can be purchased individually, in 4-packs, and in bulk.
When printing a label, the label maker leaves the first approximately half to three-quarters of an inch of tape blank and then starts printing the word(s) or phrase. After it has been printed, the label maker leaves another half to three-quarters of an inch blank on the right side of the word/phrase.
That’s A LOT of WASTED label tape. Wasted label tape = wasted money
For those who own label makers, you know how quickly a tape cartridge can run out of tape–usually in the middle of typing a long phrase or when you need to it to print out quickly (not that I have any experience with either of those…ahem…).
I’ve been using my label maker on the job and in my home for close to twenty years and in that time, I’ve discovered a way to save label maker tape. This works especially well when needing to print many related labels such as for folders in a file cabinet or for kid’s school supplies.
Here’s how you do it:
1-Think about your needs. What are you labeling? Spice jars? File folders? Pantry shelves?
2-On paper or on your phone, write the words or phrases you wish to create labels for.
3-Type those words/phrases into your label maker. As you type, press the space bar 5-6 times between each word/phrase. This will create a small blank space between each word/phrase.
4-Press the ‘Print’ button and watch your label maker miraculously give birth to one long label with all of your words/phrases on it.
5-Use the built-in cutting tool to separate the label from the label maker.
6-Use a scissor to cut in between each word/phrase.
Look how much label maker tape you’ve saved!
This label maker hack will eliminate a bulk of the wasted tape on both ends, saving you inches of tape and piles of money.
Hack #2: Keep Your Font Sizes and Styles on Display
Every label maker is different but most offer the user multiple font styles and font sizes to choose from.
Depending upon how old or new your label maker is determines how many font styles and font size options it has. I own a nineteen year old label maker so I only have 5 font sizes and 9 styles. Newer models have upwards of 14 fonts and 10 font styles.
When creating labels for a project, I like to be able to offer my clients some size and style options. Sometimes the nature of the project dictates what size and style font to use. Attic bins need the largest font while small objects require the use of the smallest font. But, sometimes we’re able to use any size and style–that’s when I ask my client to consider their choices.
In order to show my clients their style and size choices without printing all of them out on the spot (and repeatedly using an excessive amount of label tape), I devised a system that would save me precious time and precious label maker tape.
Here’s what I did–I advise you to do the same:
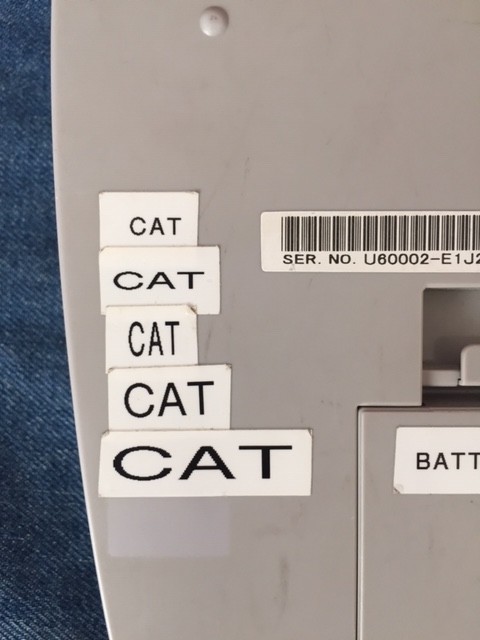
1-Select a short word (I chose cat because it’s short and hey, I like cats…)
2-Print out one label of that word for each size and style your label maker can create.
3-Stick the labels to the back of your label maker or on a large index card for easy reference. Keep the index card in the same place where you store your label maker.
Taking time to set this up takes the work of remembering all the font styles and sizes out of your brain and onto the back of your label maker or on an index card.
After creating the font display almost two decades ago, I now just turn my label maker over, show my client the selection and say, “Pick the font you want!” Happy clients!
Hack #3: Split it Down the Middle
Label maker tape has two parts to it–the label itself and the backing that covers the stickiness.
If you’ve had a label maker for as long as I have, you may remember that label tape was not that easy to work with. When I started using a label maker almost twenty years ago, it was very challenging to get the backing off the label. And frustrating. The backing was about a hairline larger than the actual label. With a keen eye, a few long fingernails, and a lot of practice I was able to remove the backing fairly easily and look like a label maker rock star to my clients.
People must have filed complaints because Brother (the label maker company) eventually changed the backing of the label tape. Hallelujah! Now, the backing of the label splits in two horizontally allowing for MUCH EASIER removal. On the Brother website, it’s called ‘easy-to-use and easy-to-peel-off split-back’ tape.
Less stressed customers = happier customers!
No more struggling to remove the backing of the label. Here’s what to do:
1-Take the label with the words facing away from you and gently bend it in half away from you on the horizontal. You’ll notice a line that will divide the backing in two.
2-Remove both backing strips and apply the label to your surface.
Now you know how to take the backing off the label–what a time (and fingernail) saver!
I hope you enjoyed today’s class. There will be no final exam on the material. Your homework is to practice what you’ve learned and share these hacks with other label maker owners.
Now, go forth and share your new-found knowledge. Class dismissed!
If there’s one thing I hear over and over from my clients and others, it’s that one of the most challenging parts of getting organized is starting. Many people don’t know where or how to start. And we all know what happens when you don’t know where or how to start. You.Don’t.Start. (Insert sad face here)
I want you to start! And I want you to succeed. But there are a few steps you’ll need to take before you can even begin to contemplate setting an organizing project in motion. Don’t toss anything in the trash. Refrain from buying cute bins and baskets. Read on.
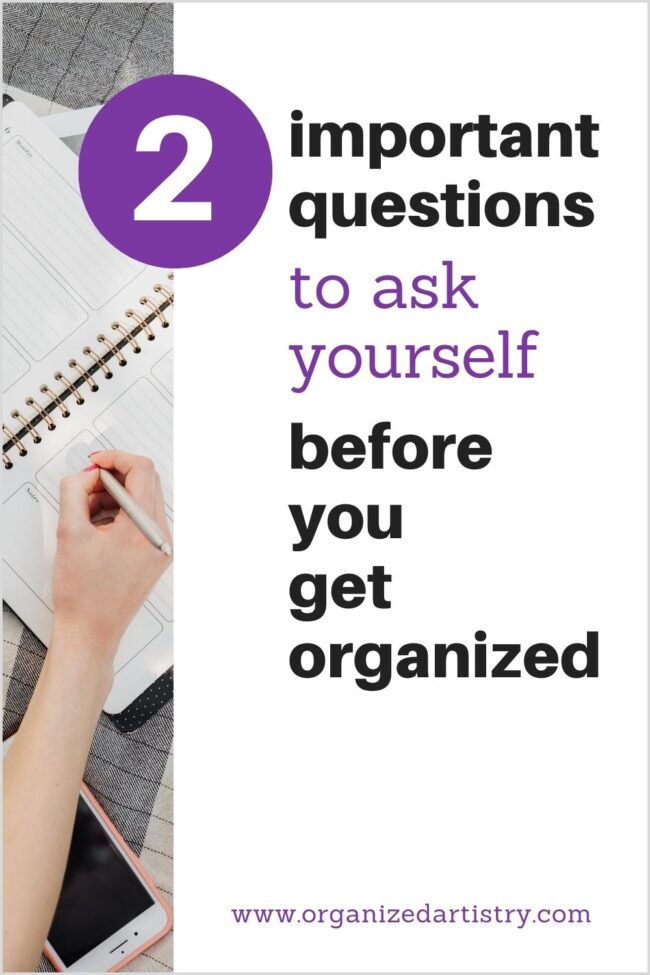
In order for you to get organized and stay organized, it’s necessary to ask yourself two important questions.
What is my WHAT?
and
What is my WHY?
Yup. Ask yourself those two questions. And grab either your phone or paper and pen to help you remember your answers. Let’s start with ‘your WHAT.’
Your WHAT = What do I want to get organized?
Is it…
-your clothing closet filled with multiple sizes?
-your basement filled with thirty years of accumulation?
-your overstuffed file cabinets?
-your overstuffed kitchen cabinets?
Coming up with answers to ‘What is my WHAT?’ is the easier of the two questions to answer. Your WHAT is the part that is usually easy to determine because you come in contact with it all the time in your home. You see your WHAT on a daily or weekly basis so it’s easy to name. Write it down.
Next, consider your WHY.
Your WHY = WHY do I want it to be organized?
also know as…
WHY do I want to get my ‘WHAT’ organized?
This is the more challenging of the two questions. Asking yourself WHY requires that you dig deep for answers. The answers may not be simple ones and may require the examination of past habits and patterns as well as the reflection of past decisions and choices. Pay attention to your feelings and take time to understand them. I know–easier said than done. But, being honest with yourself and your struggle to get organized will benefit you short-term and in the long run.
Let’s get back to figuring out your WHY…
WHY do YOU want to get organized? You might say…
“I’m tired of running late because I can’t find the clothes in my closet that fit me. I want to organize my closet in order to be able to get dressed in less than ten minutes. I want to look good and feel good and not start my day off stressed out anymore.”
or…
“I’ve been spending a lot of money in credit card late fees. I want to create an organized bill paying system so I can pay my bills on time, stop wasting money, and eventually raise my low credit score. I can’t save for a down payment on a house if I’m letting money slip through my fingers. I’ll never be able to buy a home if my credit score prevents me from getting a mortgage.”
or…
“I’m exhausted from always running to the supermarket at the end of my work day. I want to organize my kitchen cabinets for meal planning. I don’t want to do the ‘5 o’clock scramble’ anymore! Knowing in advance what my family and I are eating for dinner will save me time and money and may even help me eat more healthily and lose weight.”
Whatever your WHY is, write it on a post-it and hang it somewhere you’ll see it often. Make it your screen saver or your phone’s wallpaper. Keep it on a card in your wallet. Don’t lose sight of it. During the organizing process, you might feel stuck, frustrated, or overwhelmed. Go back and look at your WHY.
Your WHY will focus you and keep you on track to complete your organizing tasks.
Your WHY is there to remind you WHY you’re working hard to get organized.
Your WHY will motivate you to move forward towards your personal organizing finish line.
Just by knowing your WHAT and your WHY, you’re ready to take the next step on your path to a more organized life.
What is your WHAT and what is your WHY?
Click the image below to print a *free* worksheet to help you think about more than just your WHAT and your WHY!