Archive for the ‘
Basic Organizing Principles ’ Category

Whether I’m at a networking meeting, a client’s home, or a social or family gathering I am often asked the same few questions about getting organized. Some people ask me about products, others ask me how I feel about all the organizing shows that have been on television, but most ask the questions below.
I hope the answers to these questions prove to be helpful as you begin or continue your journey to an organized life.
Why is it important to be organized?
Organized people are able to find the things they need when they need them—and finding what you need when you need it is what ‘being organized’ is all about. Being organized saves you time, money, and stress. By being organized, one is able to put lost time back in their day, money back in their wallets, and live life with less stress and frustration overall.
How do I get organized if I don’t have the time?
You have to MAKE the time. If you didn’t make the time to get your car an oil change would it work well? If you didn’t make the time to exercise and cook healthy meals would your body be able to maintain an active lifestyle? If you don’t set aside the time to ‘get organized,’ your household as well as your life will not function to it’s fullest capacity.
Start by making a fifteen-minute appointment with yourself at a time of day when you are most energetic. Mark it in a calendar and stick to it. You don’t need to devote eight hours on a Sunday to getting organized—you’d be amazed at how much you can get done by spending fifteen minutes in ‘organizing mode.’
Where do I begin?
I’m always asked this question and the person asking it usually has a look of panic on their face! I always recommend to people that they take inventory of their organizing needs and select an area that is driving them crazy or making their life difficult. For a small business owner, it may be their filing system. For a stay-at-home mom, it may be the playroom or the kitchen.
Break the task down into small, manageable tasks. For instance, if it’s your kitchen that’s disorganized, start by going through the silverware drawer. After you’ve tackled the drawer, you’re done with organizing for the day unless you choose to move on to another small section of the kitchen such as the sippy cup collection or the spice rack.
Once I’m organized, how do I maintain it?
The most important thing you need to keep your home/home office organized is DESIRE—the desire to keep your space organized and the desire to put forth the effort to keep it as so. Realistic goals are also necessary when it comes to ‘staying organized.’ You cannot expect an overnight change–on average it takes 21 days to establish a habit. So, if you install a hook by the front door for your keys and you forget once in a while to hang them there, don’t beat yourself up over it—it will come naturally soon enough.
Be prepared–there will be some days where you won’t have the time or energy to organize even the smallest of spaces—that’s OK. Just do your best. I tell people that one of the most important things they can do when they lack the time or energy to organize is to just stay ‘on top of their lives.’ Putting dishes back in the cabinet after they’ve dried, dealing with your mail shortly after you walk through the door, straightening out the medicine cabinet while you’re brushing your teeth are all quick and easy ways to prevent disorganization from creeping back into a newly organized space.
What can a Professional Organizer do for me?
A Professional Organizer has the skills and experience to provide their clients with information, ideas, solutions and systems to increase productivity and reduce stress. By hiring a professional organizer you will not only be able to take advantage of their knowledge, and expertise, but you’ll be able to benefit from their non-judgemental physical and emotional support as well.
To find a Professional Organizer in your area, go to the website of the National Association of Professional Organizers and click on ‘Find an Organizer.’ It may be the first step on your journey to an organized life.
Do you have any other questions? Ask away!

SaveSave

Where I live, it’s kinda cold. And it’s the first day of Spring (insert frowny face here). As much as I’d love to start doing a little spring cleaning in my closet, I still need my polartec tops and flannel lined jeans. May have to start elsewhere this weekend…
But, if you live in a warmer climate or just can’t look at your boots one more day, then by all means start spring cleaning your clothes closet.
Here are the 5 ‘must-haves’ you’ll need for this project:
Garbage bags
Despite their name, these bags won’t all be used for garbage. Grab two colors–black, white, and a third bag can be a reusable tote. Designate black for trash, white for donations, and the tote for repairs. Why use this system? I have heard stories of people accidentally donating their trash and putting their donations to the curb because they used bags of one color.
As you are sorting through and purging clothes from your closet, place them in the correct bag. Clothes with repairable tears and shoes/handbags that need a little TLC from the shoemaker go in your tote bag. When you finish, place the black bags wherever you keep your trash, put the donation and repair bags in your car or at your doorway, and mark off a day on your calendar to drop off them off at their next destinations.
Pad of paper and pen or cell phone
As you go through your clothes, you may find that they have an old stain, they’re too loose or tight, or you just don’t love it anymore. When getting rid of garments, keep a list of items you’d like to replace. That way, when you’re at the mall, you don’t have to think about what clothes you need–just refer to your list and you’ll know exactly what purchases to focus on. Use pen and paper or your cell phone to create the list–whichever works best for you.
Bottle of water/snack
Spring cleaning a clothes closet is a physical activity. Handling some sentimental items and items with ‘bad karma’ attached to them can be emotional as well. Even if you’ve eaten a large meal before starting, I’d recommend having a bottle of water and a snack at arm’s reach. You’ll need a break to clear your head and refuel–how often you do that during this task is up to you and your needs. But, I always advise my clients to bring a snack and drink into the space we’re working on. It means they don’t have to leave the room and lose focus while we’re working.
Large flat or multiple small flat surfaces
When doing a spring cleaning of your clothes closet, it’s important to have a place to put the clothes while sorting them out. If your closet is in your bedroom, use the bed to place the garments down as you make decisions. If your clothes live in a room without a bed, use folding chairs or storage tubs to separate your clothes by category. The floor is NOT a good option unless absolutely necessary. If that’s the case, please open a flat sheet, lay it on the floor and place your piles on top of the sheet.
Time
A basic organizing principle to follow for spring cleaning or any organizing task is. ‘Make an Appointment With Yourself.’ We make appointments to see doctors and to make our hair look fabulous and we wouldn’t consider canceling them except in an emergency. Do the same with Spring Cleaning. Take out your calendar and pick a day to start. Pencil in 15 minutes, a half hour, an hour–whatever amount of time you think you can manage. Keep that appointment. You’ll be glad you did.
Are you ready to spring cleaning your clothes closet? What do you think you’ll find in your closet this Spring?
 |
| Courtesy of PJlibrary.org |
If you haven’t been on Facebook lately or you’re not into pop-culture, you may not have heard the news. This year, for the first time since 1861 and the last time until the year 79,811, the holidays of Thanksgiving and Hannukah land on the same day. To commemorate this special day, the phrase, ‘Thanksgivukkah,’ was coined (and trademarked) by two women in Boston. A Facebook and Twitter account devoted to the day was created and the idea spread like wildfire across the United States.
For many of you, this day is business as usual. Turkey, cranberry sauce, football, and family traditions will be the norm. But for those who celebrate Hannukah as well, this day just became a little more challenging.
One holiday is religious. One is secular. The foods are different. Maybe you celebrate Turkey-day and Latke-day with different people. Celebrating two holidays at once? OY!
If you haven’t already started to plan, here are a few tips for getting organized for the won’t-see-this-again-in-our-lifetime holiday of Thanksgivukkah:
De-clutter Your Brain
You’re probably thinking, “Two holidays? What am I going to do? Where do I start?”
Start by dumping your brain onto a piece of paper or into a productivity app. Write down all the shopping, cooking, gift-giving, prepping and schlepping you’ll need to do for both holidays. Prioritize and then…
Delegate
It’s tough enough preparing for one holiday, but two? You’re going to need to delegate tasks in order to cover the important rituals and traditions of both holidays. If you’re a self-declared perfectionist, this is the time to lose the title. Control freak? LET IT GO. Some tasks to delegate:
• preparation of a Thanksgivukkah side dish
• creating and facilitating games to keep the kiddies occupied
• shopping for gifts
• cleaning up the kitchen
• playing ‘bartender’ for the day
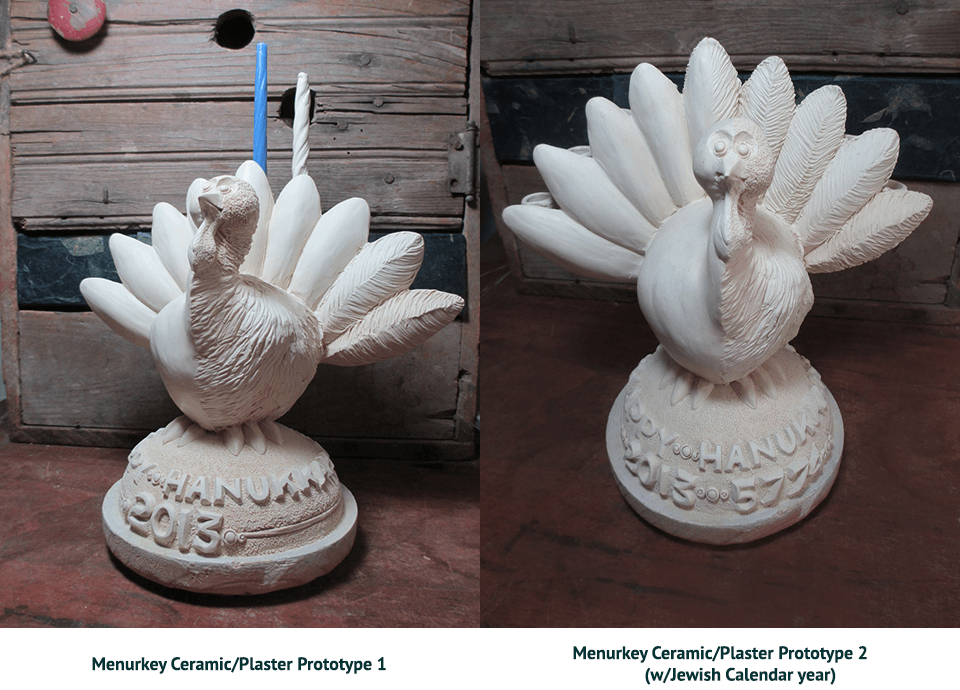
• supplying candles and matches for the menorah/menurkey
 |
| A Menurkey–created by a ten year old boy with a Thanksgivukkah dream… |
Prepare in Advance
Mise en Place is a French phrase meaning, ‘to have all of your cooking tools and ingredients prepared before you start cooking.’ The key to not stressing out while cooking for two different holidays at once is organization. Review every recipe and take note of what ingredients you’ll need. Also take note of what size measuring cups and spoons you’ll be working with. Do you have enough platters? What dishes need to cook in the oven and which on the stove top? Preparing in advance will prevent kitchen chaos and ‘Harried Hostess-itis.’
Keep it Simple
Two major holidays. One day. ‘Nuff said.
Ways to Keep it Simple:
• Usually, I advise people to make lists and store them in a file or electronically for the next year. You’re celebrating these two holidays together for the first and last time next week. Feel free to jot down notes but I don’t recommend creating a permanent file labeled ‘Thanksgivukkah’ unless you want to look back at it for some reason. I leave that up to you.
• Buy some pre-made food. My husband and I used to make potato latkes from scratch. Then we had two kids. No more latkes from scratch. My savior–Trader Joe’s Potato Pancakes. They are delicious and I don’t stay up half a night cleaning my kitchen.
• Eliminate a ton of side dishes by melding the two holidays in your recipes. Ideas: Sweet potato latkes, challah-chestnut stuffing, pumpkin pie a la mode with Manischewitz ice cream! (delegate the last item to someone with an ice cream maker and time on their hands…)
 |
| Latkes? Stuffing? Or both! |
It’s been a real hoot reading articles about this once-in-a-lifetime holiday. Here are some interesting and informative ideas about Thanksgivukkah that were cool to read and helped me write this post:
Much of the historical information for this post has been gleaned from articles on the web and this one from Wikipedia.
How to Celebrate Thanksgivukkah, The Best Holiday of All Time
Recipes, decorations and funny stuff
Everything You Need to Know About Thanksgivukkah
Read to find out who came up with the word, ‘Thanksgivukkah!”
Ingeniuous 10-Year Old Creates ‘Menurkey’ for Thanksgivukkah
Never underestimate a child again…
Happy Organized Thanksgivukkah!
It’s hard to believe but Organized Artistry is heading into it’s 11th year in business. The time has certainly flown! In that time, I’ve written organizing tip articles for my website and almost four years ago, I started this blog.
In honor of 11 years of organizing, I share with you the top ten most popular posts of this blog–plus one bonus post to make it 11. I hope at least one of them will offer you an idea or a resource for creating and maintaining an organized life.
Curious as to what readers liked most?
Top 3 blog posts:
Best Products for Organizing Your Car
This post was the most popular by a landslide! Maybe I need to add ‘car organizing’ to my list of services…
Organizing Inspiration from Curious George
Who would think that a mischievous monkey could teach us a lesson on organization?
Peter Walsh Organizes Rachael Ray’s Kitchen
She’s got a smaller kitchen than one would assume. Peter Walsh makes cooking at home a more stress-free activity for the famous cook.
Cool Product blog posts:
Cool Product – Jewelry Organizer
Not your usual jewelry holder…
Cool Product – Cable Turtle
Wires! Wires! Wires! No more unsightly wire messes thanks to cable turtles.
Cool Product – Fridge Binz
If your fridge need organizing, check these out…
Other popular blog posts:
De-Cluttering Tips
Simple, basic steps to follow for de-cluttering…
Top Ten Helper Shelf ‘Hot Spots’ for Your Home
This was a popular post, too. I love helper shelves! See how they can transform your closets and cabinets.
Organizing Up and Down–a Vertical Makeover
My motto: “If you can’t go outward, go UPWARD!”
Organizing on the Cheap: Target Dollar Spot
Love the Target Dollar Spot. You never know what organizing products (or other goodies) you’ll find there.
New Baby? Time to Get Organized
These little people have a lot of stuff and require a ton of organization!
Bonus post: Some organizing humor…
Professional Organizer Humor
Yes, there’s a bumper sticker for our profession, too!
My blog posts are written with the intention of providing information, tips, resources and sometimes a good laugh. I hope they have provided you with all that and more. Thanks so much for supporting Organized Artistry!

Did you make New Year’s resolutions or set goals for yourself this year? I thought I heard you shouting from the rooftop, “This is the year I’m going to get organized!’
Did you create a plan for getting organized? Have you mapped out some mini-goals for yourself? If yes, then great!
If not, that’s OK. No beating yourself up about it. Maybe you or a family member has been under the weather. Maybe ‘life’ has gotten in the way. Or perhaps, you just don’t know where to begin. You can start at anytime. How about TODAY?
No worries–take ‘baby steps.’
No one expects a baby to stand up one day and walk across the room. There’s a lot that goes on before a child meets that developmental milestone. They sit up, they crawl, they practice standing up in their crib. They take ‘baby steps’ towards mastering their actual baby steps.
You can take baby steps to reach your organizing goals, too.
Here are a few examples:
– Take a few minutes before bedtime to sort through and purge expired medicine.
– Sort and purge your piles of coupons while waiting for pasta water to boil.
– Schedule 15 minutes on your calendar to organize your sock drawer.
– Read a few posts on organizing blogs that pertain to your organizing challenge(s).
– Look at organizing ideas/products on Pinterest (don’t get sucked in, though!).
All of these teeny-tiny organizing projects and tasks are baby steps that will eventually get you to achieve organizing success.
I often tell my clients to visualize their organizing goal as an iceberg. Baby steps are equal to the act of chipping away at that iceberg. Some days you may feel like you’re chipping away with a hammer, other days, with a toothpick. Regardless of your tool, if you keep working at it, you will reach your goal, however challenging it may be.
You CAN get organized–I know you can. Just take a baby step–one little step in the direction of the organizing goals you have set for yourself. In the beginning, it may feel as if you’re not making much progress but let me assure you–every ‘baby step’ you take towards reaching your goal will get you one step closer to the day when you can proudly shout from the rooftop, “I did it!”
What baby steps will you take to achieve organizing success?
In my last post, guest blogger Audrey Cupo of a A Better Space encouraged you to evaluate the past and plan for the future.
Well, the future is here. Did you make any resolutions for the next twelve months?
According to the people at StatisticBrain.com, the top ten New Year’s resolutions for 2013 are:
1. Lose Weight
2. Getting Organized
3. Spend Less, Save More
4. Enjoy Life to the Fullest
5. Staying Fit and Healthy
6. Learn Something Exciting
7. Quit Smoking
8. Help Others in Their Dreams
9. Fall in Love
10. Spend More Time with Family
Did you see that? ‘Getting Organized’ is one of the top two resolutions people made in the new year. Looks like my colleagues and I are going to be very busy this year!
All kidding aside, many people say they want to get organized but are not successful at achieving their goal. Unfortunately, only a small percentage are. But why?
A few reasons:
– The goals they set for themselves are too vague.
– People get easily discouraged and give up too soon.
– They don’t have a way of measuring their successes however small.
They don’t have a PLAN.
That’s why I would advise anyone who has made a resolution for themselves this year to do two things first:
– Create a plan for reaching your New Year’s goal
– Set mini-goals within that plan
Planning out the path for reaching a goal can be as easy as doing a ‘brain dump’ on a piece of paper or on your computer. Create a list of all the steps you need to take to reach your goal. They don’t need to be in any order–you can fix that later.
If you’re a visual person like me, you might want to use a graphic organizer to help you with your plan. This is a great way to organize your thoughts. An example of one:
 |
| Courtesy of The Writing Bug |
If ‘Getting Organized’ is one of your New Year’s resolutions, write ‘Get Organized’ in the big circle. In the next smaller circles write the room/area of your home or life you’d like to get organized. In the smallest circles (attached to the medium sized circles) list the tasks that need to be done to achieve your resolution to get organized. Create as many spokes and circles as needed. These are your mini-goals.
A mini-goal is a tiny step to complete on your way to reaching your ultimate goal. It helps you to break down the process into smaller, more manageable pieces.
Examples of mini-goals for getting your home/life organized:
-Every Tuesday, I will sort/purge/organize one drawer in my dresser until all drawers have been gone through.
-I will label an envelope ‘Receipts’ and once a week, I will empty my wallet of all receipts into that envelope. At the end of the month I will review all receipts.
-At the end of the day, I will spend 15 minutes making sure all items are in the home they belong in.
-I will create a ‘Donations’ bag in my garage and pledge to put all items to be donated in it. When I know I will pass the local thrift shop, I will put the bag in my car, drop off the donations and place the donations bin back in its ‘home.’
-I will inventory my pantry before heading to the supermarket.
Successfully setting mini-goals and reaching them are cause for celebration–don’t over look that. Every mini-goal milestone brings you a step closer to your goal and should be honored and celebrated!
“Vision without action is daydream.
Action without vision is nightmare”
– Japanese proverb
Did you make any New Year’s resolutions? What’s your plan?
If you watch television and you have even the teeniest tiniest interest in organizing then you know who Peter Walsh is. If not, here’s the short version: Peter Walsh is an Organizing Expert from Australia who has a ‘tell it like it is’ attitude but also uses compassion and empathy while organizing with his clients. He has worked miracles in tiny spaces, as well as in the homes of hoarders. I first saw him on an organizing show called ‘Clean Sweep’ and from there, he occasionally appeared on The Oprah Show as well as other daytime shows.
I ‘Like’ Peter Walsh on Facebook. He’s always posting about projects he’s working on, easy organizing tips, and when he’ll be on TV next. So, a short while ago, he posted that he was going to be de-cluttering Rachael Ray’s home kitchen on The Rachael Ray Show. Sweet! My DVR was set. If you didn’t get to catch it last week, here’s what happened…
Rachael Ray, America’s sweetheart of the kitchen had a secret…
She told her audience that she has a tiny NYC apartment kitchen and that she’s just as guilty as other homeowners when it comes to de-cluttering her kitchen–it never happens. Cluttered cupboards, out-of-date food in the pantry and cabinets overflowing with pots and pans were just some of her organizing issues.
If I had her hectic schedule, I might not have time to de-clutter my kitchen either…
She decided to bring Peter Walsh to her home to see if he could get her kitchen organized again. Rachael gave him a quick tour of the room and then he kicked her out and started organizing. Peter started with the pantry–he emptied it, sorted the items and tossed all expired food in the trash.
Some of Peter’s pantry tips:
-Store platters upright for easier access. Use an organizing product that stores baking trays to do the same thing for platters.
-Keep flat surfaces clear. They are for food prep–not for storage.
Peter then headed to a spot most people wrestle with in their kitchen–the junk drawer. Like the panty, Peter emptied the drawer and sorted out the trash. He then grouped ‘Like with Like’ and used containers to keep ‘like’ items together.
 |
| Peter used drawer dividers like these to organize Rachael’s junk drawer |
What junk drawer items did he hold up for all the world to see? Four pair of gardening shears! Since Rachael didn’t use them very often, he promptly moved them to a different area of the kitchen.
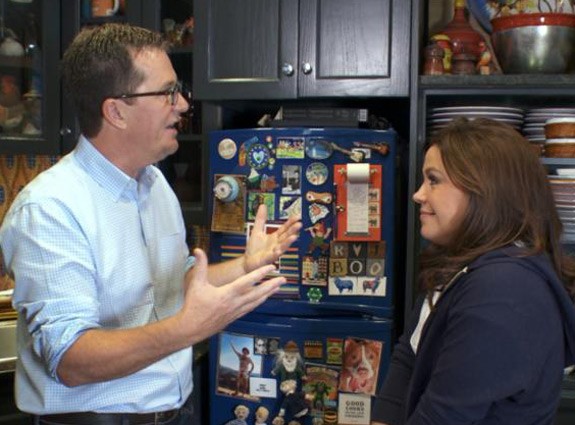
He then removed all magnets from her refrigerator. I have a ton of magnets and children’s artwork on my fridge–Peter Walsh would have a field day with my fridge!
He and his crew worked to de-clutter the rest of Rachael’s kitchen and then brought her back in to see.
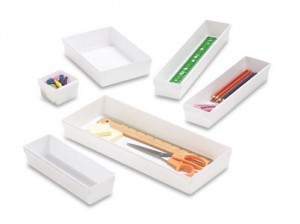
The first spot he showed her was the pantry–she loved how de-cluttered it was and how Peter had grouped ‘like’ items with like items on clear trays from The Container Store. They then moved on to the junk drawer–Rachael was so thrilled with the way it looked, she gave Peter a high-five! He had removed many of her household tools and placed them in labeled bins in a cabinet over the refrigerator to get them out of the way.
Rachael then walked over to the fridge and saw that most of her magnets were gone! She almost had a heart attack because a magnet with her deceased dog’s picture on it was no where to be found. It was quickly placed back on the fridge–organizing crisis averted!
As I often do with my clients, Peter gave ‘Organizing Homework’ to Rachael Ray…
-go through all cooking utensils
-separate out the ones she uses often from the ones she barely uses
-keep drawers neat and tidy
Peter offered up two tips and advice for the viewing audience:
1. Stop using the word LATER as in, “I’ll put that away later.” Do things as you go and he promises it will make a huge difference.
2. Flat surfaces are for PREPARATION not STORAGE.
Peter also gave the viewing audience five ‘Double Duty’ organizing products to use in the home:
1. Use an empty tissue box to store plastic bags (I do this in my own home.)
2. Use a tension rod to create hanging space under a sink
3. Thread a tab from a soda can over a hanger and hang another garment from it to double your closet’s hanging space. (I LOVED this tip!)
4. A tag from a loaf of bread can be used to wrap around and label electrical cords.
5. Use extra glass vases to corral multiples of items.
I thought this was a great segment. Kudos to Rachael Ray for being brave enough to have Peter Walsh organize her kitchen for all the world to see!
*Author’s Note: I love watching de-cluttering segments on daytime television–I pick up great organizing and product ideas all the time. But, what I’d like you to know is that de-cluttering a room takes hours–sometimes days and sometimes weeks. It looks quick on TV but what you don’t see is a multi-person crew working arduously to get the job done in a certain amount of time. When it’s just you, or you and a friend, or even you and a Professional Organizer the process takes a LONG time.
If you are de-cluttering an area of your home, don’t despair that it’s taking a while to emerge as a clutter-free space. Make good decisions, have trash bags at the ready and look for the light at the end of the tunnel. Here are a few tips to make sure your organizing efforts are taking you in the right direction.

A while ago, I wrote a blog post called, “Ready for Spring Cleaning?” In that post, I talked about a basic organizing principle: Make an Appointment With Yourself to Get Organized.
The process of getting organized can be overwhelming. Most people are unsure as to where or how to begin. Making an appointment with yourself to get organized is a starting point. Carving out that time to chip away at a pile of papers or sort through your sock drawer is a necessary step towards de-cluttering your home and reaching your organizing goals.
A few weeks ago, I got an email from my friend, Deb–the subject line said ‘Photo Albums.’ The email stated that she was blocking out some time one night to work on her photo albums–did anyone want to bring theirs and join her at her dining room table?
I read that email and later responded, “I’ll be there…”
You know the phrase, ‘The shoemaker’s son has no shoes?’ Well, sometimes Professional Organizers spend so much time organizing others, that projects of their own fall by the wayside. In my case, it would be photos and photo albums.
I have two small children and I take a ton of pictures and videos of them on my camera and iPhone. I download them but haven’t always kept up with the ordering of pictures and placing them in albums. My relatives are constantly asking me for pictures of my kids. I’ve bought picture frames but don’t have the pictures to put in them. The signs were there–it was time to make an appointment with myself to organize my photos and albums.
A few days before the photo album gathering I took inventory of what I had:
• one broken photo album (wear and tear from 2 kids flipping pages)
• two new photo albums (ordered months ago and still in the box they shipped in)
• pictures I had printed but not put in albums yet (already separated by child)
To prepare for ‘Photo Night’, I removed all the pictures from the broken album and sorted through and purged a few out. I removed all pictures from my first child’s second album, too. I loaded all my photo albums and pictures into a large shopping bag and was ready to go.
I only worked on my albums for an hour and a half but got a lot accomplished. I managed to put all pictures from birth to two years old in the albums designated for my eldest child. Making this appointment with myself motivated me to keep working on this important project. The next night at my own dining room table, I finished putting the pictures of my oldest child in his albums.
My next steps are to:
• Sort and purge through pictures of my youngest child.
• Put them in chronological order
• Place them in the designated album
• Check the end of each album to see the last pictures I ordered. Go on iPhoto and order copies for relatives and the albums
• Give out pictures and place the rest in albums
My goal is to finish this project by the end of May. I will be making an appointment with myself each week to make that happen and I’ll keep you posted on my progress.
Thanks, Deb for giving me the jumpstart I needed to organize my photos!
Every year, my cousins host a Valentine’s Day pizza party. They order in pizzas, set up a huge salad bar on their counter, and people bring wine and desserts to round out the celebration. Last year, I made heart shaped brownies and although they were good, I wanted to get a bit more creative.
For inspiration, I walked into a store near me and found all types of cool looking confections including pretzel rods decorated with yummy-looking sugary stuff. I thought to myself, “I could make those!” I even had a feeling I owned a recipe for it and lo and behold, I did.
I had a ton of tasks to get done the morning I was making them so I turned to a basic organizing principle to help me accomplish my goal: to create chocolate-dipped and decorated pretzel rods in a short amount of time with a minimal mess in the kitchen. This basic organizing principle I utilized, well known to those in the world of cooking is:
Mise en Place
You may be asking, ‘What does the phrase Mise en Place mean?” According to TheReluctantGourmet.com, the phrase is pronounced MEEZ ahn plahs and means ‘to have all of your ingredients and cooking tools prepared before you start cooking’. Literally translated, it means, ‘to put in place.’ I think it’s French for ‘Get your stuff organized before you cook!’
Mise en Place takes the stress out of cooking and makes it a more pleasurable task. There’s no searching for the garlic press when your oil is hot. There’s no such thing as , “Uh, oh–I’m missing an ingredient.” Mise en Place (or ‘meez’ as the professionals say) allows you to be focused and prepared for cooking.
Here are the steps I took to Mise en Place–create an organized environment for my pretzel rod project:
1. I read the recipe and made notes as to what ingredients I needed. I added them to my shopping list, purchased them and kept them together in one bag so I they would be in one place when I was ready to make the recipe.
2. I cleared my counter space and unpacked the pretzel rods, chocolate chips and sprinkles. I set up two bowls for melting the two flavors of chocolate chips, two spatulas (for stirring the chocolate chips and spreading them on the pretzels) and three paper plates for the three pretzel toppings.
3. Next to my counter space, I set up a baking tray covered in wax paper and placed a wire rack on top of it. This is where the pretzel rods would relax while the chocolate was setting.
4. I placed half a bag of each type of chocolate chip into a bowl and put a spatula in each bowl. I placed a half cup of sprinkles and mini chocolate chips into each paper plate.
Now, I was ready to begin!

And, voila! The finished product…
Here’s the recipe I used. Try it–and don’t forget the Mise en Place. It will make creating these decorated pretzel rods so easy, you’ll want to make them for every occasion. Green sprinkles for St. Patrick’s Day? Red, white, and blue for Fourth of July? My cousin also hosts Mother’s Day. If you have any sprinkle color ideas for that day, I’d love to hear them!
Recipe: Decorated Pretzel Rods
One bag of Rold Gold Pretzel Rods
Half a bag of Nestle Mini Semi-Sweet Chocolate Chip Morsels
Half a bag of Nestle White Chocolate Chip Morsels
Multi-colored sprinkles
Pink and white sprinkles (Tip: sprinkles purchased less expensively in the ice cream aisle rather than the baking aisle…)
Follow Mise en Place steps 2-4 from above.
1. Melt mini chocolate chips and white chocolate chips in separate microwave safe bowls. Microwave for 30 seconds and stir. Microwave another 30 seconds if necessary and stir until smooth.
2. Start with one flavor of chocolate. Dip pretzel rod in chocolate and spread with spatula. Let any excess chocolate drip off and hold pretzel over plate of sprinkles.
3. Using a spoon or your hands, drop sprinkles onto chocolate part of pretzel rod while turning the pretzel so all chocolate is covered.
4. Place on wire rack to cool and set.
5. Repeat with all toppings until chocolate is finished.
6. Repeat all steps with white chocolate.
7. Taste one to make sure they’re OK…
8. Pack carefully to take to someone’s home. Yum!
How will Mise en Place make your life easier?
SaveSave
It’s the beginning of the new year–a time when people make resolutions to lose weight, spend more time with family and make other such improvements to their life. Many set goals to get organized in the New Year.
If that is one of your goals, that’s wonderful! I commend you for setting a goal to improve the quality of your life. I have the perfect organizing project for you. When you’ve finished it, you’ll be less stressed and have more time to enjoy the beginning of Spring.
I don’t want you to sort your sock drawer. No, I’m not sending you to organize your garage in the middle of winter.
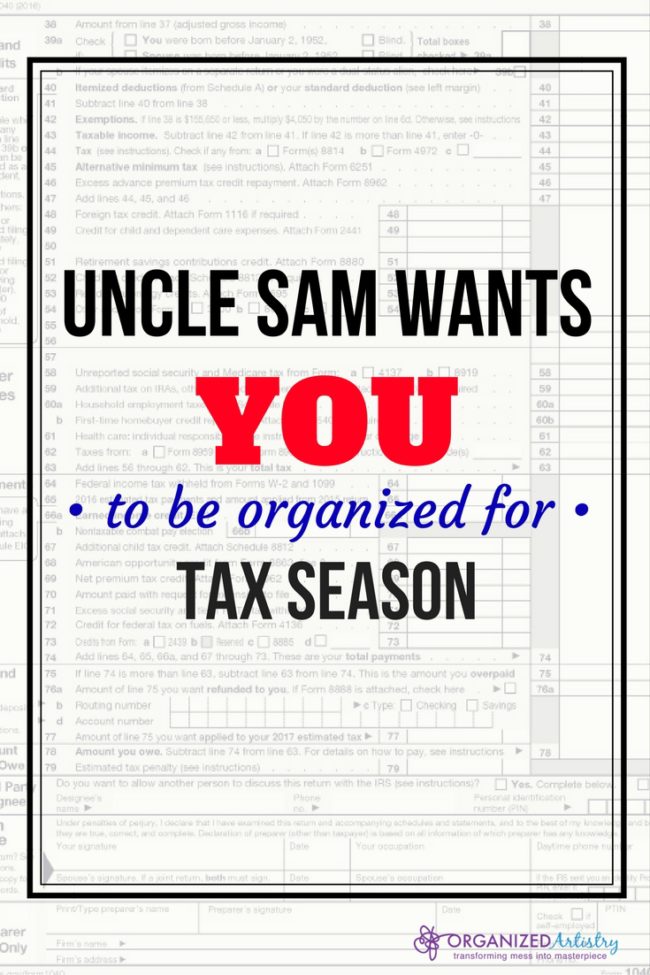
Your first organizing project of the new year is to: Get Organized for Tax Season.
We’ve all heard about the person who walks into an accountant’s office with a shoebox full of receipts. It’s a stereotype, but if I polled a bunch of accountants, they’d probably tell me that the stereotype is more of a truth than an exaggeration.
If the thought of getting organized for tax season makes you start to twitch, not to worry. I’m going to use a few basic organizing principles to guide you through the process and put a smile on your face and your accountant’s.
Break a Large Task into Smaller Tasks
Prepping for your tax appointment can seem overwhelming. I’ll tell you that a task becomes less overwhelming once it is broken down into many smaller tasks. Do a brain dump of all the things you need to do to prepare for a tax appointment. Then put those tasks into priority order and create a check-off list for you to follow until the last step has been completed. Here’s a helpful checklist for you to download (courtesy of the A Bowl Full of Lemons blog).
Create a Home
In the next few weeks, your mailbox will be stuffed with W-2’s, 1099’s, statements from financial institutions and other papers necessary for filing your taxes. In order to keep track of them, you’ll need to create a place for all of these papers to ‘live’ before they visit the accountant. Normally, I advise people to use shoeboxes an an inexpensive organizing tool but in this case, I’d prefer not to feed the shoebox stereotype. Take a large poly envelope, preferably see through, and place all tax-related documents in there. Have a file drawer or cabinet? Create a hanging file with a tab that says ‘TAXES.’ As they come in the mail, place the tax papers in the file.
Make an Appointment with Yourself or Delegate
If you’re doing your own taxes, make an appointment with yourself to get them done. Pick a day and time when there are few distractions and when you are most coherent. Write that date on your calendar and stick to it. Are you having an accountant file your taxes? Great–you’re delegating! Call their office in late January or early February to make an appointment. Put it on your calendar.
Sort it Out/Group ‘Like with ‘Like’
It’s a week before your appointment. Take out that poly envelope or tax file and look at all your papers. If you have a stack of them you’ll need to sort them by grouping ‘like with like’–all interest statements from banks go together, all receipts for gas and tolls should be clipped together, etc. This will enable you and your accountant to process your tax return quickly and with less stress (and coffee).A few tax season Do’s and Don’ts:
Don’t: procrastinate. This is one of the worst things you can do at tax time except for showing up with that shoebox (see above). If you’re doing your own taxes, it won’t be much fun if your version of Turbo Tax unexpectedly quits at 10:30pm on April 15th. You’ll never get your accountant’s full attention if you procrastinate–in fact you might be put on extension. And by then, you’ll be talking to the secretary if she hasn’t fallen over from working overtime for the past three months.
Don’t: arrive at your accountant’s office with your statements in their sealed envelopes unless you want to see his/her head pop off. If your accountant’s head does not pop off, it’s because they have already decided that they will charge you for having to open all of your envelopes.
Do: take the Social Security numbers of all family members you are filing taxes for. If you or a member of your family owns a business, bring the tax ID number with you as well. Your accountant will thank you a hundred times for being prepared with that vital information.
Do: collect all proof of donation papers (thrift stores, schools, great causes, etc.) throughout the year and keep them in the poly envelope or tax file discussed above. You’ll need them to get that tax deduction!
Tax season does not have to be a painful time of year. With some preparation and organization, you’ll be on your way to a less stressful and more relaxed way to pay Uncle Sam.