Welcome to the first in a series of home organizer case studies I’ll be profiling on my blog!
I’ve been working with clients for over twenty years and have helped each of them find solutions to a variety of their organizing challenges. In this series, I’ll be highlighting some of the more common organizing problems my clients have come to me with and show you what we did to solve them.
Maybe you’ll see yourself in one of these case studies? Perhaps the process will motivate you to take action to achieve a similar goal? I hope you find them helpful as you navigate your own organizing journey.
Case Study: An Overstuffed Clothing Closet
Client Profile:
Mrs. B. called me to inquire about my services and how I could help her organize her overstuffed clothing closet. She informed me upfront that her budget covered three hours of my services. I went to her home for a short Needs Assessment and saw that the closet, although small, was stuffed from top to bottom.
As an experienced home organizer, I knew that we’d be ‘cutting it close’ on completing the task in three hours but if she was able to make decisions quickly, we’d be able to complete her closet organizing project in time. She was very motivated and I had a good feeling she was up for the time-crunched task.
What prompted client to reach out to Organized Artistry?
Mrs. B. was tired of being unable to find the clothes she wanted to wear on a daily basis. She was also planning a future vacation and the thought of looking for the clothes she wanted to wear on her trip was causing her stress.
Goals:
• To organize the overstuffed clothing closet so Client could find the clothes she loved, clothes that fit, and reflected her current lifestyle. • For Client to have the ability to locate clothes to wear on an upcoming warm weather vacation.
Organizing Challenges:
• Overstuffed closet • Client can’t find the clothes she needs when she needs them • Variety of sizes and seasons in one closet • Client is frustrated • Client buys more of what she is unable to find • Only three hours to complete the job
Organizing Process:
You may think that three hours is plenty of time to organize a closet–even a full one. But, in my experience, I have found it can take many more hours than that. Besides the quantity of clothes to process, the speed of that process has to do with how quickly the client can make decisions as to what to keep and what to let go of. With only three hours to accomplish our goal, we said a quick hello to each other, walked upstairs, and got down to work.
My client’s closet was in her bedroom. We used her bed as a large surface to sort and purge on (Tip: If using a bed to sort and purge items, lay a flat sheet on top of the bed first so dust from closet shelves and dirt from shoes doesn’t land where you sleep).
We started pulling clothes out of her closet by category (pants, then dresses, then skirts, etc.) and sorted them on the bed by season. I split the surface of the bed into two sides–one was for Fall/Winter clothes and the other side was for Spring/Summer clothes.
Mrs. B. and I sorted through her clothes piece by piece to determine whether they would ‘stay’ or ‘go.’ She made most decisions quickly. Any item that required extra thought went into a pile that we made decisions on together towards the end of our session.
Discoveries:
You never know what you’ll find when working in a client’s closet. Once, I unearthed a rubber chicken! This time, no chicken–but instead, I discovered that my client had amassed an extensive collection of black pants. Twenty-four pair of black pants to be exact!
To be fair, in the Northeast, the temperature can go from below zero all the way to one hundred degrees in the span of a year. Black pants of different fabric weights and lengths are a wardrobe necessity for most women.
How did I discover my client had twenty four pair of black pants?
While we were removing items from her closet and sorting them on her bed, out of the corner of my eye, I watched Mrs. B. group all of her ‘like’ clothes together by type. The pants pile on each side of her bed resembled a mountain–a dark one. She kept pulling black pants out of her closet and putting them on top of each pile.
I asked for her permission to dig into her pile of pants to start counting them and she gave me the go ahead. In counting black pants on both side of the bed, I added them up and got to twenty-four pair. I told my client the number and she couldn’t believe it. She confessed to me that there had been times when she couldn’t find the black pants she needed so she’d go to the store and buy another pair. I let her know that it was a common occurrence for people with overstuffed closets and that after we organized her closet, she wouldn’t need to do that anymore.
The Result:
After working together for three hours, Mrs. B. and I:
• Purged twelve pair of black pants. Client kept twelve. • Filled three bags of clothes for donation. • Relocated summer clothes to under the bed storage bins that client had purchased but had not yet used. • Placed the remaining clothes back in her closet by category (grouping ‘like with like’). • Separated out the summer clothes she wanted to pack for her upcoming vacation and placed them in a storage bag at the bottom of her closet.
I removed a garbage bag filled with wire hangers that Mrs. B said I could bring to my dry cleaner. Boy, was he happy to see me later that day!
Mrs. B. was exhausted and thrilled at the end of our three-hour organizing session. Her overstuffed clothing closet had been purged and re-organized, she put aside the clothes she wanted to bring with her on her vacation, and she now knew where all of her clothes could be found–including her twelve pair of pants.
It takes time as well as brain power to consider options, weigh pros and cons, and collect information. Decision-making can be stressful–you’re responsible for the outcome and your decision often affects more than just you.
It’s easier to not make a decision. But that doesn’t work in real life–especially when it comes to getting organized. If you want your home to be an organized space, it’s vital to start exercising your decision-making muscles!
Barbara Hemphill, a pioneer in the field of Professional Organizing says…
“Clutter is nothing more than postponed decisions.”
If you take a moment to think about that statement, it makes total sense.
Picture your kitchen countertops, your dining room table, your clothing closet and other areas of your home that may be cluttered. Bills, kid toys, old socks–have you been making decisions on those items or avoiding them in the hope that you’ll wake up one morning and the necessary decisions will have been made for you?
Maybe you’re putting off making decisions on items in your home because…
– you need more information or guidance before deciding.
– you need to ask another person for permission first.
– your decision may hurt someone’s feelings.
– you’re busy, you don’t have time, or it’s too emotionally taxing to think about it clearly.
By not making decisions, your belongings stay where you’ve placed them and will become clutter. They’ll keep your home cluttered and keep you stuck. Making a decision will ‘unstick’ you and move you forward.
The easiest way make a decision about physical items that are cluttering up your home is to make those decisions as easy as possible to make. Keep it simple–especially in the beginning.
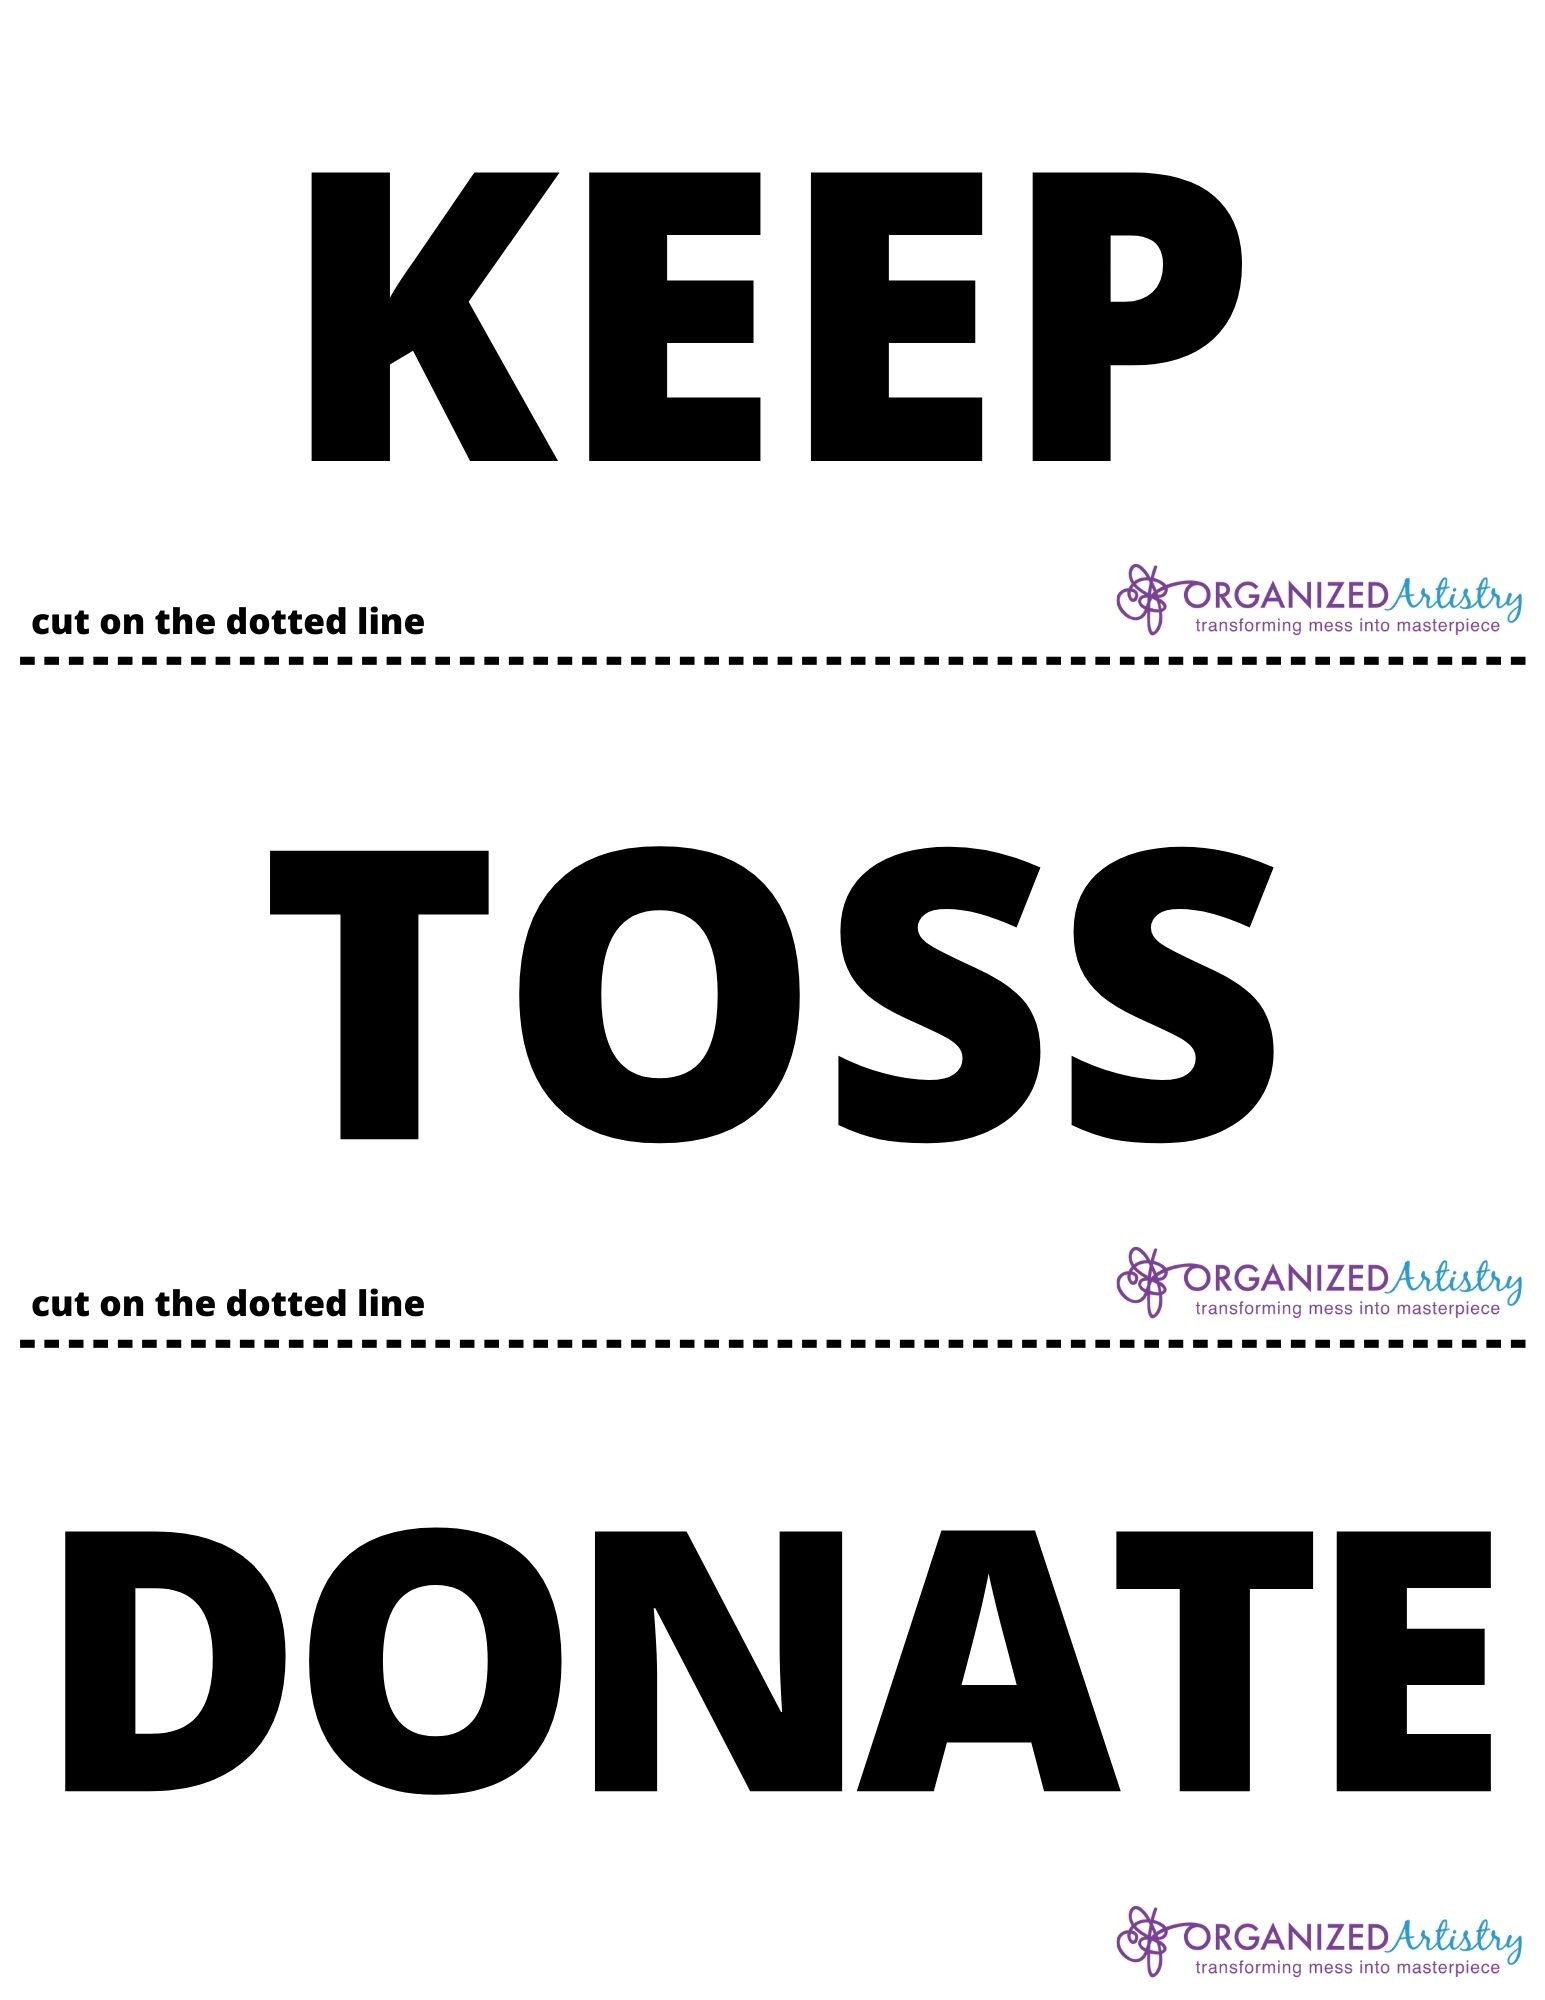
How to start simply and easily? Use three words: Keep, Toss, Donate. Pick a category–shoes, books, toiletries, donation requests (or whatever is causing clutter in your home) and apply those three words to making decisions on items in that category.
Don’t think about decluttering a category or a space in your home any more deeply than that at this moment. Don’t think about where an item will live or where it should be donated to. Don’t think about how you’ll get it to the thrift shop or whether or not it will fit in your cabinet, drawer, or closet. Just look at the item you need to make a decision on and ask Keep? Toss? or Donate? Start there.
That’s your first decision–Keep, Toss, or Donate. Making that basic decision is the first step to clearing your clutter and moving you and your home in a less cluttered and more positive direction.
If you’re feeling overwhelmed by your clutter, take a deep breath and repeat out loud, “Keep, Toss, or Donate.” That’s the only decision you have to make right now–Keep, Toss, or Donate. If it helps, make it your organizing mantra! Write it on a post-it. Make it your laptop’s screen saver–whatever works for you.
To help you visualize those decisions while decluttering and keep your decluttering process organized, I’ve created a free downloadable ‘Keep-Toss-Donate’ printable for you to use. Designate three spaces (or bins/bags/boxes) in the area you’re working in–one will be for the ‘Keep’ items, one for the ‘Donate’ items and one for the ‘Toss’ items. Use the printable ‘Keep’ ‘Toss’ and ‘Donate’ tags to clearly designate your spaces and decisions. You don’t want to accidentally donate your trash or trash your donations!
Start with the easy stuff–junk mail, pens that may/may not work, old clothes and shoes. As you practice using your decision-making muscles, move onto magazines, sheets and towels, and seasonal clothes. Use “Keep, Toss, or Donate” as the first step toward making space in your home for items that you want, use, and love.
OK–you finally finished your Spring Cleaning. You spent days sorting and purging through your belongings. You threw a few things out and even repaired one or two items. But, what will you do with everything else you uncovered and discovered? If you’re willing to invest some time and energy, why not have a garage sale?
Garage sales are a great way to get rid of things you no longer want, need, or cherish. But, is it as easy as just dumping your stuff on the lawn and waiting for customers to drive by? Not if you want to make any money, it isn’t. Besides having decent-quality merchandise, the key to a successful garage sale is being organized.
Here are 3 steps for making your garage sale organized for happy customers and optimal sales:
Step 1: Pre-Sale Organizing
• Select a weekend for your sale and make no other commitments on those days. You WILL be exhausted. Ask friends and neighbors if they would like to join you. It is a perk to be able to split advertising costs and have someone watch over your area while you’re grabbing a snack or running to the bathroom.
• Have you ever been to a garage sale where the items had no prices on them? One way of making ‘Garage Sale Day‘ organized is to create a pricing system. This makes the selling easy for you and the buying easy for your customers. Purchase colored, circle-shaped labels and designate each color to be a different dollar amount, for example blue = $.50. Use white circle labels to write an amount such as $5.00. Make signs that describe your pricing system and post them around the area of your garage sale so you don’t have a constant stream of customers asking you about prices.
Or, try these pre-printed labels. See the color-coded pricing chart I created for my last garage sale here.
Select one area of your home to be the staging area for pricing items and one area (most often the garage or an underutilized room) for storage of the items once they’ve been tagged. This last space will enable you to see exactly what you have and allow you to group ‘like-with-like’ such as toys, books, kitchenware, etc.
• Start saving grocery bags as well as heavy-duty shopping bags. Your customers will appreciate your preparedness and it will be easier for them to carry their new-found treasures off your property.
• Some of these new-found treasures will be breakable. Start saving newspaper, old wrapping paper, and bubble wrap. These packing materials will help your customers get their breakable purchases home in one piece.
• Borrow and gather folding tables, card tables, crates, workbenches, and other horizontal surfaces for displaying items.
• Check with your town regarding permits for having a garage sale.
• Advertise, make signs and post them on nearby streets facing oncoming traffic.
Step 2: During-the-Sale Organizing
• Post your pricing system signs around the area of your garage sale.
• Wear clothes with pockets. Pockets come in handy for holding some of your garage sale supplies such as pens, markers, and extra price stickers.
• I know they’re not so fashionable but wear a fanny pack! Your money will be close to your body without spilling out of your pockets. Wear a pack with two compartments–one for bills and one for coins.
• Know exactly how much money you started the day with so you’ll be able to calculate exactly what you earned.
• Set up your belongings outside by category–all toys together in one spot, all office supplies together in another area. Group ‘like’ items to the best of your ability. If a customer is looking for baby toys and they’re all in one place, it is very likely that they’ll buy more since everything they’re looking for will be right in front of them.
• Have at least one other person working with you. It is difficult to sell merchandise, wrap breakables and field questions by yourself. Take turns helping customers, straightening up merchandise, and taking breaks.
Step 3: Post-Sale Organizing
• Bring everything that was not sold into the garage or another room to make final decisions on whether or not to keep unsold items.
• Throw out anything that became damaged or broken as a result of being in the garage sale.
• Donate the ‘leftovers’ to a charity of your choice.
• Clean your lawn/driveway of any debris from the garage sale.
• Count your money and determine your profit. $$$
• Create a list of all supplies used for the garage sale and keep it on your phone or in a paper file labeled ‘Garage Sale.’ Order in dinner and put your feet up. Now you’re ready for your next garage sale–job well done!
What the best thing you ever bought at a garage sale? I’d love to hear about it!
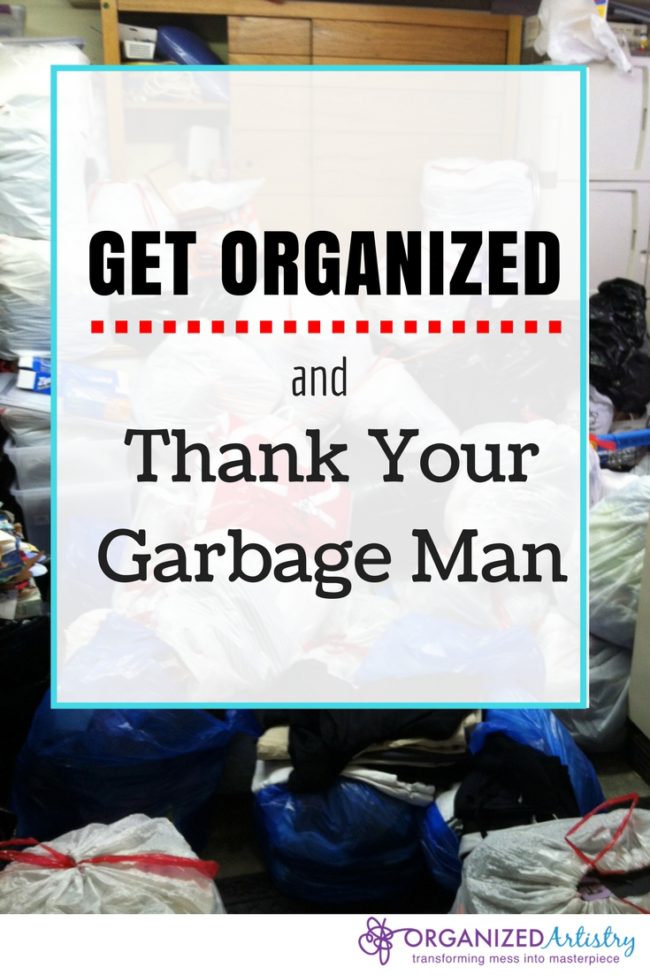
As a Professional Organizer, I help people de-clutter their homes and get rid of things they no longer need, want or use. Sometimes the items are donated, sometimes they’re given to friends and relatives. But, most often, they’re bagged up and left at the curb.
Professional Organizers (and their clients) make LOTS of garbage. On ‘Garbage Day’ our clients put all the trash bags we’ve filled out to the curb (some tell me they wait for nightfall when the neighbors can’t see) and say goodbye to them forever. We are the hero. Our clients are relieved of a weighty burden. But, who is the real hero here with the most weighty burden?
Trash Collectors, The Garbage Man, Sanitation Personnel–the people who haul away trash. Professional Organizers partner with Home Stagers, Psychologists, Real Estate Agents and other professions to help clients reach their organizing goals. Trash Collectors are the ‘silent’ member of a Professional Organizer’s team. In a blog post written by Kindness Girl, Patience Salgado, Patience decided to take a poll to find out what the most thankless job in America was. Turns out the answer was–garbage collectors. Knowing what an important role they play in our society, she created a ‘kindness project’ for them. She says in her post,
“What could be a more lovely and simple message of respect than saying, “I see you, I value your contribution to my community and I thank you.”
Patience enlisted the help of her daughter’s kindergarten class to make thank you cards for the trash collectors. Word spread and more schools joined in on her kindness project.
How great is that? Just when you think one person can’t make a difference–think again.
So if you get a moment, stick a ‘Thank You’ sign on your garbage can once in a while–especially days you put out an inordinate amount of trash.
As for me, I’m going to look into making some ‘Thank You’ stickers to place on the trash bags I create in my own home and those of my clients. It’s never too late to show appreciation for your garbage man through random acts of kindness.
Where I live, it’s kinda cold. And it’s the first day of Spring (insert frowny face here). As much as I’d love to start doing a little spring cleaning in my closet, I still need my polartec tops and flannel lined jeans. May have to start elsewhere this weekend…
But, if you live in a warmer climate or just can’t look at your boots one more day, then by all means start spring cleaning your clothes closet.
Here are the 5 ‘must-haves’ you’ll need for this project:
Garbage bags
Despite their name, these bags won’t all be used for garbage. Grab two colors–black, white, and a third bag can be a reusable tote. Designate black for trash, white for donations, and the tote for repairs. Why use this system? I have heard stories of people accidentally donating their trash and putting their donations to the curb because they used bags of one color.
As you are sorting through and purging clothes from your closet, place them in the correct bag. Clothes with repairable tears and shoes/handbags that need a little TLC from the shoemaker go in your tote bag. When you finish, place the black bags wherever you keep your trash, put the donation and repair bags in your car or at your doorway, and mark off a day on your calendar to drop off them off at their next destinations.
Pad of paper and pen or cell phone
As you go through your clothes, you may find that they have an old stain, they’re too loose or tight, or you just don’t love it anymore. When getting rid of garments, keep a list of items you’d like to replace. That way, when you’re at the mall, you don’t have to think about what clothes you need–just refer to your list and you’ll know exactly what purchases to focus on. Use pen and paper or your cell phone to create the list–whichever works best for you.
Bottle of water/snack
Spring cleaning a clothes closet is a physical activity. Handling some sentimental items and items with ‘bad karma’ attached to them can be emotional as well. Even if you’ve eaten a large meal before starting, I’d recommend having a bottle of water and a snack at arm’s reach. You’ll need a break to clear your head and refuel–how often you do that during this task is up to you and your needs. But, I always advise my clients to bring a snack and drink into the space we’re working on. It means they don’t have to leave the room and lose focus while we’re working.
Large flat or multiple small flat surfaces
When doing a spring cleaning of your clothes closet, it’s important to have a place to put the clothes while sorting them out. If your closet is in your bedroom, use the bed to place the garments down as you make decisions. If your clothes live in a room without a bed, use folding chairs or storage tubs to separate your clothes by category. The floor is NOT a good option unless absolutely necessary. If that’s the case, please open a flat sheet, lay it on the floor and place your piles on top of the sheet.
Time
A basic organizing principle to follow for spring cleaning or any organizing task is. ‘Make an Appointment With Yourself.’ We make appointments to see doctors and to make our hair look fabulous and we wouldn’t consider canceling them except in an emergency. Do the same with Spring Cleaning. Take out your calendar and pick a day to start. Pencil in 15 minutes, a half hour, an hour–whatever amount of time you think you can manage. Keep that appointment. You’ll be glad you did.
Are you ready to spring cleaning your clothes closet? What do you think you’ll find in your closet this Spring?
Do you get a truckload of charities and non-profits sending you requests for donations? They can really pile up–especially at holiday time!
This scenario may sound familiar…
You write a check to a charity. A few months later another donation request from the same charity lands in your mailbox. You don’t remember whether you’ve donated to them or not so you do one of two things:
• you send them more money
• you toss the envelope on your desk and now it’s clutter
Today’s Organizing Quick Tip will help you keep track of all of those donation requests…
Create a home for ‘donation request’ envelopes.
Follow these steps to keep those donation requests under control…
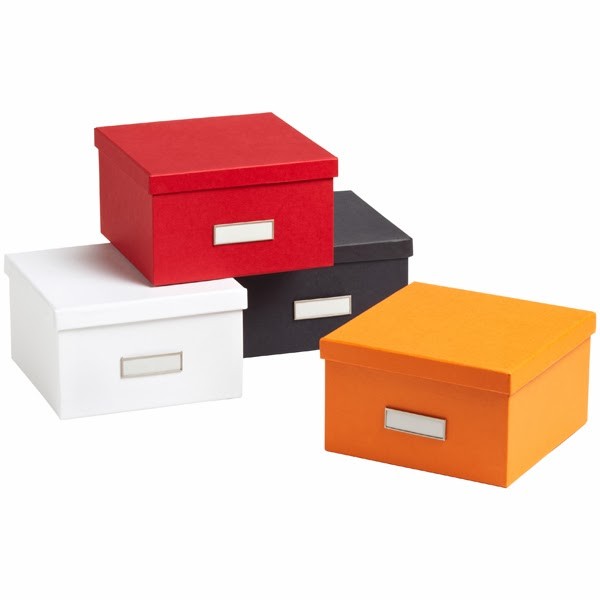
• Get a small box–approximately the size of a shoe box. An example:
Stockholm Photo Box from The Container Store
• Place the box in an area close to where the mail enters the house. When a donation envelope comes in the mail, place it in that box.
• Go through the box every three months to sort and purge for duplicates. I guarantee–you WILL have duplicates!
• After Thanksgiving, sort and purge the the donation envelopes one last time and decide which organization(s) you’ll donate to. Spread the piles across your dining room table or sofa if you need a lot of room.
• Make your donations in December–once a year (if possible). That way you’ll have no problem remembering when you sent your charitable donations. This eliminates the need to look back at a year’s worth of checkbook and credit card statements to see when and who you donated to.
• If you don’t already have one, create a ‘tax file’ for papers you’ll need to collect for tax purposes.
• Place receipts for your charitable donations in the tax file.
• Empty your ‘donation request’ box and start over.
I recently set up this system for a client and she said it has made her life so much easier in these ways:
• It organized all of her donation requests in one spot.
• It allowed her to notice when she had multiple envelopes from the same charity/non-profit.
• By doing her donations once a year, she no longer has to try and remember or look back in a check book register or credit card statement to see if she already made a donation.
This Donation Request System (DRS) will save you time, money, stamps, and brain power. Give it a try–let me know in the comments below how it works for you!
In 2000, my husband and I got married and merged two households. Between all the stuff we came with and the beautiful wedding gifts we had received, our home was overflowing with three of this, four of that and too much of a whole lotta stuff. So, we decided to sort through what we owned, purge out what we didn’t need and have a garage sale.
I wish I had pictures to show you but our driveway and lawn were filled with our belongings. People thought we were downsizing and moving! I overheard one woman on her cell phone yelling to a friend, “You gotta come over here–there’s so much great stuff!”
Two days and almost $1000 later, we had done a good job of clearing space in our home. We used the funds to buy a patio set which we still own. At the end of day two, I turned to my husband and said “I never want to have enough stuff in our home to do a garage sale again…”
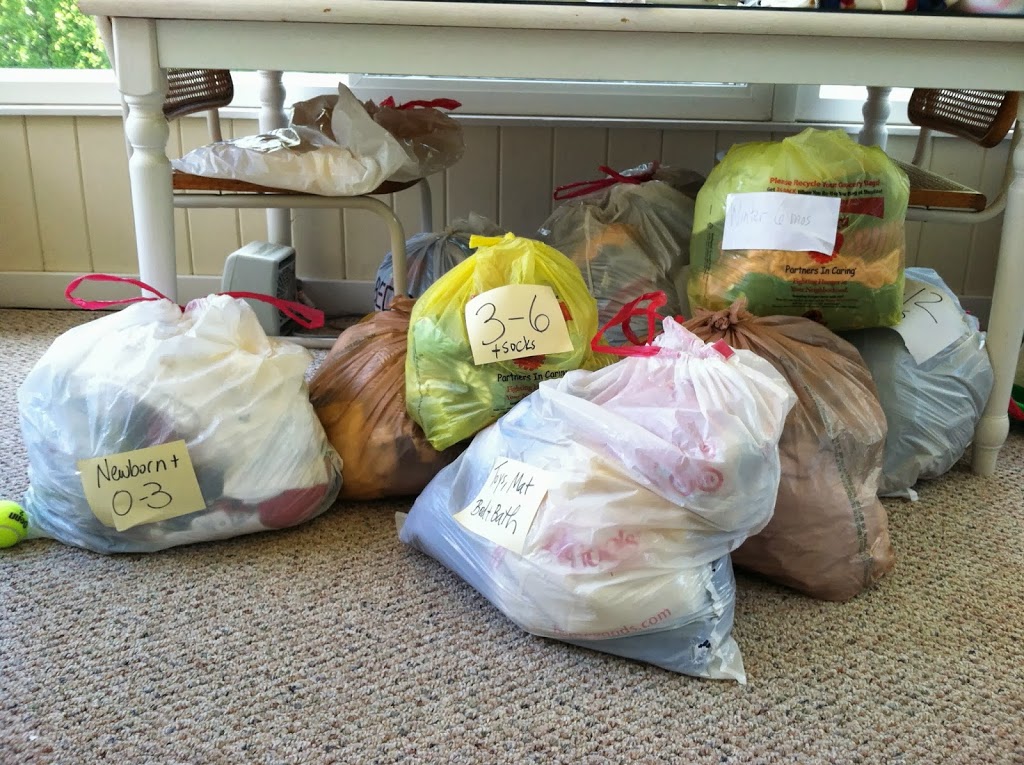
It’s now 2013. We’ve had two children and our house was feeling full. My husband swore our attic floor would soon buckle and bins of stuff would crash to the floor below. In the Spring we began, Operation ‘Get It Out of the House.’ Big ticket items like our crib and two exersaucers found new homes. Bags upon bags of baby clothing found their way to three different expectant mothers. My husband says he could hear the attic exhale for the first time in years.
Multiply this times three and that’s how many bags of 0-12m baby clothing I gave away!
I kept purging–kiddie toys to the preschool, old pillows to the trash and then it happened…My neighbor tells me our town is having it’s first town-wide garage sale.
I pass the great news about the town-wide garage sale on to my husband. He’s as excited as I am.
I continue purging. I started to collect boxes and plastic bags, and began pricing. I even dug up the Word file for the garage sale sign I had created in 2000 (Hubby says that didn’t surprise him one bit…).
My cousin Dale gave me the ‘Fill a bag for $1’ idea. Brilliant!
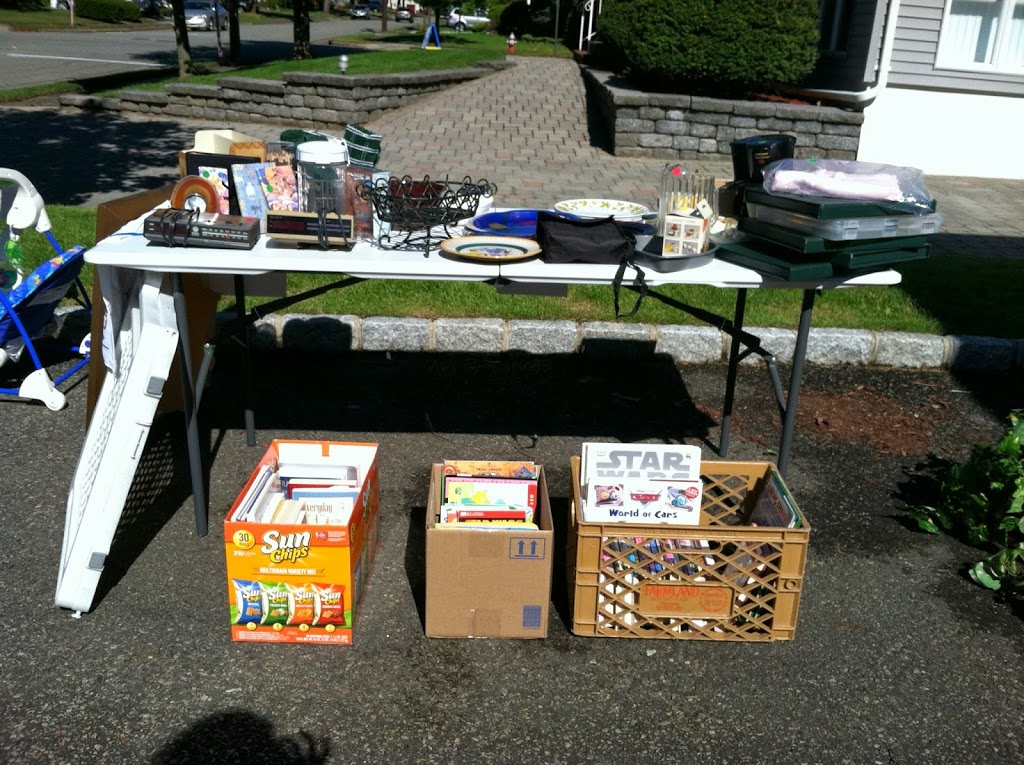
After pricing, I sorted our items by category–Baby, Kid Toys, Housewares, Books, etc. counting down the days when I could finally reclaim my garage space again.
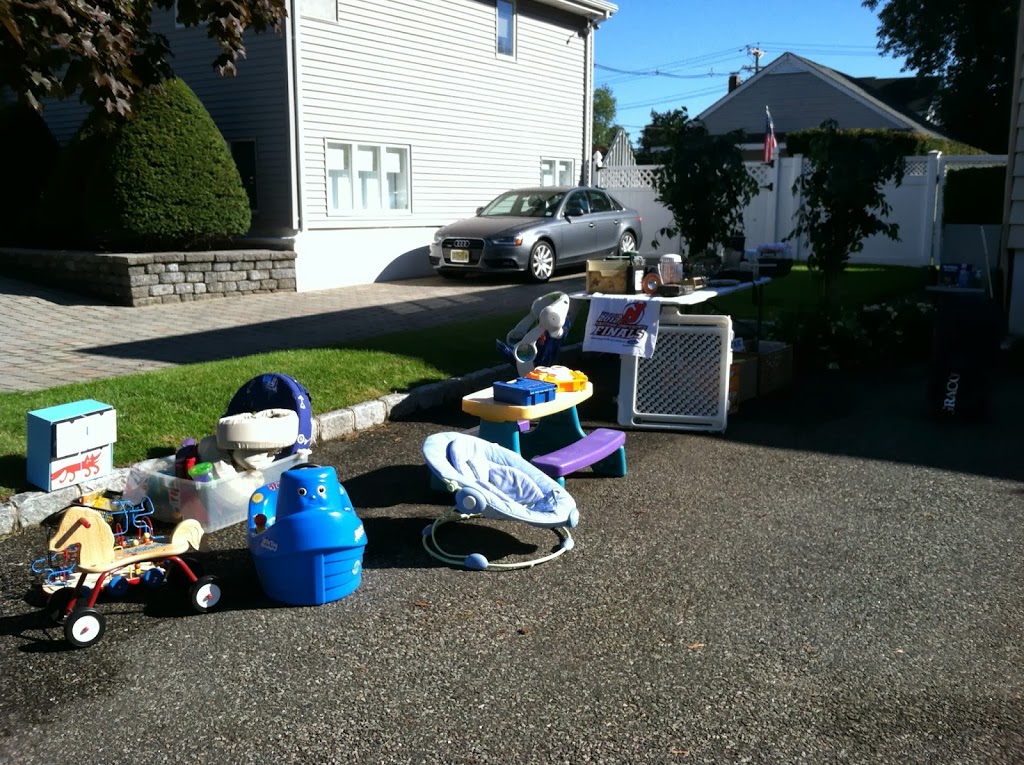
We had about a tenth of the stuff we put out in 2000. Our friend gave us some of her things to put in the garage sale so she could purge her house, too. We had two beautiful sunny days and although foot traffic was light, enough customers made purchases to say it was successful.
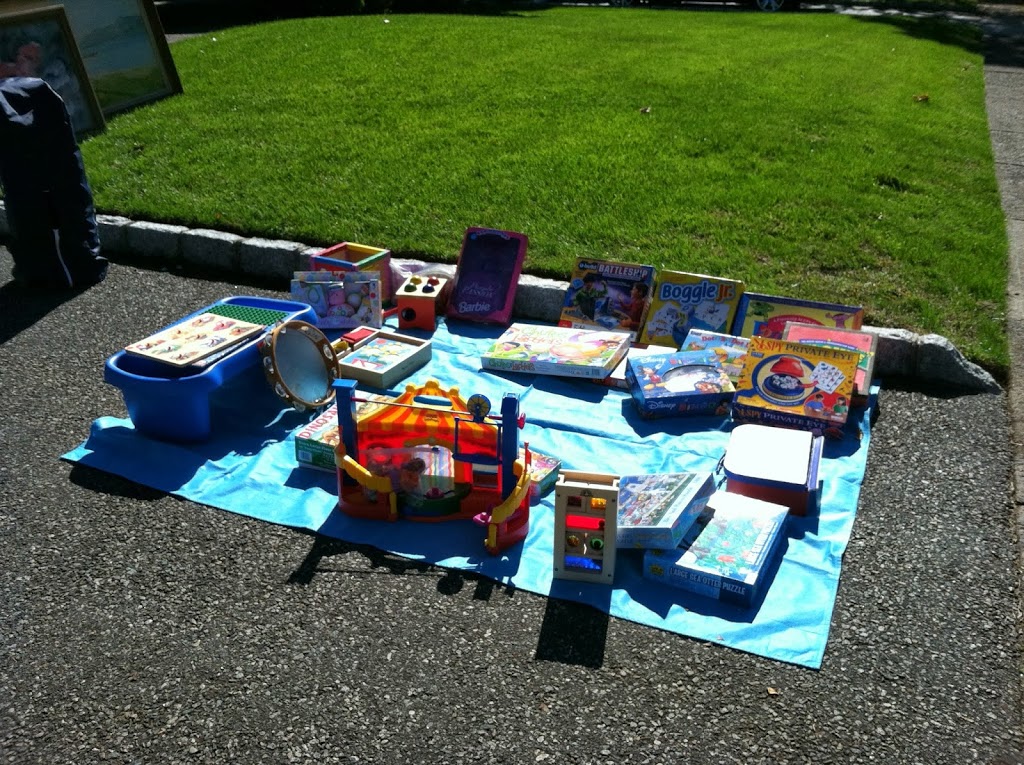
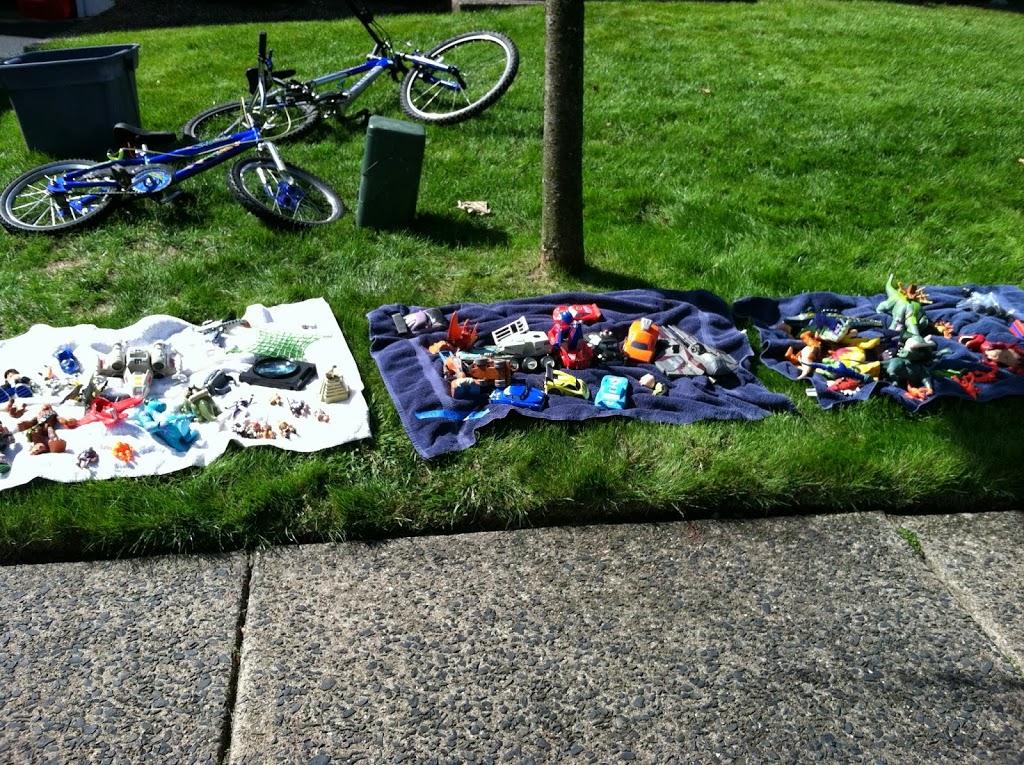
My neighbors across the street set up a few tables and my nine year old neighbor decided to try his hand at selling some toys he and his brother didn’t play with anymore. I advised him to lay them out on towels grouping ‘like’ with ‘like’–dinosaurs with other dinos and all vehicles together, too. He sold a few items (including one of the bikes in the background) but at least half of them went to my son’s preschool or to my own kids!
The wares of a budding entrepreneur…
A few shoppers commented on how organized my labeled pricing system was. I smiled and said, ‘Thanks.’ Oh, if they only knew…
Two days later, we made less than a tenth of the money we had made in the 2000 garage sale but that’s OK. We weren’t doing it for the money–we were getting rid of the ‘old’ to make room for the ‘new.’
Some funny/unexpected things that happened:
• My neighbors bought some of my stuff!
• A shopper thought a painting marked $3.00 was actually $300. We all had a good chuckle…
• A grandma about six inches shorter than me bought and then picked up a Little Tikes picnic table and walked back to her house with it.
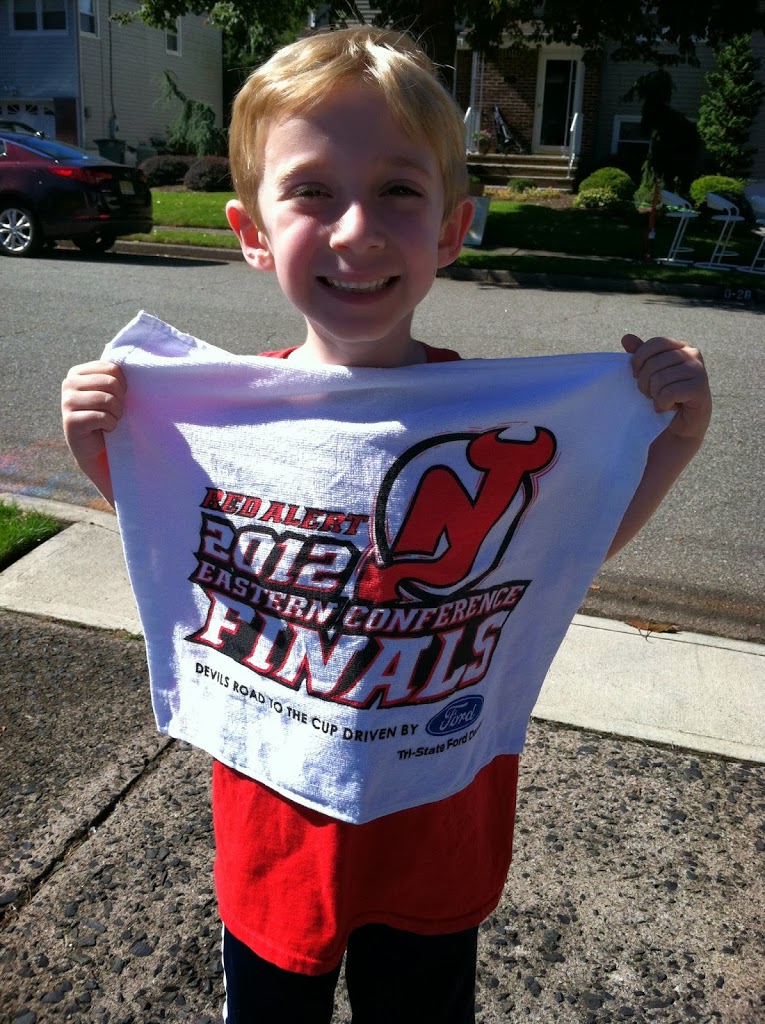
• I sold a NJ Devils giveaway towel to my seven year old for $ .25. I thought it would be a good math lesson…
He said, “Mommy, I can’t believe you were going to sell this!”
Some great things that happened:
• I had fun hanging out with my neighbors and celebrating our selling successes.
• My kids acquired some cool toys and baseball mitts from our neighbors across the street.
• I got to read two magazines during selling ‘downtime.’ Any mom of small kids know that this is quite a feat!
• We made a little extra spending money.
• We purged our home of things we no longer needed.
At the end of the town-wide garage sale, I packed up all unsold goods and split them into three categories. Give to Preschool, Give to Thrift Shop, Bring Back in the Garage. The ‘Give to Thrift Shop’ bags and boxes went from my driveway to my car to a local donation center. My ‘Preschool’ items are enjoying a new home in my son’s classroom and the one (!) bin marked ‘Bring Back in the Garage’ is being dealt with this week.
So, if your town is declaring a town-wide garage sale soon, or you’re looking to make some room in your home and some money for your wallet, it’s time to plan ahead! Click here or click the image below for my *free* download: 5 Tips for a Successful Garage Sale.
In my last post, guest blogger Audrey Cupo of a A Better Space encouraged you to evaluate the past and plan for the future.
Well, the future is here. Did you make any resolutions for the next twelve months?
According to the people at StatisticBrain.com, the top ten New Year’s resolutions for 2013 are:
1. Lose Weight
2. Getting Organized
3. Spend Less, Save More
4. Enjoy Life to the Fullest
5. Staying Fit and Healthy
6. Learn Something Exciting
7. Quit Smoking
8. Help Others in Their Dreams
9. Fall in Love
10. Spend More Time with Family
Did you see that? ‘Getting Organized’ is one of the top two resolutions people made in the new year. Looks like my colleagues and I are going to be very busy this year!
All kidding aside, many people say they want to get organized but are not successful at achieving their goal. Unfortunately, only a small percentage are. But why?
A few reasons:
– The goals they set for themselves are too vague.
– People get easily discouraged and give up too soon.
– They don’t have a way of measuring their successes however small.
They don’t have a PLAN.
That’s why I would advise anyone who has made a resolution for themselves this year to do two things first:
– Create a plan for reaching your New Year’s goal
– Set mini-goals within that plan
Planning out the path for reaching a goal can be as easy as doing a ‘brain dump’ on a piece of paper or on your computer. Create a list of all the steps you need to take to reach your goal. They don’t need to be in any order–you can fix that later.
If you’re a visual person like me, you might want to use a graphic organizer to help you with your plan. This is a great way to organize your thoughts. An example of one:
Courtesy of The Writing Bug
If ‘Getting Organized’ is one of your New Year’s resolutions, write ‘Get Organized’ in the big circle. In the next smaller circles write the room/area of your home or life you’d like to get organized. In the smallest circles (attached to the medium sized circles) list the tasks that need to be done to achieve your resolution to get organized. Create as many spokes and circles as needed. These are your mini-goals.
A mini-goal is a tiny step to complete on your way to reaching your ultimate goal. It helps you to break down the process into smaller, more manageable pieces.
Examples of mini-goals for getting your home/life organized:
-Every Tuesday, I will sort/purge/organize one drawer in my dresser until all drawers have been gone through.
-I will label an envelope ‘Receipts’ and once a week, I will empty my wallet of all receipts into that envelope. At the end of the month I will review all receipts.
-At the end of the day, I will spend 15 minutes making sure all items are in the home they belong in.
-I will create a ‘Donations’ bag in my garage and pledge to put all items to be donated in it. When I know I will pass the local thrift shop, I will put the bag in my car, drop off the donations and place the donations bin back in its ‘home.’
-I will inventory my pantry before heading to the supermarket.
Successfully setting mini-goals and reaching them are cause for celebration–don’t over look that. Every mini-goal milestone brings you a step closer to your goal and should be honored and celebrated!
“Vision without action is daydream.
Action without vision is nightmare”
– Japanese proverb
Did you make any New Year’s resolutions? What’s your plan?
It’s been almost a month since Hurricane Sandy blew through the Northeast.
I am thankful that my family came out of the hurricane fairly unscathed. We had power and heat–our only loss was internet and cable for about a week. We know many who slept in chilled houses and went wherever they could to charge their phones and laptops for weeks on end. And that’s nothing compared to people who completely lost their homes…
But I was nervous…
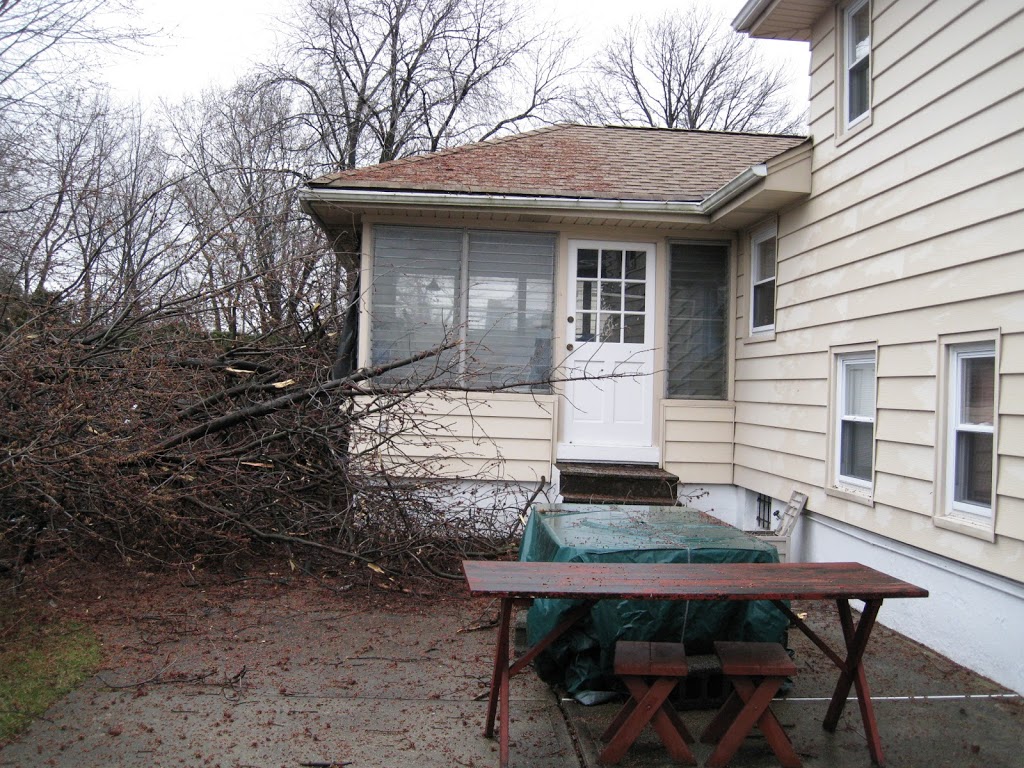
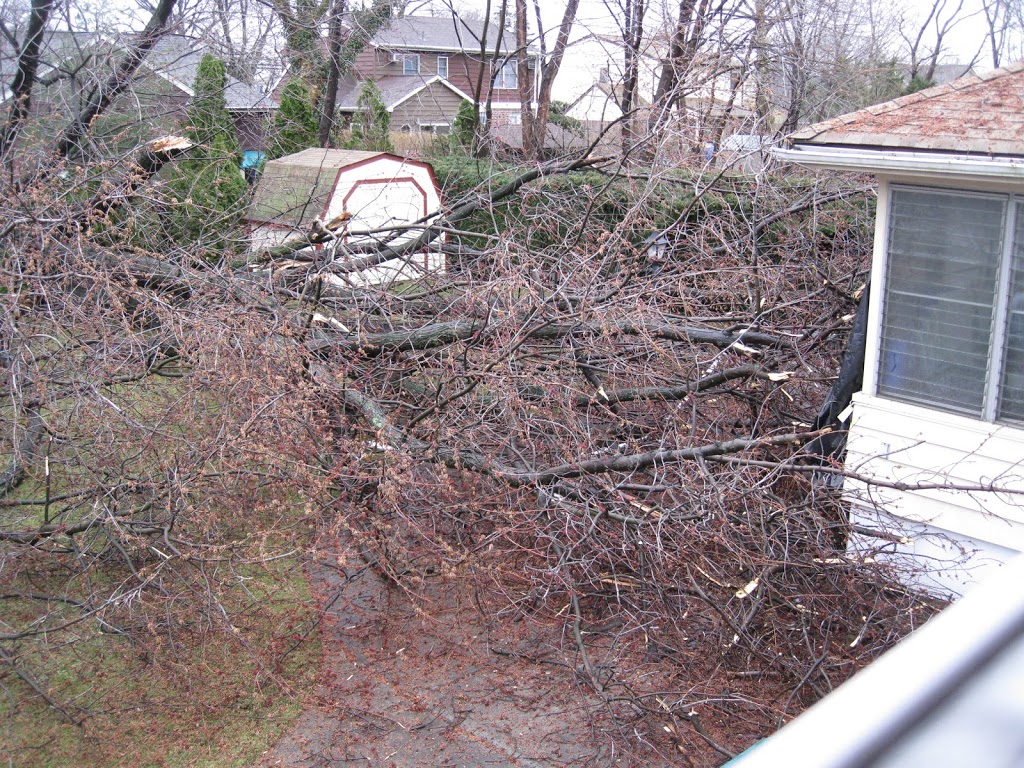
You see, in the spring of 2010, a month before giving birth to baby #2, a storm dropped our neighbor’s huge tree onto our home. It came through a window of our three-season room and took up about 80% of our backyard.
Our neighbor still has another big tree in his backyard and as you can imagine, my husband and I were concerned about Hurricane Sandy causing similar or worse damage to our home.
We hoped for the best but prepared for the worst. And then got organized.
We made ice. And filled ziploc bags with water to make more ice. We bought all the ‘D’ batteries we could find and gathered all our flashlights, candles, and electronics in one place. I also gathered all information we might need in case of an emergency:
-our homeowners and car insurance polices/account numbers,
-our PSE&G account and contact information,
-the telephone number for News 12 New Jersey to hear news reports if we had no other way to access the news.
I packed a few days worth of clothes for all of us and a weeks worth of diapers for my little guy. This is just the kids’ pile…
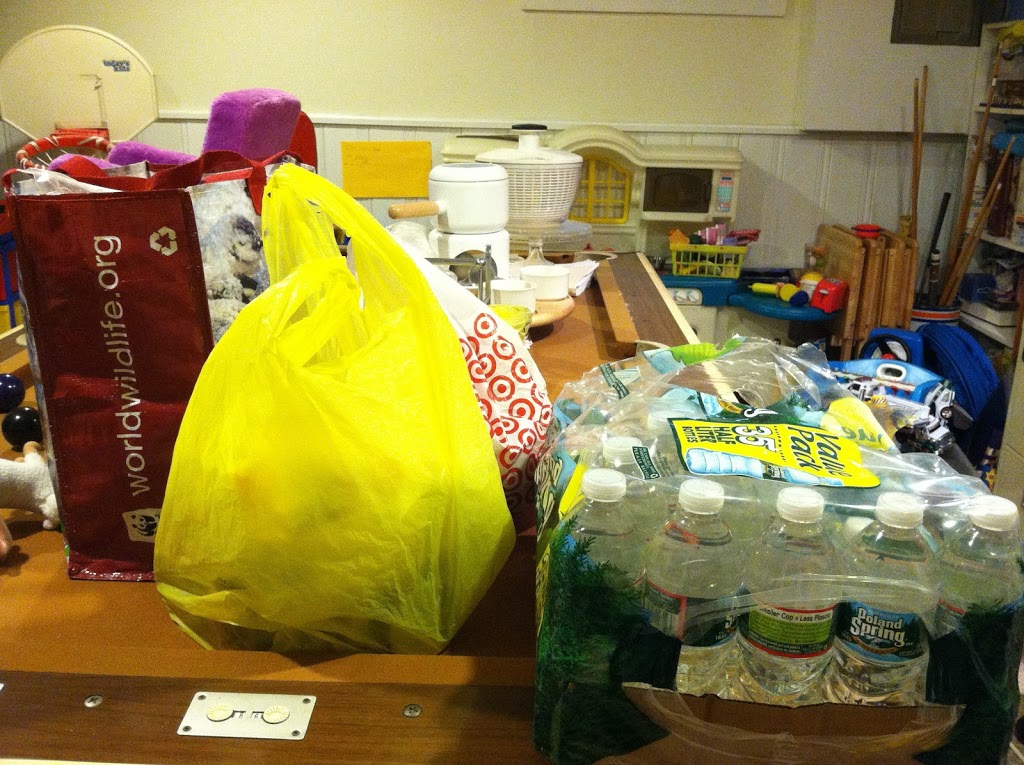
I also packed water, non-perishables and made a list of perishables to take with us in case we had to evacuate our home.
I was anxious about another tree falling on my house during the hurricane but I was equally as anxious about the possibility of having to feed my youngest child if we had no refrigeration or way to heat food up. He has multiple food allergies on top of the fact that he’s 2.5 and doesn’t have the most sophisticated palette.
I channeled my anxiety by making lists–a great way to get organized and prepare for an event such as a hurricane. I started on paper but then switched over to my favorite productivity app, Evernote. I use this app as a place to dump my brain and keep information for future use. I started an ‘Emergency Preparedness’ folder in Evernote and created the following lists of items we’d need:
-perishable food
-non-perishable food
-perishable food for my child with food allergies
-non-perishable food for my child with food allergies
-important contact information
-what we’d need to take with us in case we need to evacuate (clothing, cash, medicine, important papers, etc.)
You can access Evernote from any computer or your phone–the information is all in the cloud. I HIGHLY recommend this app. My desk would be overrun with papers and post-its without it!
Now that I had made my lists, I felt more prepared for the upcoming storm. What I wasn’t prepared for was my 2.5 year old getting his foot stuck between the slats of a dining room chair as the wind was howling and the trees were swaying. Days later, people asked us if we had any damage due to Hurricane Sandy. I laughed and said to them, “one chair–and it was INSIDE the house.”
It was repaired the next day and now our son’s booster seat sits on this chair. I think we’re going to be telling this story for years to come…
After the storm blew through, we touched base with family and friends discovered that we were one of the few homes around town that had power. We had no TV or internet access but I was grateful that we had heat and a fully working kitchen.
Our preparedness helped us as well as with others. We shared extra batteries, extra room in our fridge and freezer and gave out food, ice and a warm place to hang out to those who needed it.
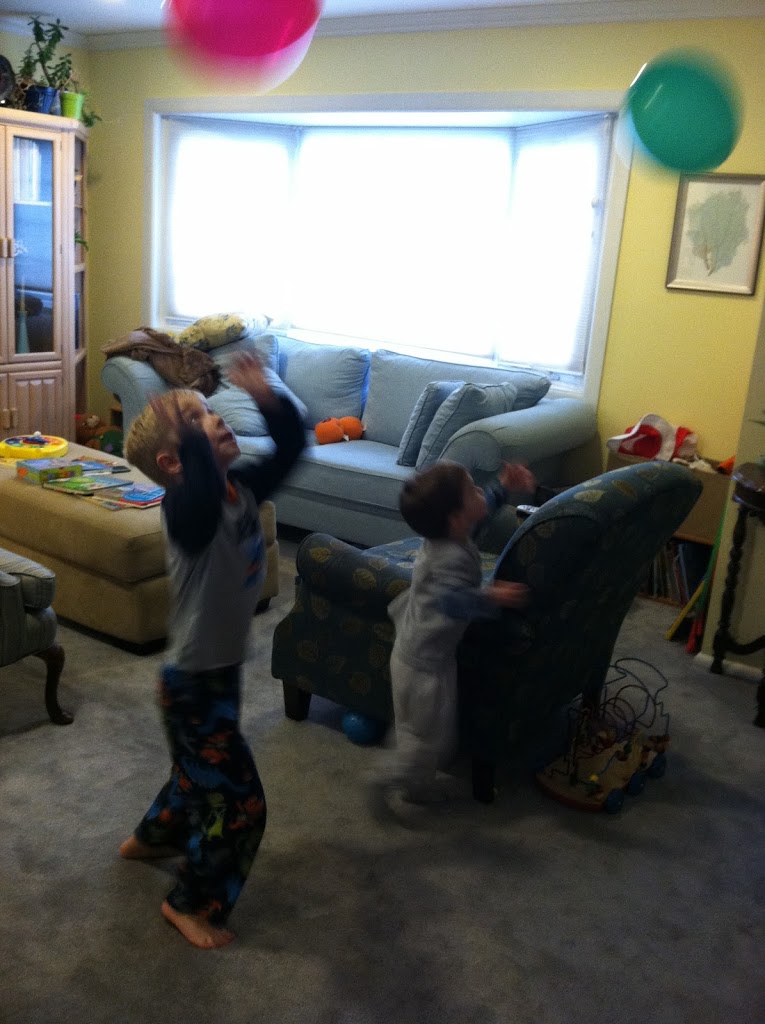
School was closed for seven days. What kept my kids most occupied during the no-school days following the hurricane?
Balloons!
Is it possible to be thankful for a bag of balloons? Why not?
We also had nieces and nephews stop by to play and warm up. We had fun with stickers and crayons and other non-electronic toys. I will say–despite the fact we did not have cable, our DVR worked. So, we did have a bit of television to keep the kiddies occupied.
During this time, I also taught my kids how to use the Swiffer. They loved pushing it around, especially my 2.5 year old. He and my 6 year old had a competition–who could pick up the most dirt and dust with it. I had very clean floors after the hurricane!
Slowly we heard about more and more people getting their power back. Schools were opening again. Gas lines were getting shorter. Everyone from celebrities to relief organizations were collecting for Hurricane Sandy relief.
My son’s school sent a note home that they were collecting items for the towns of Little Ferry and Moonachie, NJ. I used this event as a lesson in gratitude/being thankful. My six year old and I talked about how we were very lucky that nothing happened to our house during the hurricane and how others had not been so lucky. We collected items from the list, labeled the bags and he helped me take them to school.
Three cheers for Warren Point Elementary School of Fair Lawn, NJ!
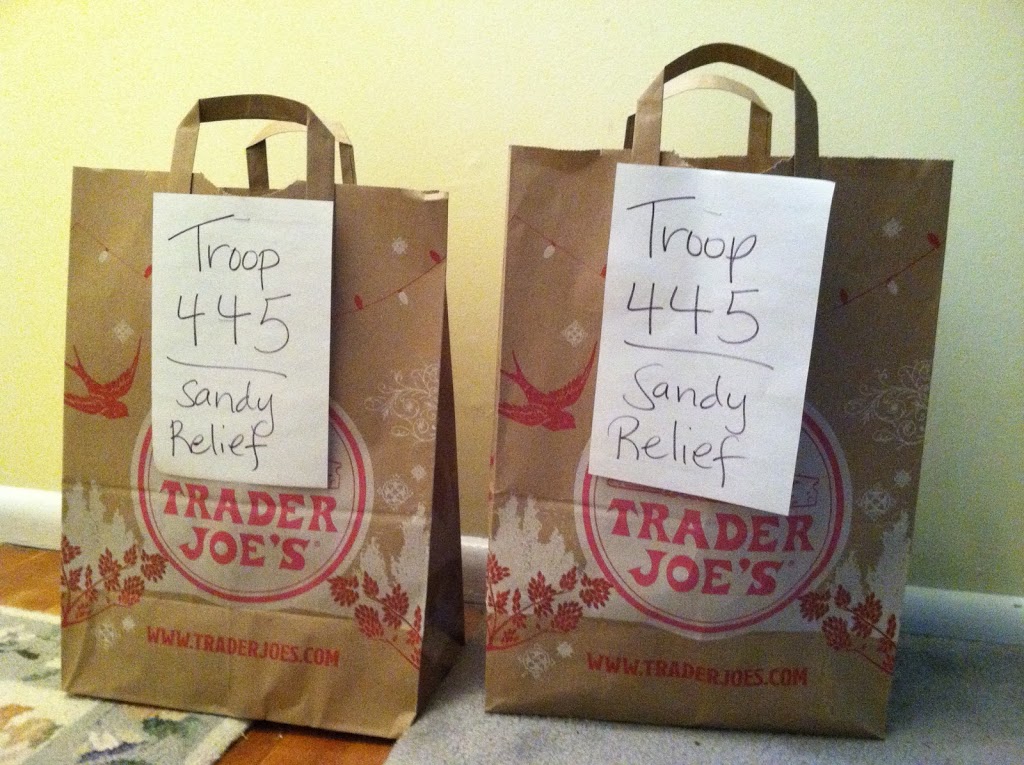
Three more cheers go out to Girl Scout Troop 445 of Fair Lawn. They made up a list of food items they wished to collect for those affected by Hurricane Sandy and were nice enough to staple a plastic bag to the list. Very organized, ladies!
Once again, I took my son into our pantry. We had another talk about people affected by the hurricane that need food and how lucky we were to have what we need in our house. He read the items from the list and I put them in the bags–a lesson in literacy and gratitude. I recycled the plastic bag, and used paper instead…
Other companies/organizations involved in collecting for Hurricane Sandy–
Deposit A Gift, an online cash gift registry service, has partnered with The Foundling Hurricane Sandy Relief Fund and is donating an extra 4% for every dollar given. Here’s how you can help. People have even created ‘registries’ for family/friends who have lost much to Huricane Sandy. Here’s an example of how one couple is raising funds for their Aunt Pat who lived in the devastated Breezy Point area of NY.
Whole Foods near me in Paramus, NJ is collecting coats through December 7th for New York Cares 24th Annual Coat Drive. According to the NY Cares website, “the storm created an unprecedented demand for warm coats.”
Please take a look in your closets and see if you have any outerwear that is in good enough shape to donate. This is the perfect time to de-clutter and help others.
Hurricane Sandy blew through town a few weeks before Thanksgiving–a time when most of us have more of an awareness of what we’re thankful for.
I’m thankful for much but in terms of the hurricane, I’m thankful…
-we had power, a working kitchen and didn’t need to leave our home.
-that we were able to help others after the storm.
-for my husband being home from work for a week and the time we got to spend as a family.
-for the break from the internet. As wonderful as it is, sometimes my eyes and brain need a rest…
-for the little time we got to organize. Not always easy with little kids around but we tackled a few -hot spots in my house.
-for Evernote which got me organized for this storm and prepared for a similar emergency in the future.
-that the only storm damage we had was a dining room chair!
A hurricane is a powerful reminder of our need to express gratitude and desire to be of help to others. Just because Thanksgiving has passed and the holiday season is upon us doesn’t mean we should forget about those who were affected by Hurricane Sandy. Please consider de-cluttering your closets, buying an extra holiday gift for a displaced child, or donating food to a local food pantry. Keep thankfulness and gratitude on your mind and in your heart this season and always.
You’ve sorted and purged. I know you’re exhausted but don’t stop yet. Keep going for another couple of minutes–then you can sit down and relax. You have a few more tasks to attend to before your time for organizing is over for the day…
You filled a bunch of trash bags, right? Yay for you! You’ve made good decisions and you’re getting rid of the old to make room for the new. There’s one more step before you’re done…
Your Organizing ‘Quick Tip:’ After purging items for Trash, Donation, or Repair get them out of your home ASAP.
• The bag(s) of trash goes right to your garbage cans/garbage room
• The bag(s) of donations go to a local thrift shop or drop-off bin
• The bag(s) of items that need to be repaired go to the tailor or fix-it shop
Put Donations/Repairs in the trunk of your car and deliver the bags to the appropriate places as soon as you can. If you can arrange it, purge items from your home the day before your garbage is scheduled to be picked up.
A piece of advice: Don’t wait to do these last steps. After a few days, you’ll lack the motivation to get those bags out of your home.
Watch my YouTube video to prevent this embarrassing moment from happening to you…
NOW you can relax!
Your bags of trash are going down a chute or onto the curb. Please be kind to your garbage collector–pack them safely and please don’t make them too heavy! For more on this topic, click to read my blog post, ‘Get Organized and Thank Your Garbage Man.’
Where’s your favorite place to take your donations? I’d love to hear in the comments below!
A blog by Professional Organizer Stacey Agin Murray bursting with cool products, 'gotta-tell-a-friend' ideas, and a whole lotta organizing know-how. Learn more...
Subscribe to the Blog
Subscribe to the blog and never miss a post!
About Stacey
When you grow up in a 5’x12′ bedroom, you learn to organize pretty quickly! I chose to take that knowledge and turn it into a business helping people find what they need when they need it. I’m also the author of The Organized Bride’s Thank You Note Handbook–a book that offers wedding thank you note-related organizing tips and how-to’s plus 101 unique sample thank you notes (what bride can’t use that?).