Archive for the ‘
Money ’ Category
It’s summer! The sun, the water, the shade of a leafy tree and the smell of a BBQ–it’s all calling your name.
But, wait…
You say you need to get organized. Your kitchen, your closet, your papers from the last three months–all need organizing.
It’s a dilemma. Spending time outside means you’re not organizing inside.
I’m a Professional Organizer and even I don’t want to spend much time organizing when it’s 85 degrees and sunny!
The solution for the summer (as well as the other three seasons)?
Get organized in 5 minutes.
No, I’m not crazy. It IS possible to get organized in 5 minutes. You’re not going to organize your entire closet or kitchen in 5 minutes but there are teeny-tiny tasks that you can complete that will move you one step forward towards your organizing goals. And, I’ve said it a bunch of times–it’s those baby steps that will motivate you and keep your eye on the organizing prize.
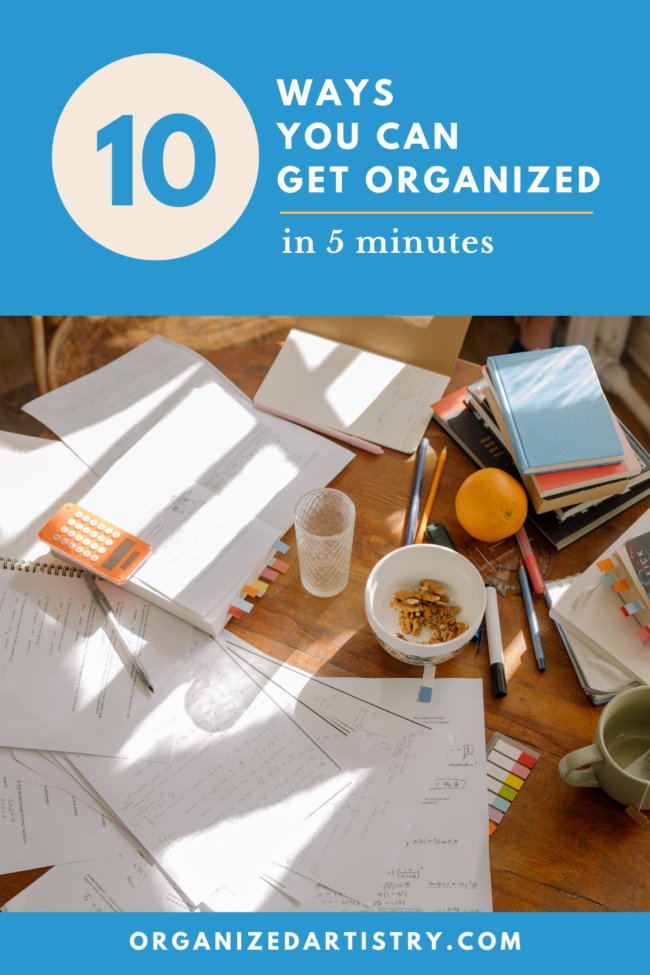
Here are 10 ways you can get organized in 5 minutes:
Declutter your wallet
A bulging wallet isn’t always a sign of wealth–it can sometimes be a sign of a wallet in need of decluttering! Cash, receipts, business cards, and random scraps of paper multiply like bunnies in between clean-outs. Take 5 minutes to make space in your wallet for money to flow into it!
Create a home for an item that doesn’t have one
We’re always bringing new items into our homes whether it’s children’s artwork, a plant, a picture frame, or a new piece of technology. If the item will be sticking around for a while (or permanently), it’s going to need a place to ‘live.’ Spend 5 minutes thinking of the best ‘home’ for the item and place it in that spot.
Create a file for a new document
Papers also need ‘homes!’ Perhaps you opened a new bank account or you just received your child’s school directory. Those papers need to live somewhere (not your dining room table!). Take 5 minutes to label a file folder, place the papers inside, and store it in a spot that guarantees you’ll always be able to find it.
Delete blurry or duplicate photos from your phone
I was telling my kids the other day about how cameras used to use something called film and you could only take either 24 or 36 shots at a time. And then we had to pay to develop the whole roll regardless of what the pictures could potentially look like. And you had to carry an extra roll of film in case you ran out of shots (and flash cubes, but that’s a whole other story…).
It’s so easy to take multiple pictures of the same thing on our phones. But, that takes up precious space on our little hand-held computers. Ever spend time waiting in a line for 5 minutes? Waiting for the water on the stove to boil? Waiting for the laundry to stop spinning? All of these scenarios and many other 5-minute pockets of time are perfect for deleting blurry and duplicate photos on your phone.
Plan one meal
Does this scenario resonate with you? You come home from work or school or from taking your kids to activities and discover you have nothing in your pantry that comes close to resembling a meal. Taking 5 minutes to plan one meal in advance will save you hours in the supermarket and at the stove, put money back in your wallet, and time back in your day. You won’t feel ‘hangry’ and it may even help trim your waistline, too…
Toss expired food from your fridge, cabinets, or pantry
While you’re planning that one meal, take another 5 minutes to dispose of food that has expired or that resembles a science experiment. Sort through and purge one shelf at a time. Check expiration dates and if you’re brave enough, give leftovers the ‘sniff test.’ By doing this for 5 minutes at a time, you’ll stay on top of your food inventory and keep your refrigerator fresh and clean. Best time to do this? The night before your garbage collection.
Unsubscribe to emails from businesses/organizations you no longer make purchases from/donations to
Imagine if all of those unsolicited emails you receive daily were actual physical pieces of mail. You would have one clogged up mailbox and a whole lot of recycling to do! Get organized in 5 minutes by unsubscribing from unwanted email solicitations. It may take a few days for the ‘unsubscribe’ to take effect but those 5 minutes will have been worth it when you’re no longer using your time to sort through so many ‘junk’ emails.
Test pens and markers
Is your junk drawer overflowing with pens, highlighters, and markers? If so, spend 5 minutes finding out if they still work. This is an ideal job for kids! Give them a pad of paper and a bunch of pens and markers and have them scribble and sort–anything that still works stays and anything that is out of ink or isn’t writing as well as it should gets thrown out or recycled.
Create your to-do list for the next day
Take 5 minutes to write out your next day ‘to-do’ list before you turn in for the night. This technique has multiple benefits. It will help you sleep well–you’ll wake up knowing exactly what needs to be done. It gives your brain an opportunity to think about what needs to be accomplished and places that information elsewhere when you write it down (using paper or tech). Now you can use those morning hours to plan and prioritize your tasks instead of spending time wondering what you should be doing next.
Make your bed
It’s one of the first chores of the day and the first accomplishment of the day. It starts your morning off in a calm and organized fashion. No need to make your bed look picture perfect. Cover the bed with your blanket/comforter, smooth it out, and tidy up your pillows. Unless you sleep restlessly it should take you less than 5 minutes to make your bed. If you have a partner, split the task with them–it will take even less time!
5 minutes making your bed = Time.Well.Spent.
You CAN get organized in 5 minutes!
What 5 minute organizing task will you accomplish today?
Want to stay current and connected to Organized Artistry? Follow us on Facebook, Pinterest, YouTube, LinkedIn, Instagram, and Goodreads!

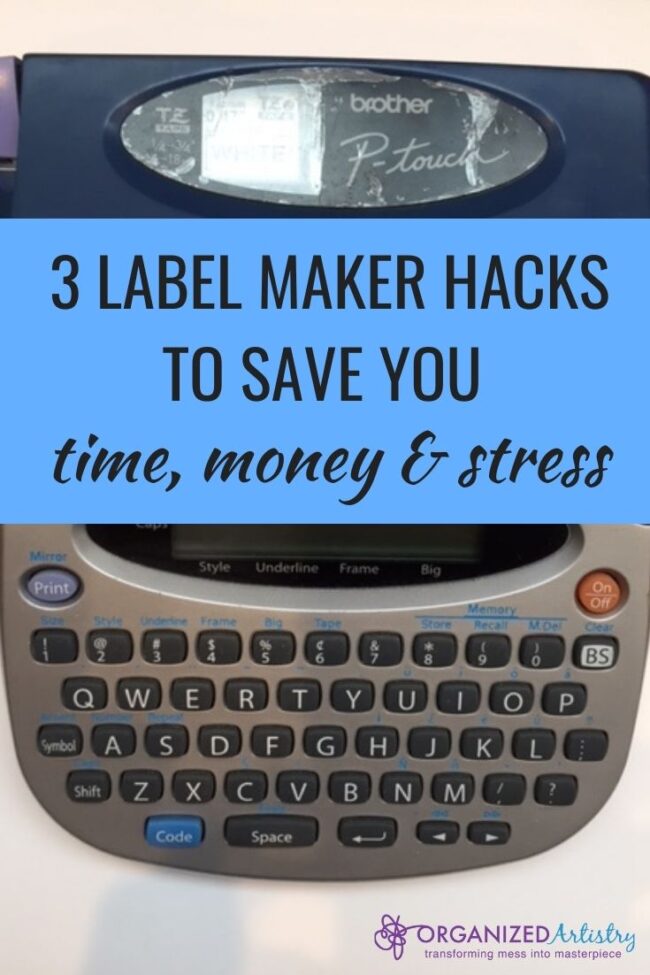
Good morning, class! Welcome to Label Maker Hacks 101. I’m Professor Murray and in today’s lesson we’re going to be discovering 3 label maker hacks to save you time, money, and stress.
Please take out your label maker, place it on the desk in front of you, and make sure the batteries are working. We’ll start off with some fingertip exercises, a quick review of the QWERTY keyboard, and then move on to today’s lesson.
If you have walked into my lecture hall by mistake but wish to stay and learn, please refer to my blog post: 5 Reasons Why You Should Own a Label Maker. It is required reading for the Label Maker Hacks 101 course…
No need to take any notes–I have all the label maker hack details outlined for you below. Let the learning begin!
Todays Lesson: 3 Label Maker Hacks to Save You Time, Money, and Stress
Hack #1: How to Save Tape
If you do not own a label maker you may not be aware of the fact that although a new label maker often comes with one ‘starter’ tape cartridge, in order to print more labels, you must purchase more tape cartridges. They can be purchased individually, in 4-packs, and in bulk.
When printing a label, the label maker leaves the first approximately half to three-quarters of an inch of tape blank and then starts printing the word(s) or phrase. After it has been printed, the label maker leaves another half to three-quarters of an inch blank on the right side of the word/phrase.
That’s A LOT of WASTED label tape. Wasted label tape = wasted money
For those who own label makers, you know how quickly a tape cartridge can run out of tape–usually in the middle of typing a long phrase or when you need to it to print out quickly (not that I have any experience with either of those…ahem…).
I’ve been using my label maker on the job and in my home for close to twenty years and in that time, I’ve discovered a way to save label maker tape. This works especially well when needing to print many related labels such as for folders in a file cabinet or for kid’s school supplies.
Here’s how you do it:
1-Think about your needs. What are you labeling? Spice jars? File folders? Pantry shelves?
2-On paper or on your phone, write the words or phrases you wish to create labels for.
3-Type those words/phrases into your label maker. As you type, press the space bar 5-6 times between each word/phrase. This will create a small blank space between each word/phrase.
4-Press the ‘Print’ button and watch your label maker miraculously give birth to one long label with all of your words/phrases on it.
5-Use the built-in cutting tool to separate the label from the label maker.
6-Use a scissor to cut in between each word/phrase.
Look how much label maker tape you’ve saved!
This label maker hack will eliminate a bulk of the wasted tape on both ends, saving you inches of tape and piles of money.
Hack #2: Keep Your Font Sizes and Styles on Display
Every label maker is different but most offer the user multiple font styles and font sizes to choose from.
Depending upon how old or new your label maker is determines how many font styles and font size options it has. I own a nineteen year old label maker so I only have 5 font sizes and 9 styles. Newer models have upwards of 14 fonts and 10 font styles.
When creating labels for a project, I like to be able to offer my clients some size and style options. Sometimes the nature of the project dictates what size and style font to use. Attic bins need the largest font while small objects require the use of the smallest font. But, sometimes we’re able to use any size and style–that’s when I ask my client to consider their choices.
In order to show my clients their style and size choices without printing all of them out on the spot (and repeatedly using an excessive amount of label tape), I devised a system that would save me precious time and precious label maker tape.
Here’s what I did–I advise you to do the same:
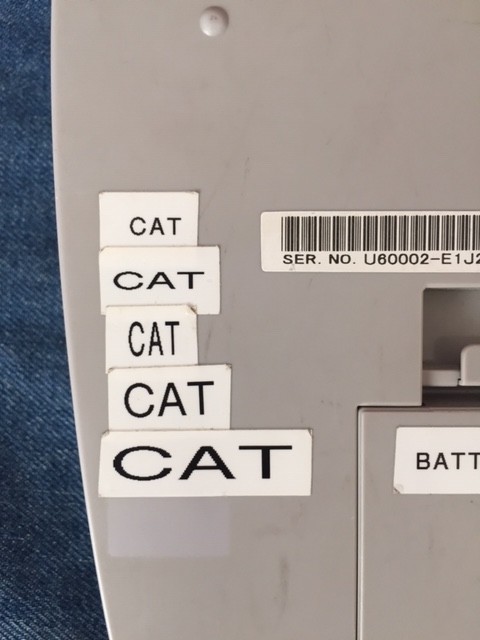
1-Select a short word (I chose cat because it’s short and hey, I like cats…)
2-Print out one label of that word for each size and style your label maker can create.
3-Stick the labels to the back of your label maker or on a large index card for easy reference. Keep the index card in the same place where you store your label maker.
Taking time to set this up takes the work of remembering all the font styles and sizes out of your brain and onto the back of your label maker or on an index card.
After creating the font display almost two decades ago, I now just turn my label maker over, show my client the selection and say, “Pick the font you want!” Happy clients!
Hack #3: Split it Down the Middle
Label maker tape has two parts to it–the label itself and the backing that covers the stickiness.
If you’ve had a label maker for as long as I have, you may remember that label tape was not that easy to work with. When I started using a label maker almost twenty years ago, it was very challenging to get the backing off the label. And frustrating. The backing was about a hairline larger than the actual label. With a keen eye, a few long fingernails, and a lot of practice I was able to remove the backing fairly easily and look like a label maker rock star to my clients.
People must have filed complaints because Brother (the label maker company) eventually changed the backing of the label tape. Hallelujah! Now, the backing of the label splits in two horizontally allowing for MUCH EASIER removal. On the Brother website, it’s called ‘easy-to-use and easy-to-peel-off split-back’ tape.
Less stressed customers = happier customers!
No more struggling to remove the backing of the label. Here’s what to do:
1-Take the label with the words facing away from you and gently bend it in half away from you on the horizontal. You’ll notice a line that will divide the backing in two.
2-Remove both backing strips and apply the label to your surface.
Now you know how to take the backing off the label–what a time (and fingernail) saver!
I hope you enjoyed today’s class. There will be no final exam on the material. Your homework is to practice what you’ve learned and share these hacks with other label maker owners.
Now, go forth and share your new-found knowledge. Class dismissed!
This blog post is the third in a series of posts designed to teach you how to meal plan during times of crisis and in your everyday life (post-coronavirus). If there was ever a time to consider practicing the Art of Organized Meal Planning–it’s now.
Do you have a mantra?
A mantra is a statement or slogan that is repeated frequently. It’s often a positive phrase used to motivate, encourage, and inspire yourself or others to achieve a particular goal.
You may have a personal mantra for meditating, feeling empowered, or for living your life. You may even have mantra or two to help you get through this pandemic we’re currently living through.
But, do you have a mantra for meal planning?
I’ve been ‘head chef’ of my household for almost twenty years. That’s twenty years of breakfast, lunch, dinner, snacks, holiday meals, brunches, and the occasional barbecue. Since going on lockdown in mid-March due to the coronavirus pandemic, I’ve done an inordinate amount of meal planning and cooking. Three meals a day plus snacks for my family of four has kept me (and our dishwasher) very busy. I’ve mostly stuck to ‘crowd-pleaser’ meals and familiar foods to help make this time in our lives dare I say–more palatable.
The more time I spend in my kitchen, the more I find myself repeating a few food-related sayings. I say these phrases so often, they’ve become my meal planning mantras. I sometimes even hear my husband and kids repeating them!
BTW…While I was composing this blog post in WordPress, my 10 year old son walked into the room. He looked at my desktop screen and the image quotes below and asked me what a mantra was. After I told him, he looked at me and said, “Mommy you say ALL of these–a lot!”
Here are my top three favorite meal planning mantras for crisis time or any time:
MANTRA #1: Cook Once. Eat Twice!

Many of us are spending more time than usual eating at home. That’s a lot of meals–especially if you are feeding a family day after day, week after week (and now month after month).
I have been saying Mantra #1 for years. It brings me great joy to cook once and eat twice. It’s a major time saver to not have to prepare each component for each meal every day! The ‘cook once and eat twice’ philosophy requires thought and meal planning but not a lot of extra prep time.
A few ways to ‘cook once and eat twice’ during crisis time or any time:
• Cook enough of a protein at one time for two different meals. For example, cook enough chop meat to be used for tacos one night and bolognese sauce a few days later. Make roasted chicken for dinner and shred the leftover chicken for chicken tortilla soup to be eaten over the weekend.
• Cook enough for two complete meals. Take out those large pots you use at holiday time and double your recipes!
• Use a crockpot. A crockpot makes a ton of food. And you can ‘set it and forget it’ while you’re spending your time working, cleaning your home, keeping your kids occupied, and of course–meal planning.
Think about it: What foods would you like to ‘cook once and eat twice’ this week?
MANTRA #2: Keep it Simple with Kit Meals

If you’ve been a fan of the Food Network for over two decades like I have, you’ve watched a whole lotta cooking shows. One show from 2005 that inspired the above mantra is called ‘Cooking Thin with Kathleen Daelemans.’ It wasn’t just an in-studio how-to show demonstrating low-calorie recipes. Chef Kathleen helped ordinary people with food challenges and taught them about meal planning, goal setting, and gave them tips on cooking lighter. One tip I recall and use in my home is the basis for Meal Planning Mantra #2.
Chef Kathleen often spoke about how keeping a pantry filled with healthy foods would support a healthier way of eating. She would pull items off the shelf that worked together to create a healthy meal and referred to them as ‘kit meals.’ I started using that phrase more often after I had children. Having to come up with fairly healthy dinners without using much brain power (sleep deprivation will do that to ya) led me to create ‘kit meals’ for my family. A box of fish sticks with a box of mac and cheese and a steam-in-bag of mixed vegetables was a ‘kit meal.’ A package of chicken cutlets, one lemon, a bag of Trader Joe’s kale and a box of Near East Toasted Almond rice was a ‘kit meal.’ As long as I had all of the components to the kit meal and a way to keep on top of my pantry inventory, I could feed my family simply and easily. Thanks, Chef Kathleen!
Think about it: What kind of ‘kit meals’ could you make for your family?
MANTRA #3: The ‘L’ in Lunch Stands for Leftovers
Of the three meal planning mantras, I think this one is my favorite. It’s also the most recent one I’ve come up with. If I’m not running errands after working with a client, I come straight home and eat lunch. So as not to waste food, I try to make sure I eat leftovers at lunch time.
At the moment, I am not working with clients in their homes. I am in my own home eating lunch with my family every day and going food shopping as infrequently as possible. In an attempt to make sure none of our food went to waste, I created Mantra #3. It’s actually a take-off of a mantra I’ve chanted to my children over the past few years:
“The ‘M’ in “Mommy’ Does Not Stand for MAID!”
It’s a great title for a children’s book. I’ll keep that in mind when I’m not so busy meal planning…
To prevent food waste, I have been managing the leftovers in our home for the past few months #likeaboss. During the early days of lockdown, I would stand in front of the refrigerator and tell my family that if there were leftovers in the fridge, they had to be eaten for lunch. That’s when I would say (OK–yell) “The ‘L’ in Lunch Stands for Leftovers.” I think if my family put a dollar in a jar every time I repeated this mantra over the past few months, we’d have enough money to pay off our mortgage. It has gotten to a point where my husband and kids won’t think about making something for lunch without looking for leftovers first!
When planning your meals, consider cooking enough to have extra servings for leftovers. Even if there’s one portion of food left from dinner, that’s one meal someone can eat for lunch.
Leftovers: Plan for them. Eat them. Don’t forget about them!
Think about it: What leftovers can you eat for lunch tomorrow?
Tell me! What are some of your favorite meal planning mantras?

I have been thinking about blogging about meal planning for a while. With the coronavirus pandemic currently a part of our everyday lives, there isn’t a better time to talk about it.
I’ve been a Professional Organizer for eighteen years. I’m also the ‘head chef’ in my family. One of the most vital organizing systems I’ve created in my home is the meal planning I do for my family.
Why do I meal plan?
I grew up with my mom planning our meals–I witnessed the benefits of planning ahead. As a single woman (an elementary school teacher living on a tight budget) I shopped, packed my own lunches, and planned dinners according to the needs of my schedule. Now, as a wife and mom, good nutrition, multiple family food allergies, and a busy lifestyle make meal planning a necessity to stay on top of our food needs.
Why is it important to meal plan?
We eat every day. Multiple times a day. To live. There’s no getting around that…
Anything we do multiple times a day, every day should have some kind of automation so we don’t have to constantly be thinking about it.
Meal Planning is a multi-step system and organizing strategy designed to take the every-day-multiple-times-a-day thought process of ‘what-are-we-going-to-eat?’ out of your head and put it onto paper or your favorite digital tool.
You want to avoid organizing your sock drawer–OK. I’ll give that to you. But, please–don’t avoid meal planning. Especially now.
Why is its important to meal plan NOW?
In the time of coronavirus, food shopping is considered an essential trip outside of your home. For safety reasons, we’re supposed to stay out of public spaces as much as possible. This is not the time to be running to the grocery store for a forgotten ingredient or because you can’t think of what to cook for dinner.
Meal planning is a time management strategy but now, it is also a safety measure that will ensure you spend as little time as possible food shopping in public. You’ll also know exactly what recipes you’ll be making, what foods you’ll be eating, and when you’ll be eating them–one less thing to think about every day when we have so many other recent lifestyle changes to juggle.
*If you currently do most or all of your food shopping online due to age, illness or personal choice, it’s even more important to take the time to create a meal plan for you and your family.
If you’re a beginner to meal planning (or any other organizing) I advise you to start small, start easy, and start where you are. I want you to have the tools necessary for meal planning–not only for the sake of good nutrition, saving money and time, but also to keep you safe.
What are the benefits to meal planning?
Besides promoting healthier eating, meal planning saves you time, money, and stress.
Time
With meal planning, there’s no need to take time out of your day to run to the market, find a parking spot, grab a few items, stand on line, come home and eat later than you wanted to. Meal planning will put hours back into your life!
Money
With a meal planning system in place, there’s no need to pull out a menu and order last minute takeout–often more expensive than a home-cooked meal. Fewer trips to the store means fewer opportunities for impulse shopping which can add up to hundreds of dollars a year. With many people out of work at this time, meal planning is a necessary part of tightening up a budget.
Stress
This coronavirus pandemic is causing us to feel more stressed than usual. Our brains are working on overdrive. With that being said–we HAVE to eat. But, we don’t have to keep all that food-knowledge in our head. Meal planning takes the every day decision-making out of your brain.
“Your mind is meant for having ideas, not for holding them” says David Allen (the founder of the Getting Things Done work-life management system). Bluntly said, (by me)–your brain is not a storage device! We already have enough swirling around up there–we shouldn’t keep any more information up there than we need to!
Are you ready to learn how to meal plan? Great! Follow the steps to help you get organized for meal planning…
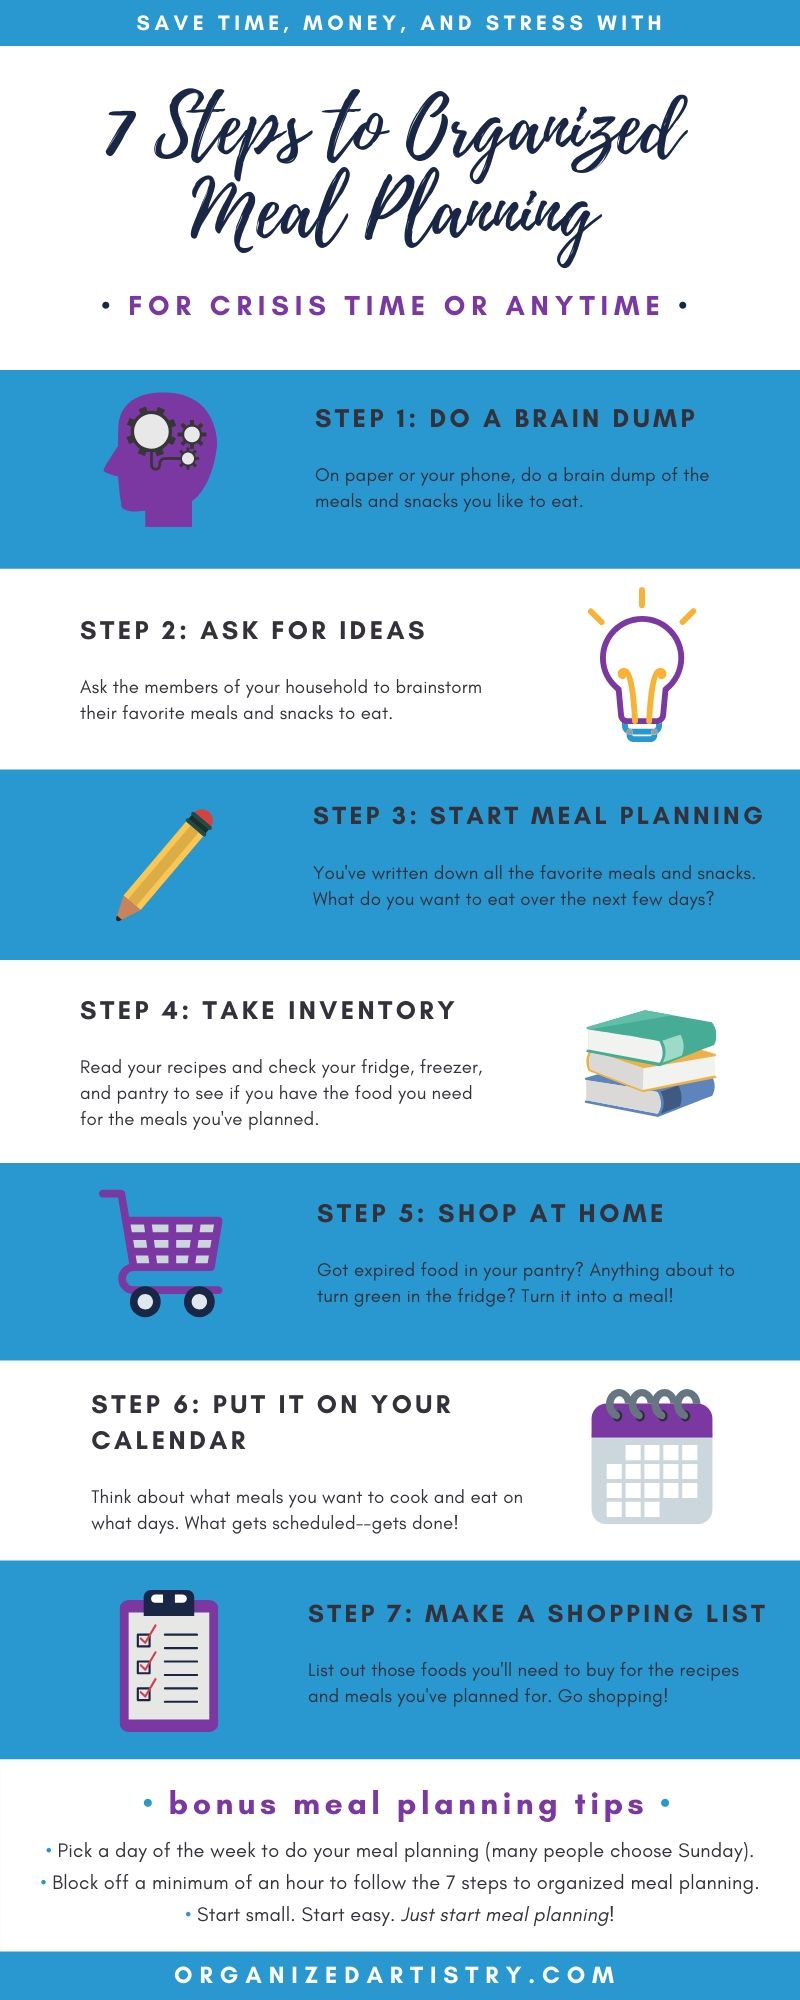
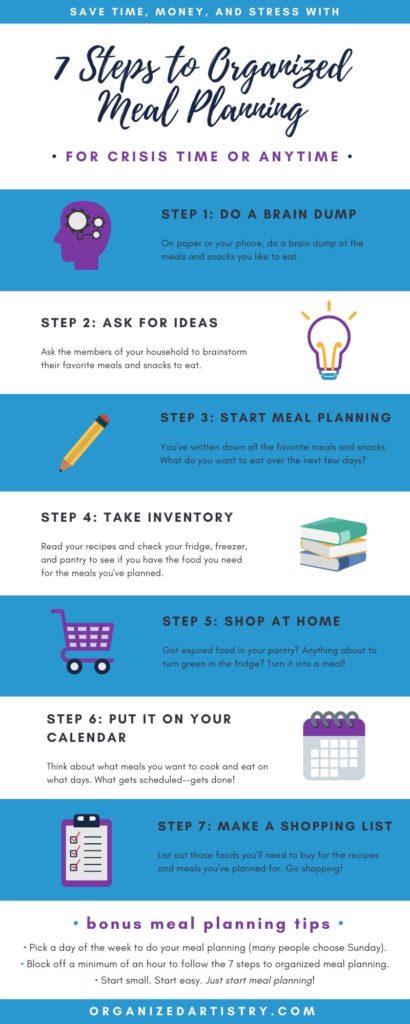
My Seven Step System for Meal Planning:
Step 1: Do a Brain Dump
Take four separate pieces of paper. Write the word ‘breakfast’ one one, ‘lunch’ on the next piece, ‘dinner’ on the third and ‘snacks’ at the top of the fourth piece of paper.
Take a few minutes to do a ‘brain dump’ of what meals/snacks you like to eat and write them on the appropriate papers.
Ex:
breakfast = almond butter on a bagel, blueberry pancakes and syrup, cereal with milk and fruit
lunch = chicken nuggets and french fries, turkey sandwiches and chips, cheese sticks with crackers and baby carrots
dinner = chicken cutlets/steam-in-bag veggies/rice, spaghetti and meatballs
snacks = dried apricots, Oreo cookies, pretzel rods
Step 2: Ask for Ideas
Gather the members of your household and ask them to brainstorm their favorite meals in each of the categories and add them to the appropriate lists.
Everyone eats? Everyone gets a say!
*In the time of coronavirus–remember to also list out meals you may be cooking for/delivering to family and friends. You’ll need to add those ingredients to your shopping list, too.
Step 3: Start Meal Planning
Now that you’ve written down meals that everyone likes to eat, it’s time to start meal planning!
Two things to consider:
-what recipes you want to make
-how many days you want to plan for–two? Five? A whole week?
It’s now time to take out a new piece of paper (to plan out your meals) and consult those four pieces of paper from Step 1 and Step 2 for ideas on what meals to plan for.
As an example, let’s create a one-day sample meal plan using the meals from above:
MONDAY
breakfast: cereal with milk and fruit
lunch: turkey sandwiches and chips
dinner: spaghetti and meatballs
snack: pretzels
Next, make a list of foods in each meal:
breakfast = Cheerios, almond milk, raisins, banana
lunch = sliced turkey, rye bread, lettuce, mustard, Baked Lays
dinner = box of spaghetti/sauce/chop meat for meatballs/garlic & butter/Italian bread/salad items (lettuce, cucumber, etc.)
snacks = Rold Gold pretzel rods
Whether it’s one day or a whole week, do the above exercise for each day you are planning meals for.
*It’s important during this coronavirus crisis that you be in the supermarket as infrequently as possible for everyone’s safety. Please try your hand at planning out a few of your meals. If you’re not used to doing much cooking or meal planning, start off planning for 1-2 days and slowly work your way up to a week’s worth of meals. Don’t stress about this–start where you are.
Step 4: Take Inventory
After listing out all the food items you’ll need for the meals you’re planning to make, it’s time to take inventory and see if you already have the ingredients for those meals. Take the list from Step 3 and a pen and carry it to your fridge, freezer, and pantry area(s). If you already have the item at home, circle it on your list–no need to buy it (unless you want to stock up on more while at the store). Any items not circled will be added later to your Shopping List.
*If you’re using a specific recipe, take time to review it to determine what ingredients you’ll need.
Step 5: Shop at Home
You don’t always have to start from scratch. Meal planning can also start at home. It’s a time, money, and stress saver to meal plan with…
-items that are about to turn green and fuzzy in your fridge
-items that have been in your freezer long enough to have a few ice crystals on them
-items in your pantry that are about to expire
-items on sale at the supermarket
Maybe you have mushrooms that have 1-2 days left in them. Plan to make mushroom omelettes for lunch or chop the mushrooms into the sauce to go over spaghetti and meatballs. Or, maybe on page 3 of your supermarket’s sale circular, you see that chicken cutlets are on sale. Consider buying enough to make chicken based meals once a week for a month.
Add these ‘shop at home’ and ‘supermarket sale’ options to your meal plan for the next few days. This is not the time to let food go to waste!
Step 6: Put it on your Calendar
There’s a famous time management quote that says, “What gets scheduled–gets done.” Let’s combine that with David Allen’s quote from above about how your brain is not a storage room. Take your meal planning ideas out of your head and put them on your calendar!
What day do you want to make that spaghetti and meatball dinner? What day next week do you have a 4pm Zoom call?
Take out your calendar and organize those meals you just spent time planning for.
Some things to consider…
-Do you want to eat meat and vegetarian meals on alternating days?
-Do you want to create ‘theme nights’ such as Meatless Monday and Taco Tuesday?
-Which days do you want to cook? Which days would you prefer to support a local restaurant with a take-out meal?
-Do you think you’ll have enough food for a ‘leftovers night?’
All good questions to ask yourself while scanning your calendar and meal planning for the days of the week ahead of you.
*In the future (after the coronavirus pandemic is over) your schedule may include days/nights where you’re working late, your son has to be at baseball practice, or your daughter has a dance class. Check your calendar for those events and plan to make on-the-go and quick-prep meals (or takeout) on those days.
Step 7: Make Your Shopping List
You’re ready to make your shopping list! Grab a long piece of paper or your phone (whichever you prefer) and start listing out the foods you’ll be needing to purchase for your pre-determined amount of meals.
Here are two ways to do this:
-List out your foods by category (an easy place to start–especially for beginners)
-List out your foods by supermarket aisle (for advanced meal planers and/or those who are familiar with the aisles of the stores they shop in).
Listing foods on your shopping list by category can look like this:
Ex: spaghetti and meatball dinner from above (with a box of spaghetti already in your pantry)
Shopping List
Cans/Jars/Boxes: spaghetti sauce
Bread: Italian bread
Meat: 1.5 – 2 lb package of 85/15 ground beef
Spices: oregano
Dairy: butter
Produce: lettuce, cucumber, fresh garlic
Listing foods on your shopping list by supermarket aisle can resemble this (using my local ShopRite as an example):
Ex: spaghetti and meatball dinner from above (with a box of spaghetti already in your pantry)
Shopping List
lettuce, cucumber, fresh garlic (my store opens into the produce section)
oregano
spaghetti sauce
1.5 – 2 lb. package of 85/15 ground beef
Italian bread
butter (dairy is the last aisle in my store)
This infographic spells out the basics…
Congratulations! You’re a meal planner! The more often you do it, the easier it will become–I promise! And over time, you will notice your meal planning efforts saving you time, money, and stress–now in crisis time and anytime.
Be safe. Be healthy. Be a meal planner!
What meals will you plan this week? I’d love to hear about them in the comments section below…
OK–you finally finished your Spring Cleaning. You spent days sorting and purging through your belongings. You threw a few things out and even repaired one or two items. But, what will you do with everything else you uncovered and discovered? If you’re willing to invest some time and energy, why not have a garage sale?
Garage sales are a great way to get rid of things you no longer want, need, or cherish. But, is it as easy as just dumping your stuff on the lawn and waiting for customers to drive by? Not if you want to make any money, it isn’t. Besides having decent-quality merchandise, the key to a successful garage sale is being organized.
Here are 3 steps for making your garage sale organized for happy customers and optimal sales:
Step 1: Pre-Sale Organizing
• Select a weekend for your sale and make no other commitments on those days. You WILL be exhausted. Ask friends and neighbors if they would like to join you. It is a perk to be able to split advertising costs and have someone watch over your area while you’re grabbing a snack or running to the bathroom.
• Have you ever been to a garage sale where the items had no prices on them? One way of making ‘Garage Sale Day‘ organized is to create a pricing system. This makes the selling easy for you and the buying easy for your customers. Purchase colored, circle-shaped labels and designate each color to be a different dollar amount, for example blue = $.50. Use white circle labels to write an amount such as $5.00. Make signs that describe your pricing system and post them around the area of your garage sale so you don’t have a constant stream of customers asking you about prices.
Or, try these pre-printed labels. See the color-coded pricing chart I created for my last garage sale here.
Select one area of your home to be the staging area for pricing items and one area (most often the garage or an underutilized room) for storage of the items once they’ve been tagged. This last space will enable you to see exactly what you have and allow you to group ‘like-with-like’ such as toys, books, kitchenware, etc.
• Start saving grocery bags as well as heavy-duty shopping bags. Your customers will appreciate your preparedness and it will be easier for them to carry their new-found treasures off your property.
• Some of these new-found treasures will be breakable. Start saving newspaper, old wrapping paper, and bubble wrap. These packing materials will help your customers get their breakable purchases home in one piece.
• Borrow and gather folding tables, card tables, crates, workbenches, and other horizontal surfaces for displaying items.
• Check with your town regarding permits for having a garage sale.
• Advertise, make signs and post them on nearby streets facing oncoming traffic.
Step 2: During-the-Sale Organizing
• Post your pricing system signs around the area of your garage sale.
• Wear clothes with pockets. Pockets come in handy for holding some of your garage sale supplies such as pens, markers, and extra price stickers.
• I know they’re not so fashionable but wear a fanny pack! Your money will be close to your body without spilling out of your pockets. Wear a pack with two compartments–one for bills and one for coins.
• Know exactly how much money you started the day with so you’ll be able to calculate exactly what you earned.
• Set up your belongings outside by category–all toys together in one spot, all office supplies together in another area. Group ‘like’ items to the best of your ability. If a customer is looking for baby toys and they’re all in one place, it is very likely that they’ll buy more since everything they’re looking for will be right in front of them.
• Have at least one other person working with you. It is difficult to sell merchandise, wrap breakables and field questions by yourself. Take turns helping customers, straightening up merchandise, and taking breaks.
Step 3: Post-Sale Organizing
• Bring everything that was not sold into the garage or another room to make final decisions on whether or not to keep unsold items.
• Throw out anything that became damaged or broken as a result of being in the garage sale.
• Donate the ‘leftovers’ to a charity of your choice.
• Clean your lawn/driveway of any debris from the garage sale.
• Count your money and determine your profit. $$$
• Create a list of all supplies used for the garage sale and keep it on your phone or in a paper file labeled ‘Garage Sale.’ Order in dinner and put your feet up. Now you’re ready for your next garage sale–job well done!
What the best thing you ever bought at a garage sale? I’d love to hear about it!
Do you get a truckload of charities and non-profits sending you requests for donations? They can really pile up–especially at holiday time!
This scenario may sound familiar…
You write a check to a charity. A few months later another donation request from the same charity lands in your mailbox. You don’t remember whether you’ve donated to them or not so you do one of two things:
• you send them more money
• you toss the envelope on your desk and now it’s clutter
Today’s Organizing Quick Tip will help you keep track of all of those donation requests…
Create a home for
‘donation request’ envelopes.
Follow these steps to keep those donation requests under control…
• Get a small box–approximately the size of a shoe box. An example:
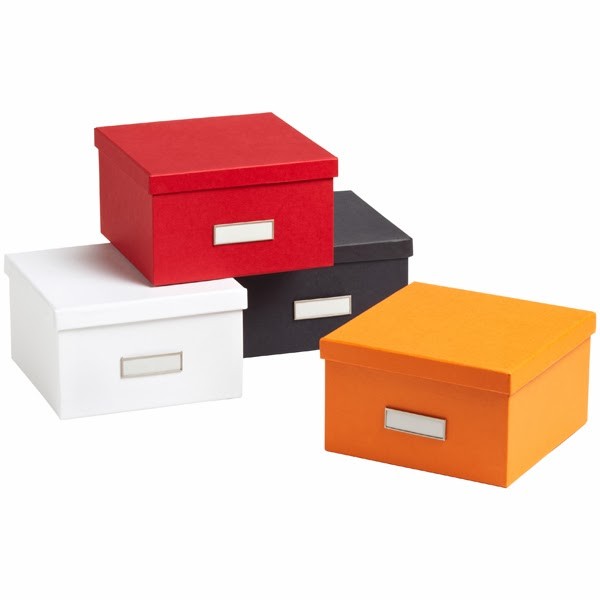 |
| Stockholm Photo Box from The Container Store |
• Place the box in an area close to where the mail enters the house. When a donation envelope comes in the mail, place it in that box.
• Go through the box every three months to sort and purge for duplicates. I guarantee–you WILL have duplicates!
• After Thanksgiving, sort and purge the the donation envelopes one last time and decide which organization(s) you’ll donate to. Spread the piles across your dining room table or sofa if you need a lot of room.
• Make your donations in December–once a year (if possible). That way you’ll have no problem remembering when you sent your charitable donations. This eliminates the need to look back at a year’s worth of checkbook and credit card statements to see when and who you donated to.
• If you don’t already have one, create a ‘tax file’ for papers you’ll need to collect for tax purposes.
• Place receipts for your charitable donations in the tax file.
• Empty your ‘donation request’ box and start over.
I recently set up this system for a client and she said it has made her life so much easier in these ways:
• It organized all of her donation requests in one spot.
• It allowed her to notice when she had multiple envelopes from the same charity/non-profit.
• By doing her donations once a year, she no longer has to try and remember or look back in a check book register or credit card statement to see if she already made a donation.
This Donation Request System (DRS) will save you time, money, stamps, and brain power. Give it a try–let me know in the comments below how it works for you!
Want to stay current and connected to Organized Artistry? Follow us on Facebook, Pinterest, YouTube, LinkedIn, Instagram, and Goodreads!

In 2000, my husband and I got married and merged two households. Between all the stuff we came with and the beautiful wedding gifts we had received, our home was overflowing with three of this, four of that and too much of a whole lotta stuff. So, we decided to sort through what we owned, purge out what we didn’t need and have a garage sale.
I wish I had pictures to show you but our driveway and lawn were filled with our belongings. People thought we were downsizing and moving! I overheard one woman on her cell phone yelling to a friend, “You gotta come over here–there’s so much great stuff!”
Two days and almost $1000 later, we had done a good job of clearing space in our home. We used the funds to buy a patio set which we still own. At the end of day two, I turned to my husband and said “I never want to have enough stuff in our home to do a garage sale again…”
It’s now 2013. We’ve had two children and our house was feeling full. My husband swore our attic floor would soon buckle and bins of stuff would crash to the floor below. In the Spring we began, Operation ‘Get It Out of the House.’ Big ticket items like our crib and two exersaucers found new homes. Bags upon bags of baby clothing found their way to three different expectant mothers. My husband says he could hear the attic exhale for the first time in years.
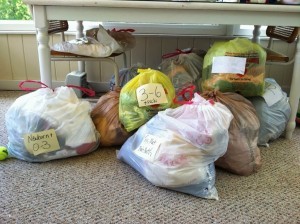 |
| Multiply this times three and that’s how many bags of 0-12m baby clothing I gave away! |
I kept purging–kiddie toys to the preschool, old pillows to the trash and then it happened…My neighbor tells me our town is having it’s first town-wide garage sale.
I pass the great news about the town-wide garage sale on to my husband. He’s as excited as I am.
I continue purging. I started to collect boxes and plastic bags, and began pricing. I even dug up the Word file for the garage sale sign I had created in 2000 (Hubby says that didn’t surprise him one bit…).
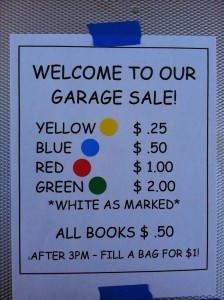 |
| My cousin Dale gave me the ‘Fill a bag for $1’ idea. Brilliant! |
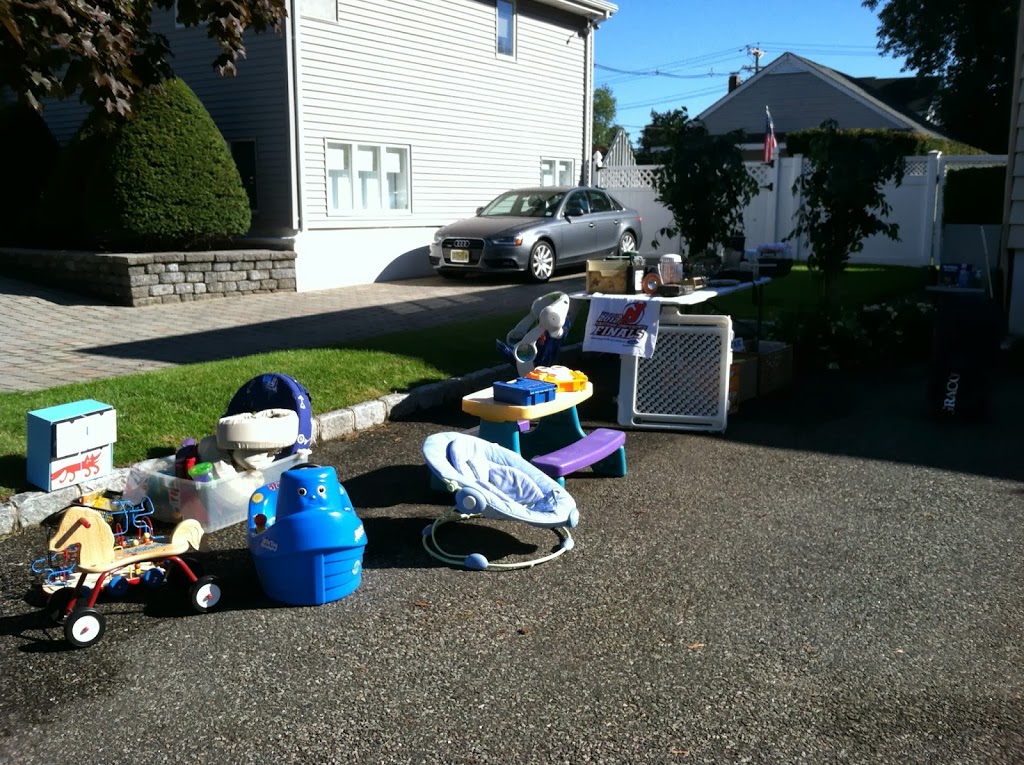
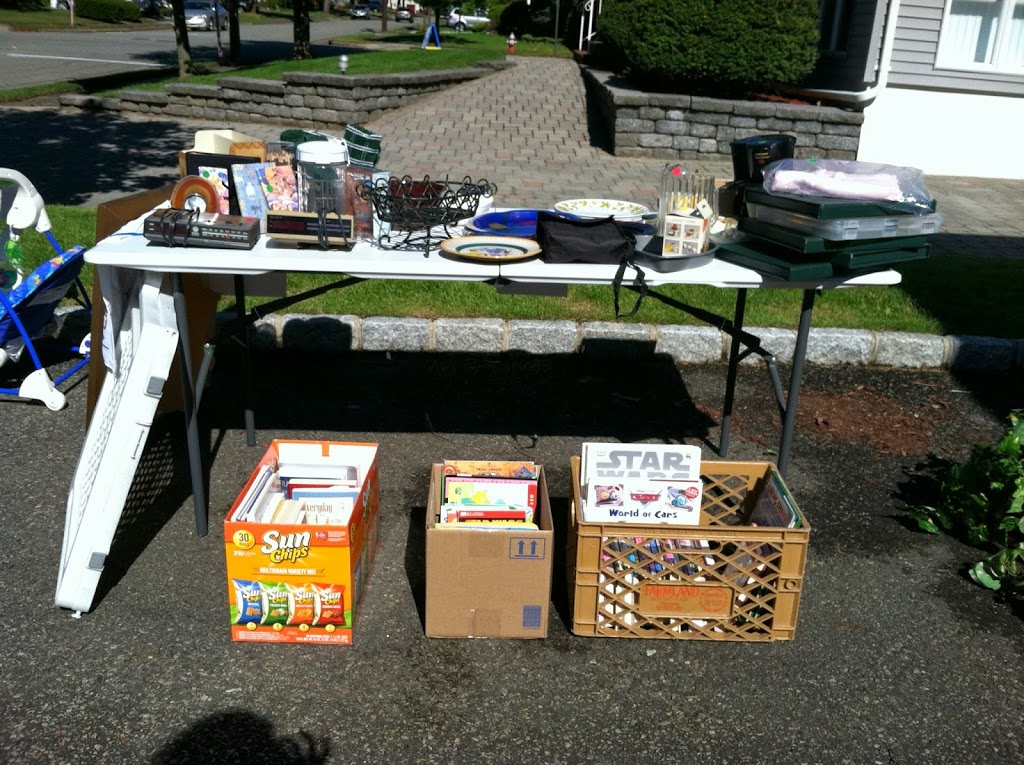
After pricing, I sorted our items by category–Baby, Kid Toys, Housewares, Books, etc. counting down the days when I could finally reclaim my garage space again.
We had about a tenth of the stuff we put out in 2000. Our friend gave us some of her things to put in the garage sale so she could purge her house, too. We had two beautiful sunny days and although foot traffic was light, enough customers made purchases to say it was successful.
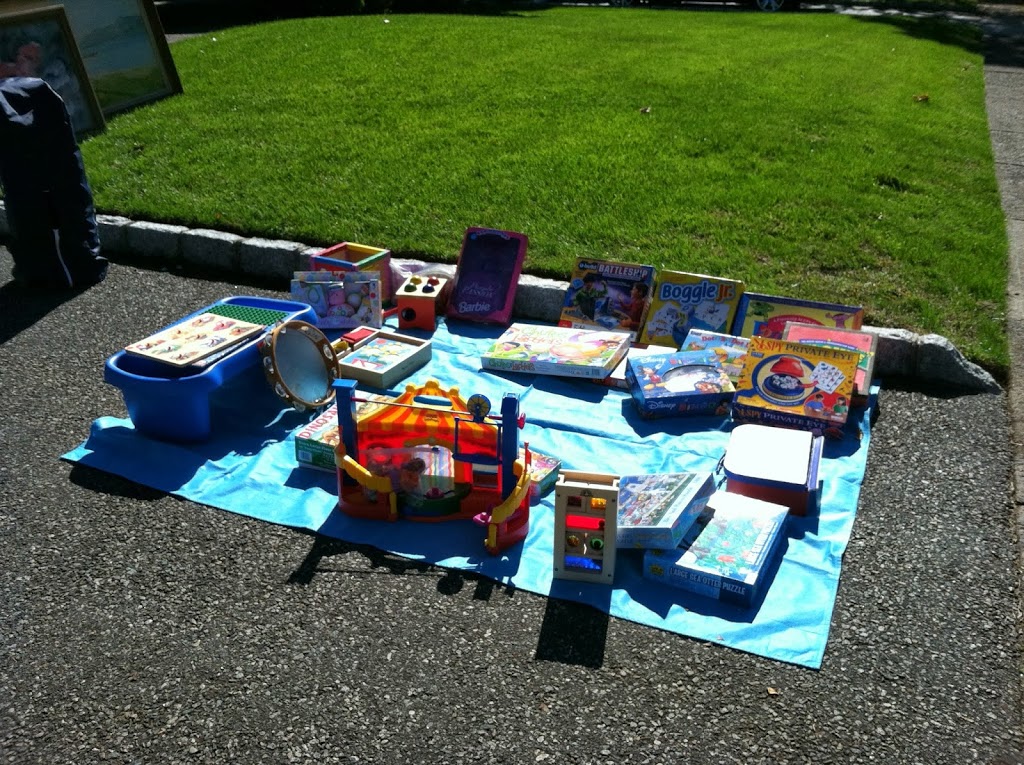
My neighbors across the street set up a few tables and my nine year old neighbor decided to try his hand at selling some toys he and his brother didn’t play with anymore. I advised him to lay them out on towels grouping ‘like’ with ‘like’–dinosaurs with other dinos and all vehicles together, too. He sold a few items (including one of the bikes in the background) but at least half of them went to my son’s preschool or to my own kids!
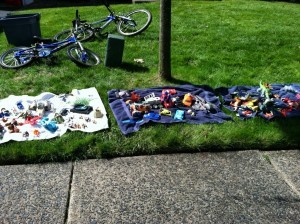 |
| The wares of a budding entrepreneur… |
A few shoppers commented on how organized my labeled pricing system was. I smiled and said, ‘Thanks.’ Oh, if they only knew…
Two days later, we made less than a tenth of the money we had made in the 2000 garage sale but that’s OK. We weren’t doing it for the money–we were getting rid of the ‘old’ to make room for the ‘new.’
Some funny/unexpected things that happened:
• My neighbors bought some of my stuff!
• A shopper thought a painting marked $3.00 was actually $300. We all had a good chuckle…
• A grandma about six inches shorter than me bought and then picked up a Little Tikes picnic table and walked back to her house with it.
• I sold a NJ Devils giveaway towel to my seven year old for $ .25. I thought it would be a good math lesson…
 |
| He said, “Mommy, I can’t believe you were going to sell this!” |
Some great things that happened:
• I had fun hanging out with my neighbors and celebrating our selling successes.
• My kids acquired some cool toys and baseball mitts from our neighbors across the street.
• I got to read two magazines during selling ‘downtime.’ Any mom of small kids know that this is quite a feat!
• We made a little extra spending money.
• We purged our home of things we no longer needed.
At the end of the town-wide garage sale, I packed up all unsold goods and split them into three categories. Give to Preschool, Give to Thrift Shop, Bring Back in the Garage. The ‘Give to Thrift Shop’ bags and boxes went from my driveway to my car to a local donation center. My ‘Preschool’ items are enjoying a new home in my son’s classroom and the one (!) bin marked ‘Bring Back in the Garage’ is being dealt with this week.
So, if your town is declaring a town-wide garage sale soon, or you’re looking to make some room in your home and some money for your wallet, it’s time to plan ahead! Click here or click the image below for my *free* download: 5 Tips for a Successful Garage Sale.

OK–Who is ready to have a garage sale?
It’s 2012. You’ve made a resolution to get organized in the new year. That’s great!
But, I’m getting the feeling there’s something bothering you…
What’s wrong? Low on cash after the holidays? Got a pink slip for Christmas?
OK–I get it. You don’t have a lot of money to put into the organizing project (or projects) you’d like to tackle this year.
Not a problem. Organizing doesn’t have to cost you a lot. In fact, getting organized SAVES you money long-term. Getting there doesn’t require a whole wad of cash.
You need time, elbow grease and some free and low-cost products to help you achieve your organizing goals. There’s no need to max out the credit cards when you’re organizing on a budget.
For inexpensive (or FREE) ideas on how to declutter your space or create places of order in your home and life, read my article, Organizing on a Budget. In the article, I talk about products and resources for getting organized on a budget. Here’s an example…
Some of the best organizing products are FREE!
Boxes
Boxes from the liquor store, shoe store, jewelry store or from your bank shouldn’t cost you anything and most of the time, they’re happy to hand them over to you. So when you buy jewelry, ask for a box and when your checks come in the mail, don’t throw out the box they came in. **It is best to not use boxes that might have had contact with any type of food product.
• Use boxes from liquor store as temporary file holders and for storage of infrequently used items.
• Use shoe boxes as deep drawer dividers (Ex. to separate different colored socks, scarves, etc.) or to hold shoes.
• Use check boxes (from your bank) or jewelry boxes from a department store as drawer dividers in anything from a desk drawer to a junk drawer.
For more ideas and ways to keep costs down while getting organized, take a look at Organizing on a Budget. Even if you use just one of my tips, it will bring you one step closer to your organizing goal and keep your financial status ‘in the black.’