Archive for the ‘
Labelmaker ’ Category
“I’m overwhelmed!”
“All this clutter is too much for me to handle!”
“I have no idea where to start!”
As a Professional Organizer in business almost nineteen years (!) I have heard the above declarations more times than I can count. I’ve recently coined a phrase I offer to my clients when they feel like it’s all too much:
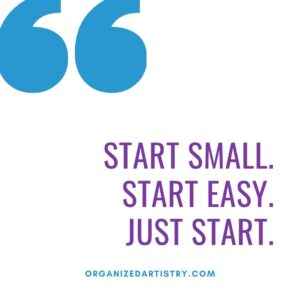 Starting ‘small’ is the solution to dealing with clutter. De-cluttering a whole room is overwhelming. Starting small by focusing on one teeny-tiny part of that room is more manageable.
Starting ‘easy’ helps us to build our de-cluttering ‘muscles.’ ‘Easy’ items are usually ones with little-to-no sentimental or monetary value. The decision making process takes barely any brain power when we start with the ‘easy’ stuff. Once we’ve trained our decision-making muscles on the easy items, we’re better equipped to make the tougher decisions later on.
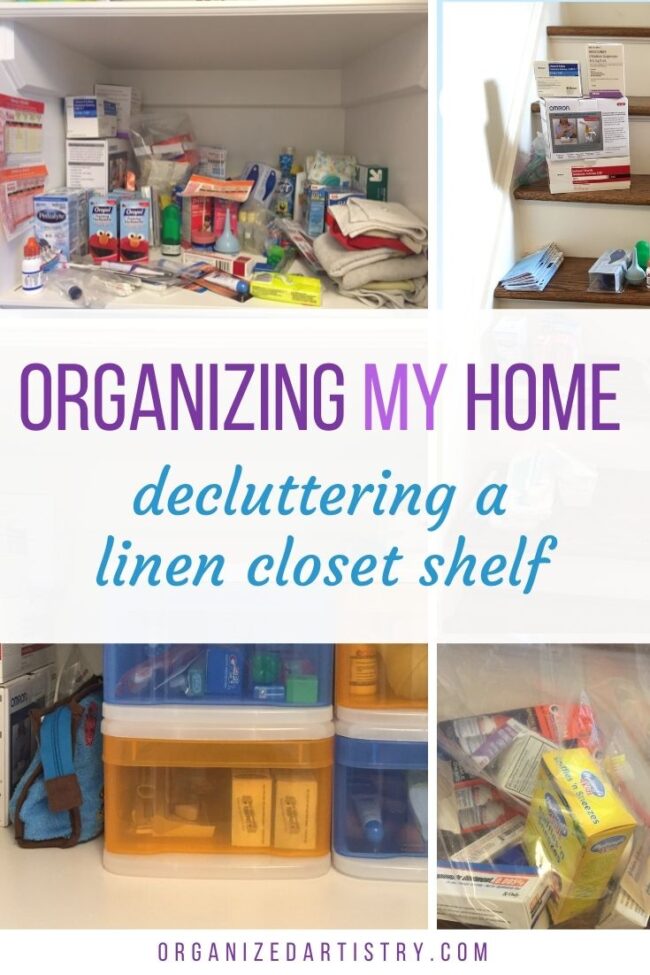
Are you familiar with the phrase, ‘The shoemaker’s son has no shoes?’ Well, sometimes I’m so focused on organizing spaces for others that I don’t focus on organizing my own! Case in point–my kid’s linen closet. OK, really it was one shelf in the linen closet…
I have two kids and they share a linen closet where I store their sheets, towels, extra blankets, and any medicine/first aid items they may need or require. When I only had one child, the shelves in this linen closet weren’t as full. Now that there are two of them, there’s A LOT more stuff.
The sheets, towels, and blanket shelves were under control but what was not was the shelf I had dedicated to my kid’s medicine and first aid items. For the first few years, I had a couple of tubes, bottles, and boxes of things that I could find easily. Then after kid number two arrived, the shelf started filling up. I could still find what I was looking for but I would sometimes accidentally knock things over and cause an unwanted ‘domino effect’ resulting in a disorganized mess.
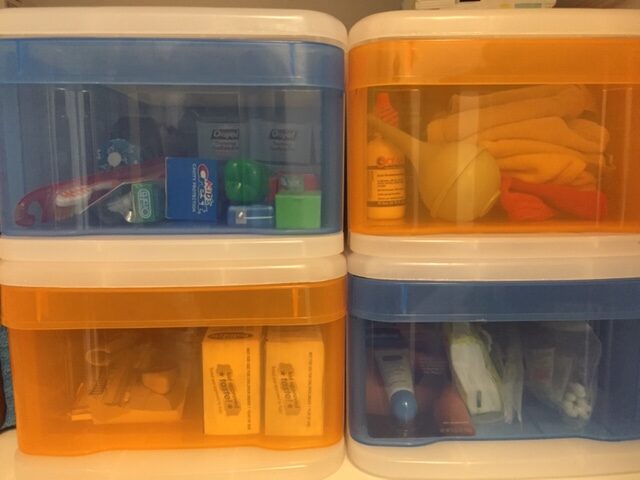
Full disclosure–this is what it looked like:
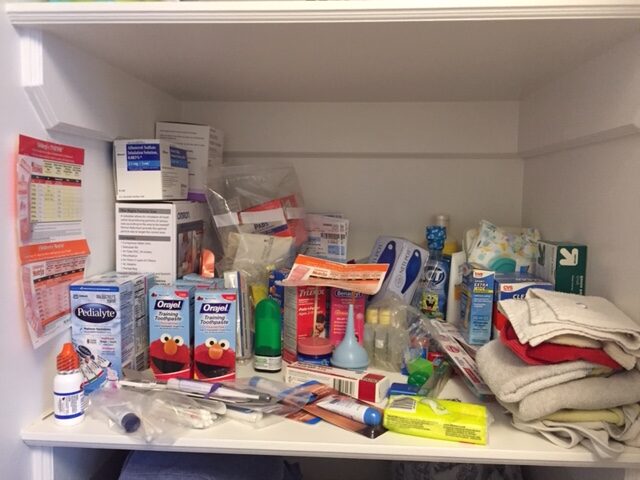
Forget about the fact that it looked cluttered when I opened the door to this closet. Visually, it was unappealing (and appalling!) to me. I needed to block off time in my calendar to organize this spot. I knew decluttering a linen closet shelf wouldn’t take me long–I just had to create a plan and stick to it.
It was time to take my own advice to start small, start easy–just start. And get the job done…
I followed the 5 steps to getting any space in the home organized–created by Professional Organizer Julie Morgenstern in her book, Organizing from the Inside Out. This is the 5 step method I use with my clients when organizing any space in their homes. It works every time!
Step 1: The Sort
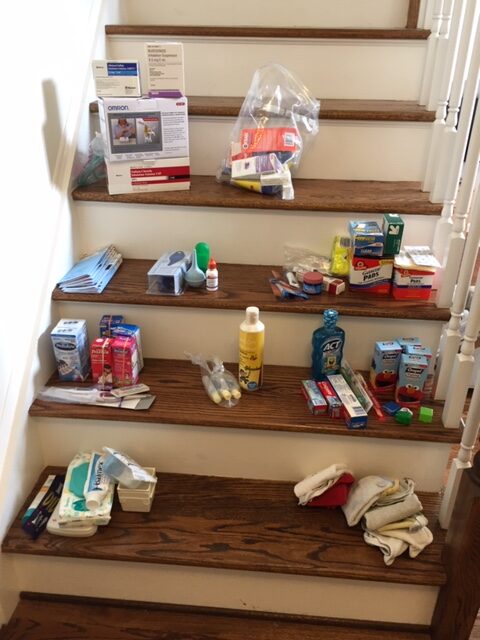
I took all items off the shelf and placed them on a nearby staircase. I sorted them by type and for the most part found that they fell into four categories: First Aid, Medicine, Nose, and Teeth. I also created a category of ‘Expired’ and ‘No Longer Used.’ to be dealt with during the next step.
Step 2: The Purge
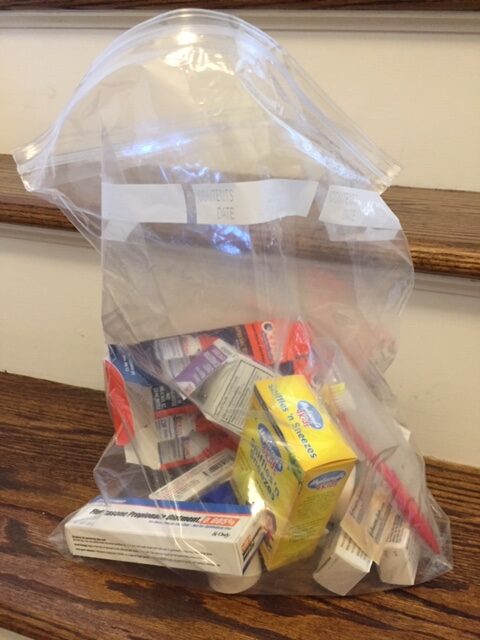
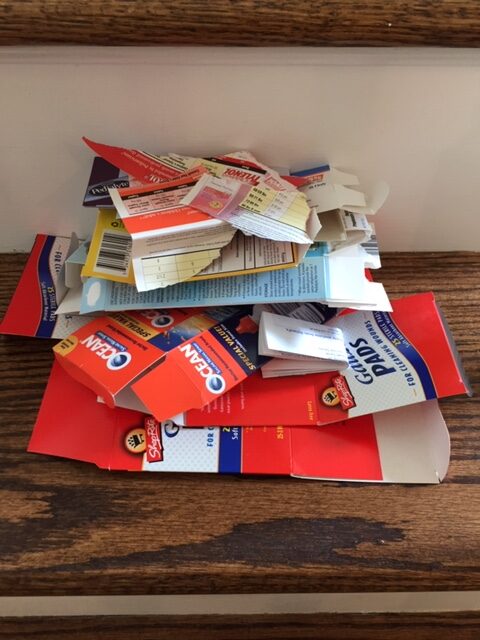
Once I sorted all the items, it was easy to see what could be purged. Expired medicine was dealt with in an ecologically-friendly manner and boxes were flattened and added to our recycle bin. Papers were filed, garbage was collected and added to our household trash. I was left with only the things my kids presently use or would need in the future.
Step 3: Assign a Home
This step asks the question, ‘Where are the post-purge items all going to live?’ I knew they were going to live on this shelf in the linen closet so this step was pretty easy to breeze through. After the purge, I placed each grouping of the remaining items back onto the shelf by category until I could complete Step 4.
Step 4: Containerize
I was certain I wanted to use some kind of drawer system to store the medical/first aid items. Quick and easy access to meds and first aid supplies is key when your child is wheezing, sneezing, or bleeding! I measured the height, width, and depth of the shelf and took to the internet to locate a product that would work.
A brief search led me to the Small Tint Stackable Storage Drawers from The Container Store. They were colorful and just the right size to fit two-stacked one on top of another on the linen closet shelf. Lucky for me, I live in driving distance of their location in Paramus, NJ so I hopped in my car and set out to get one step closer to completing my small and easy organizing project. I chose blue and orange because my boys like the NY Knicks and tolerate the Mets because their dad is a life-long fan.
I brought the drawers home, filled each drawer by category, and placed them on the shelf. Organizing success!
Step 5: Equalize
(also known as Maintain)
This is the step that comes after the organizing is done and systems are in place. Every so often, depending upon the how often you use the items, it is necessary to do what’s called ‘maintenance.’
In this case, every few weeks, I peek in the drawers and take inventory on meds, flossers, band-aids, and lip balm. I straighten up other items on the shelf such as shampoo bottles and hand sanitizer and make room for anything new that my kids have started using (deodorant–yikes!). Decluttering a linen closet shelf or any space in your home won’t take long if you keep up with maintaining it!
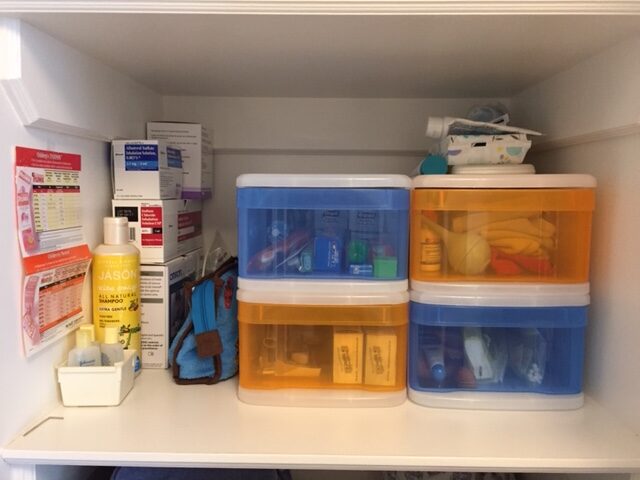
You may notice that I did not add any labels to the outside of the bins. I tossed the idea around but since the drawers are translucent, it’s fairly easy to see their contents without opening the drawer. As my kids become more independent and access the items on their own, I may choose to add labels. But, for now I like how seamless and colorful it looks when I open the linen closet door.
Not every organizing project has to be on a grand scale for it to make a positive impact on your life. Some are as small as a drawer, a shelf, or a corner of your desk. Even organizing your wallet, your car’s glove compartment, or a bucket full of batteries can save you time, money, and space. Regardless of the size of the project, block off time on your calendar, follow the five steps, and start. Start small. Start easy. Just start.
What small and easy organizing project will you start this week?

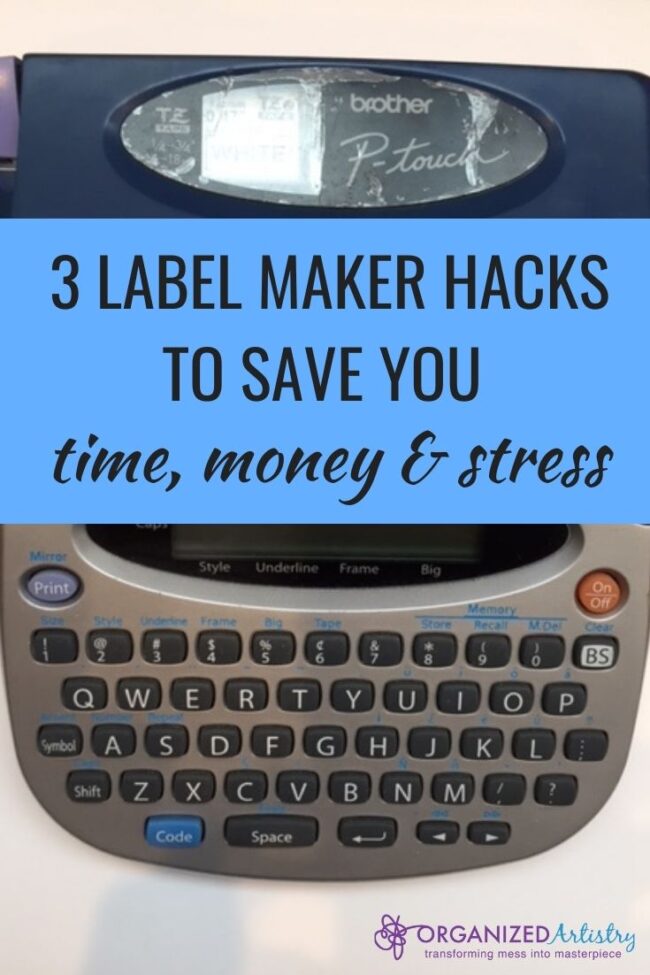
Good morning, class! Welcome to Label Maker Hacks 101. I’m Professor Murray and in today’s lesson we’re going to be discovering 3 label maker hacks to save you time, money, and stress.
Please take out your label maker, place it on the desk in front of you, and make sure the batteries are working. We’ll start off with some fingertip exercises, a quick review of the QWERTY keyboard, and then move on to today’s lesson.
If you have walked into my lecture hall by mistake but wish to stay and learn, please refer to my blog post: 5 Reasons Why You Should Own a Label Maker. It is required reading for the Label Maker Hacks 101 course…
No need to take any notes–I have all the label maker hack details outlined for you below. Let the learning begin!
Todays Lesson: 3 Label Maker Hacks to Save You Time, Money, and Stress
Hack #1: How to Save Tape
If you do not own a label maker you may not be aware of the fact that although a new label maker often comes with one ‘starter’ tape cartridge, in order to print more labels, you must purchase more tape cartridges. They can be purchased individually, in 4-packs, and in bulk.
When printing a label, the label maker leaves the first approximately half to three-quarters of an inch of tape blank and then starts printing the word(s) or phrase. After it has been printed, the label maker leaves another half to three-quarters of an inch blank on the right side of the word/phrase.
That’s A LOT of WASTED label tape. Wasted label tape = wasted money
For those who own label makers, you know how quickly a tape cartridge can run out of tape–usually in the middle of typing a long phrase or when you need to it to print out quickly (not that I have any experience with either of those…ahem…).
I’ve been using my label maker on the job and in my home for close to twenty years and in that time, I’ve discovered a way to save label maker tape. This works especially well when needing to print many related labels such as for folders in a file cabinet or for kid’s school supplies.
Here’s how you do it:
1-Think about your needs. What are you labeling? Spice jars? File folders? Pantry shelves?
2-On paper or on your phone, write the words or phrases you wish to create labels for.
3-Type those words/phrases into your label maker. As you type, press the space bar 5-6 times between each word/phrase. This will create a small blank space between each word/phrase.
4-Press the ‘Print’ button and watch your label maker miraculously give birth to one long label with all of your words/phrases on it.
5-Use the built-in cutting tool to separate the label from the label maker.
6-Use a scissor to cut in between each word/phrase.
Look how much label maker tape you’ve saved!
This label maker hack will eliminate a bulk of the wasted tape on both ends, saving you inches of tape and piles of money.
Hack #2: Keep Your Font Sizes and Styles on Display
Every label maker is different but most offer the user multiple font styles and font sizes to choose from.
Depending upon how old or new your label maker is determines how many font styles and font size options it has. I own a nineteen year old label maker so I only have 5 font sizes and 9 styles. Newer models have upwards of 14 fonts and 10 font styles.
When creating labels for a project, I like to be able to offer my clients some size and style options. Sometimes the nature of the project dictates what size and style font to use. Attic bins need the largest font while small objects require the use of the smallest font. But, sometimes we’re able to use any size and style–that’s when I ask my client to consider their choices.
In order to show my clients their style and size choices without printing all of them out on the spot (and repeatedly using an excessive amount of label tape), I devised a system that would save me precious time and precious label maker tape.
Here’s what I did–I advise you to do the same:
1-Select a short word (I chose cat because it’s short and hey, I like cats…)
2-Print out one label of that word for each size and style your label maker can create.
3-Stick the labels to the back of your label maker or on a large index card for easy reference. Keep the index card in the same place where you store your label maker.
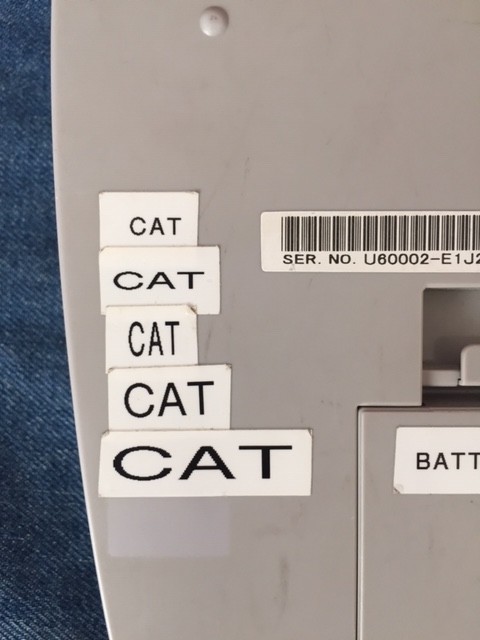
Taking time to set this up takes the work of remembering all the font styles and sizes out of your brain and onto the back of your label maker or on an index card.
After creating the font display almost two decades ago, I now just turn my label maker over, show my client the selection and say, “Pick the font you want!” Happy clients!
Hack #3: Split it Down the Middle
Label maker tape has two parts to it–the label itself and the backing that covers the stickiness.
If you’ve had a label maker for as long as I have, you may remember that label tape was not that easy to work with. When I started using a label maker almost twenty years ago, it was very challenging to get the backing off the label. And frustrating. The backing was about a hairline larger than the actual label. With a keen eye, a few long fingernails, and a lot of practice I was able to remove the backing fairly easily and look like a label maker rock star to my clients.
People must have filed complaints because Brother (the label maker company) eventually changed the backing of the label tape. Hallelujah! Now, the backing of the label splits in two horizontally allowing for MUCH EASIER removal. On the Brother website, it’s called ‘easy-to-use and easy-to-peel-off split-back’ tape.
Less stressed customers = happier customers!
No more struggling to remove the backing of the label. Here’s what to do:
1-Take the label with the words facing away from you and gently bend it in half away from you on the horizontal. You’ll notice a line that will divide the backing in two.
2-Remove both backing strips and apply the label to your surface.
Now you know how to take the backing off the label–what a time (and fingernail) saver!
I hope you enjoyed today’s class. There will be no final exam on the material. Your homework is to practice what you’ve learned and share these hacks with other label maker owners.
Now, go forth and share your new-found knowledge. Class dismissed!
It’s been a while since I’ve written a ‘Cool Product’ blog post–not because there aren’t any cool organizing products in the stores. In fact, there are so many ‘cool products’ I’ve seen, used, and read about lately, I could write a blog post a week for the next year and not cover them all!
Last year, while compiling the list of stocking stuffers for my annual I ‘Heart’ Container Store Stocking Stuffers blog post, I came across one stocking stuffer that was not only creative, colorful, and fun–I thought it would function well for my family. And it does!
I’ve been meaning to write about this product for most of this year. Every time I would use it, I’d say to myself, “I should make this the focus of a ‘Cool Product’ blog post. More people need to know about this!”
No need to hold you in suspense any longer (unless you’ve already guessed what it is by the photo above…)
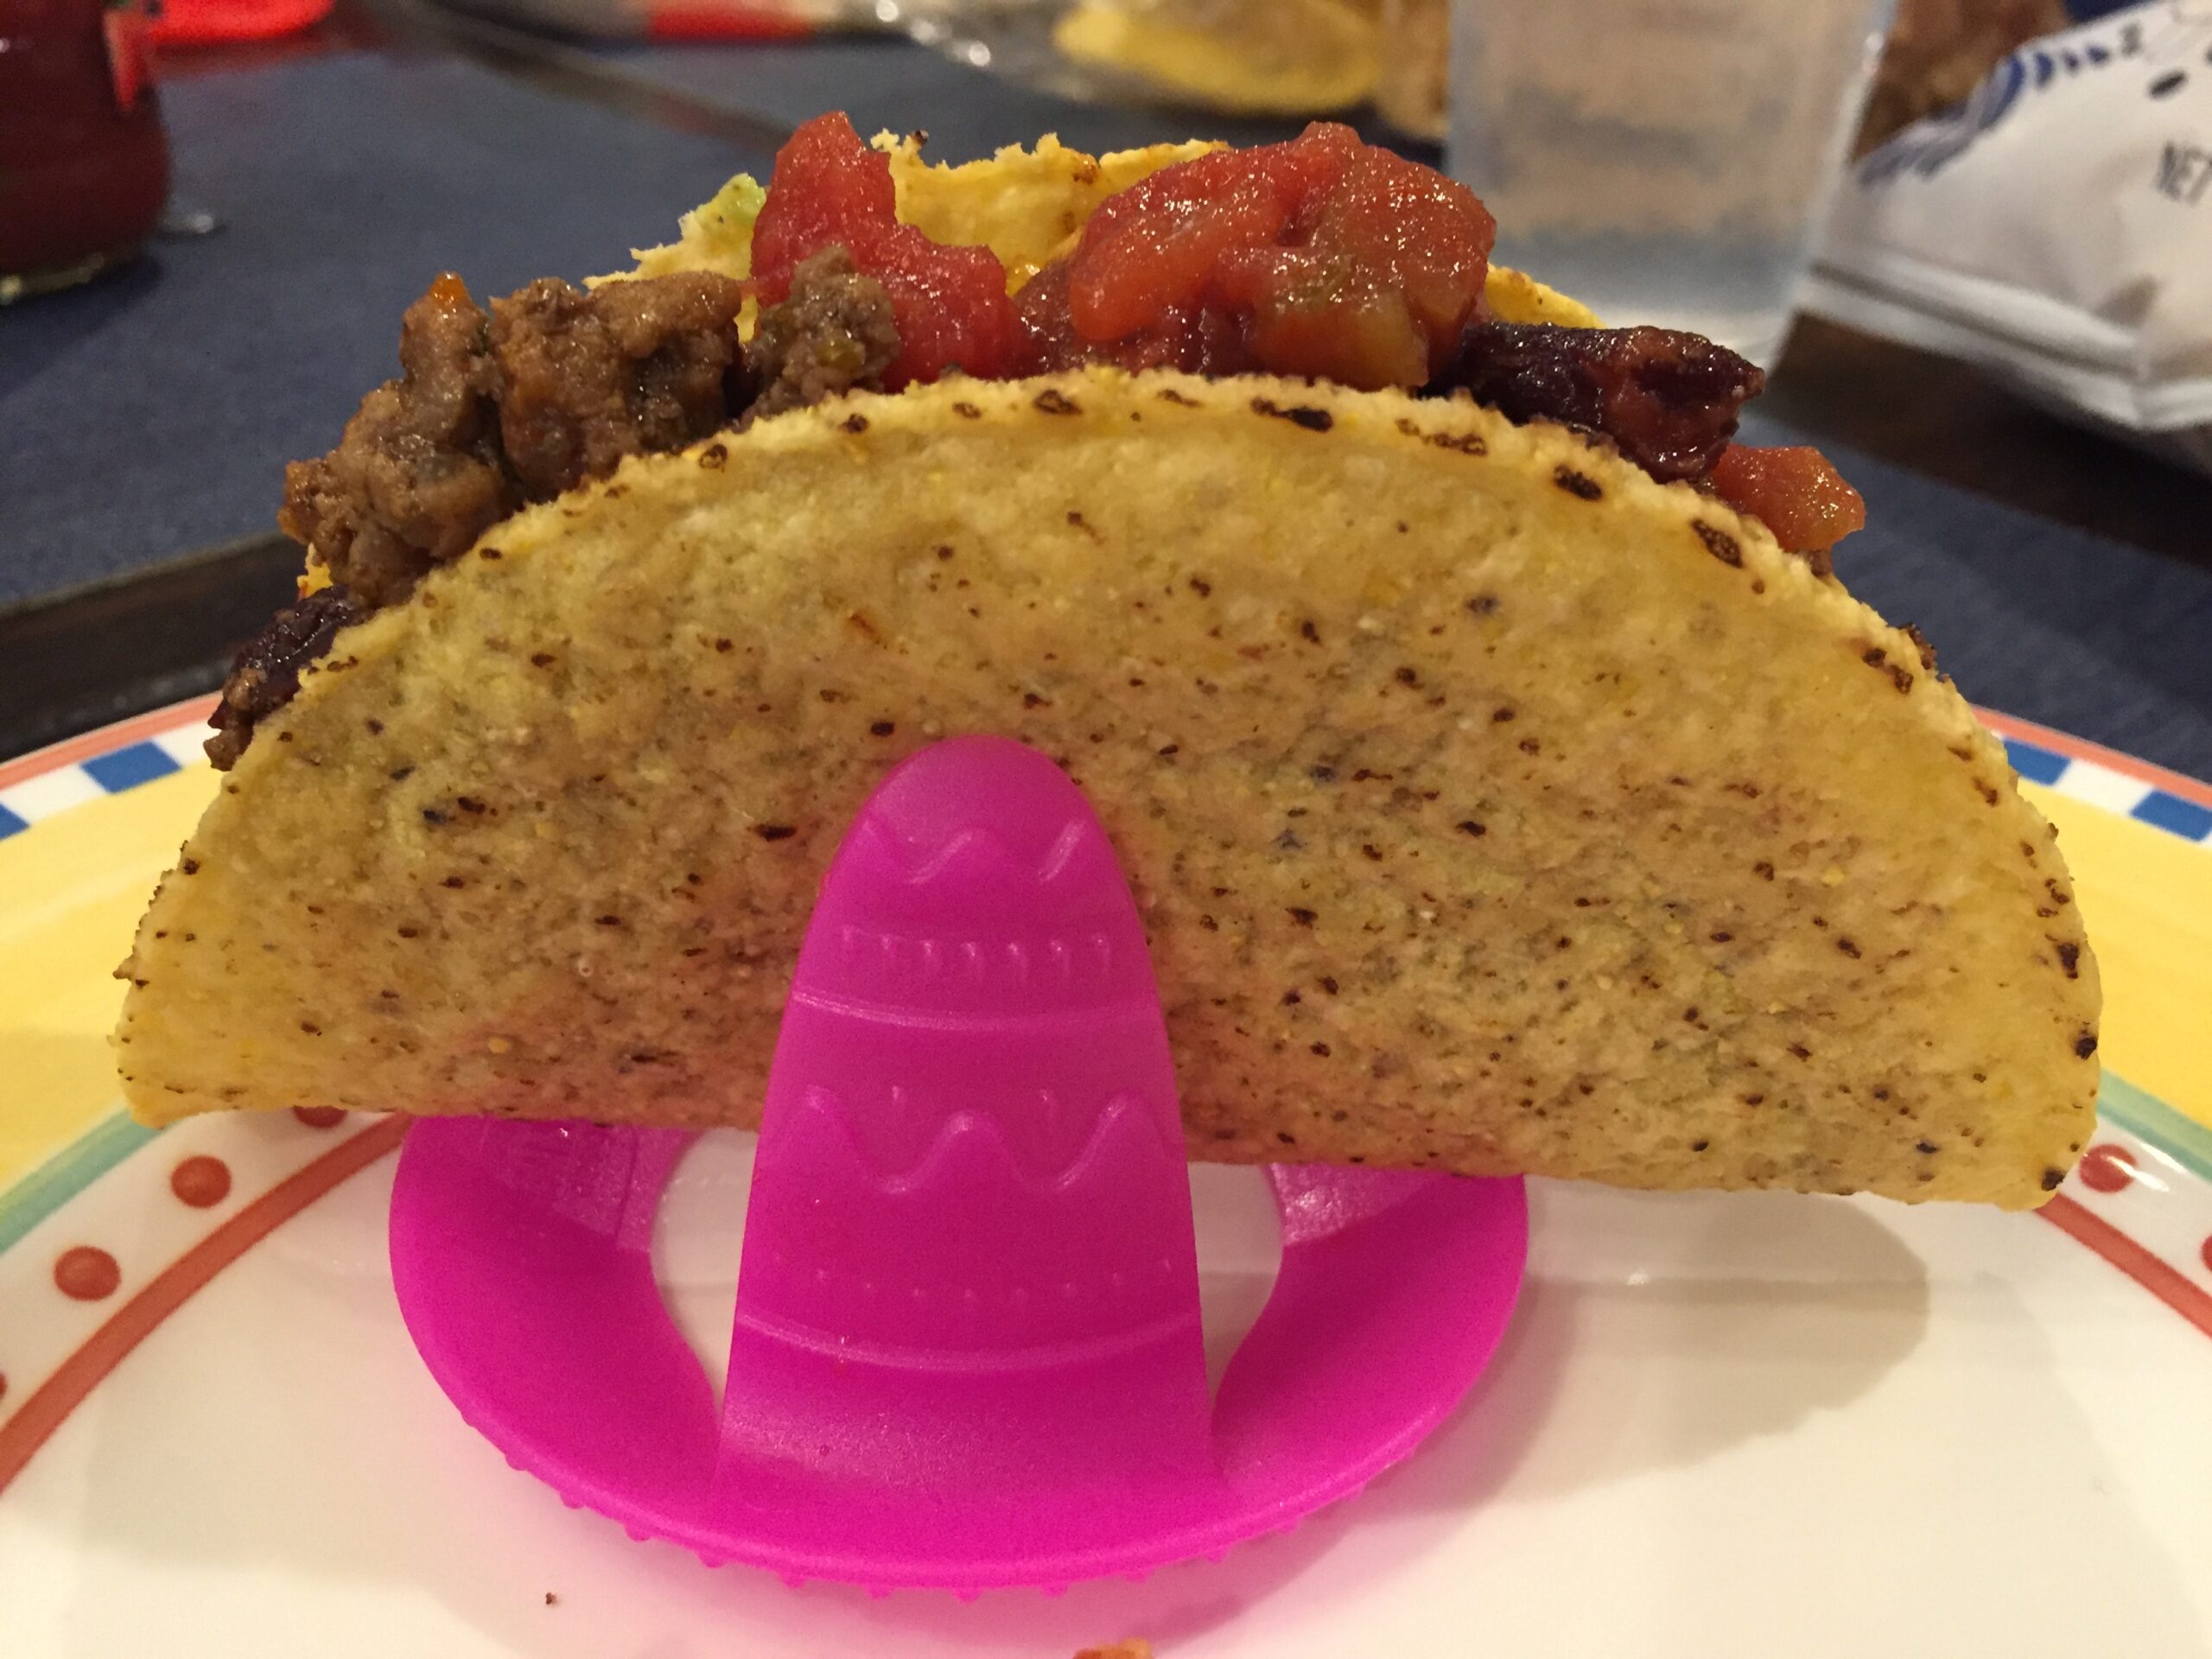
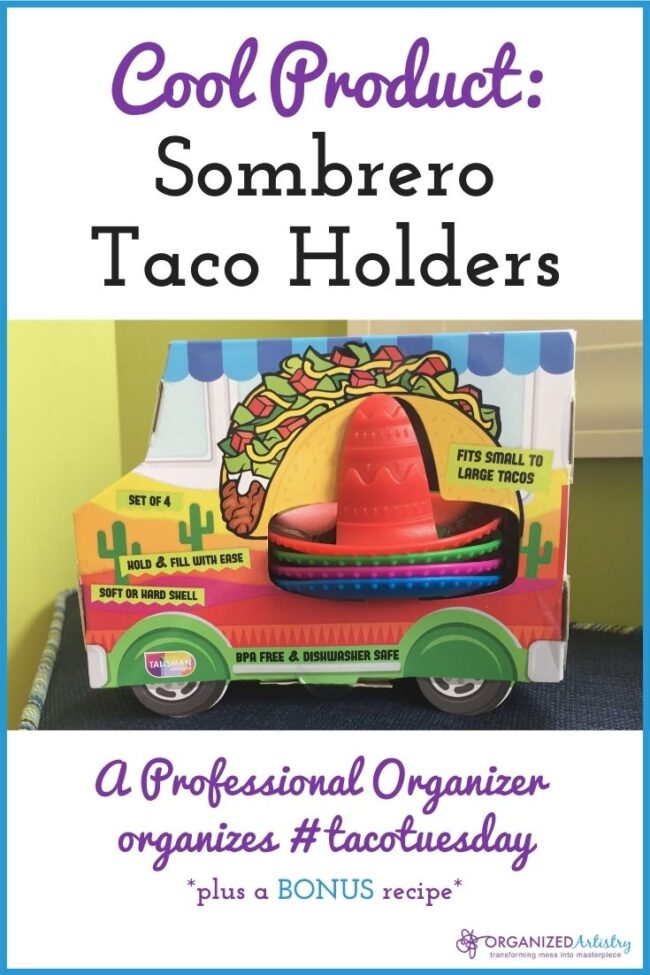
Today’s ‘Cool Product’ is: Sombrero Taco Holders
You may be asking yourself (and me)–what does this product have to do with organizing?
I know it’s a bit of a stretch. It may not revolutionize your life like other organizing products do (I’m lookin’ at you, my lovely label maker…) but yes, plastic sombreros can be an organizing tool. Stick with me and I’ll show you how…
Does your family go gaga for tacos? Mine does.
The excitement of a taco dinner is even more palpable if I make them on a Tuesday: #tacotuesday. And bonus points for me if I can time the ripening of an avocado to go with this meal. Now THAT’s organized meal planning! #mealplanningwin
Let me set the scene of my dining room on a #tacotuesday BEFORE we owned the Sombrero Taco Holders:
-hard taco shells broke easily from being handled
-broken taco shells were then rendered unusable except for dipping in salsa
-children got upset that their taco shells got broken
-children got upset when they put their tacos down to eat some rice or guacamole and the filling would spill out all over their plates
-Mom and Dad got upset because children were upset and #tacotuesday was really messy and not as fun as it was supposed to be.
Yet, everyone still begged for taco night and I still made tacos…
Enter the Sombrero Taco Holders. Four of them to the package, so there’s one for each of us. They come in red, blue, green, and pink. In a house full of boys, guess who gets the pink one?
Here it is holding up the filled taco:
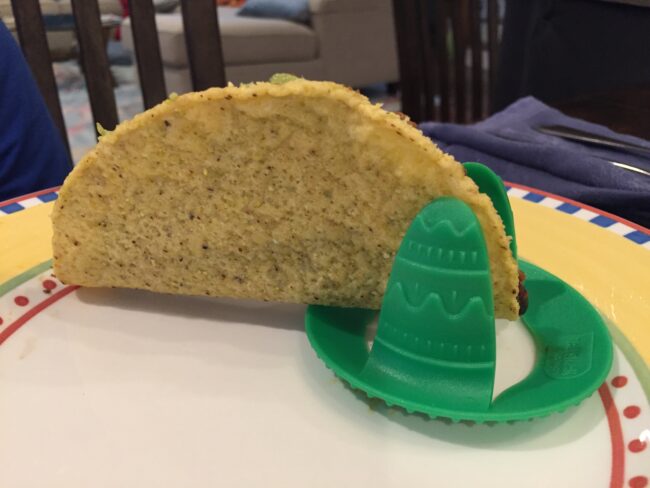
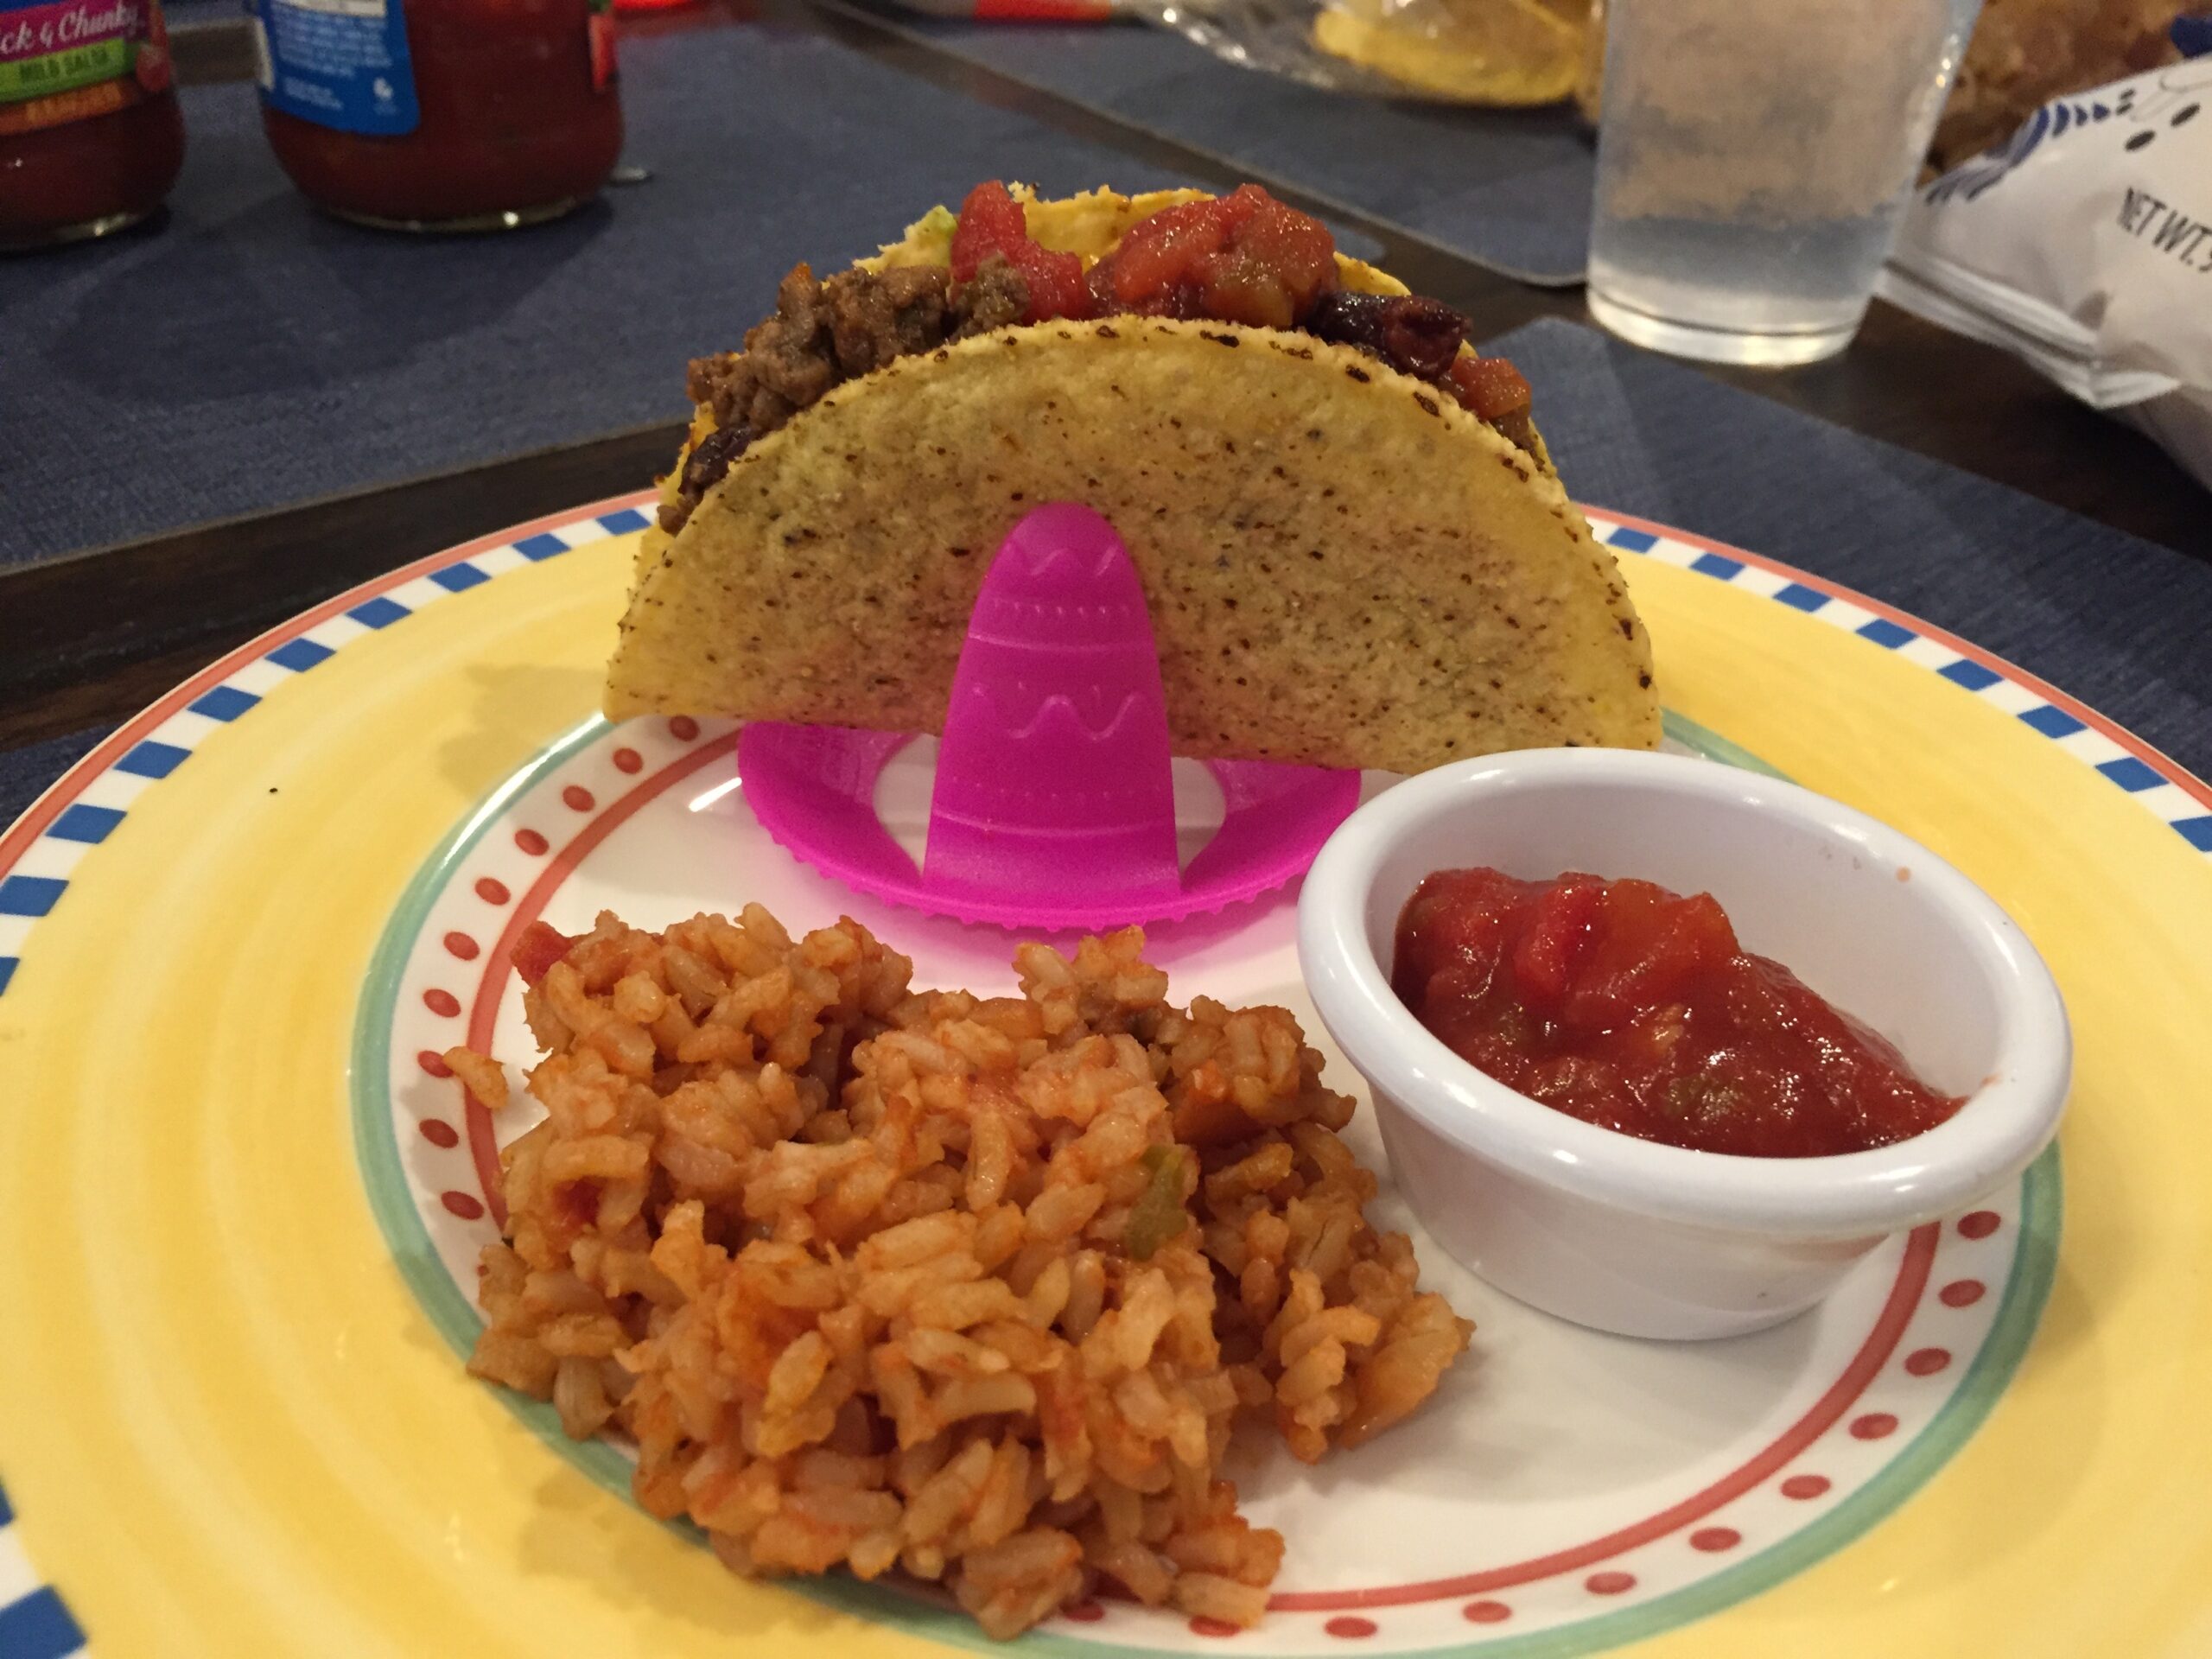
With the taco slid all the way through:

And, with a full plate of Mexican side dishes, too:

Here’s what makes them a ‘cool’ organizing product:
-They utilize vertical space on a plate making room for side dishes.
-They hold up a soft or hard taco shell so you don’t have to. ‘Hands-free’ dining!
-They stack one on top of another to save space in a drawer or cabinet
Now, let me set the scene of my dining room on a #tacotuesday after we started using the Sombrero Taco Holders:
-hard taco shells no longer break easily from being handled
-since there are no more broken taco shells, we now dip Tostitos Scoops in our salsa
-children no longer have broken taco shells
-filling no longer spills out all over children’s plates
-there’s more room on our plates for side dishes
-Less mess and more fun–Mom, Dad, and kids enjoy #tacotuesday
Three cheers for the Sombrero Taco Holder! Chip chip, olé! Chip chip, olé! Chip chip, olé!
If you think these organizing sombreros would be a fun addition to your kitchen but you don’t have a recipe for tacos, I’m more than happy to share mine…
Taco Seasoning Recipe
In the past, I’d use a taco seasoning packet for #tacotuesday. They can be very high in sodium so I set out to test the tastiness of some taco spice blends. I found this recipe over a decade ago on the web and have been using it successfully ever since. I do not recall where I found it so unfortunately, I cannot give credit where credit is due but, whoever that talented taco chef is–thank you!
Give it a try–I think you’ll agree it’s the perfect blend of spices to turn ground beef, ground turkey, or beans into a delicious taco!
TACO SEASONING
1 tsp. salt
1 tsp. chili powder
1/2 tsp. corn starch
1/2 tsp. paprika
1/2 tsp garlic powder
1/2 tsp. cumin
1/4 tsp. oregano
Mix spices together in a small bowl. Add to 1 lb. of cooked meat (or beans or meat/beans mixture) and add 1/2 cup of water to make a light sauce. Mix to coat. Cook for 10-15 minutes covered on medium to medium-low heat. Serve in a taco shell and enjoy!
Are you hungry yet? Pin this post for your next #tacotuesday dinner and share with someone you know who is loco for tacos!
What’s your favorite side dish to eat with tacos? Share one or two in the comments section below–who couldn’t use a few new dinner ideas?

You’ve seen them in the store. All those little buttons. The tape cassettes. The promise of perfectly lined up words and phrases, phrases you will stick on files and bins that will keep you organized for eternity…
You’ve may be hemming and hawing and asking yourself–do I really need one?
Should you buy a label maker?
You don’t need to be a Professional Organizer to own one. I’m here to tell you…
YES! BUY A LABEL MAKER!
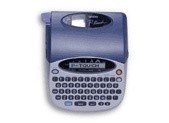
I’ve had my Brother P-Touch for over fifteen years. Like a Timex watch, ‘It takes a licking and keeps on ticking…’ I think I’ve changed the batteries less than five times since I’ve owned it. A doctor uses a stethoscope. A tailor uses a sewing machine. A professional organizer goes nowhere without a label maker.
There are a few different brands of label makers, but I prefer the products made by Brother.
It has been an indispensable tool in my organizer’s work bag. Clients love when I take it out of my bag and place it on their table. I’ve seen small children and animals mystified by the tape that comes out of the side of the machine.
Have I convinced you yet of their wonderfulness and that you need to own one? If you’re still reading this post then I guess you haven’t darted off to the store. OK, here are…
Five Reasons Why You Should Own a Label Maker
1. Label makers make our lives easier . They’re light, portable and those labels help us identify items quickly–saving us time and energy. Label makers are especially helpful to those who have illegible handwriting, too.
2. Label makers make getting organized enjoyable. Label Makers make people happy. Thus, people are happy when they are getting organized, making the process more enjoyable.
3. You can express yourself with label maker tape. Do you know the phrase, “It’s not all black and white?’ Well, neither are the label maker tape cassettes. Most often, I use black text on white tape but there are other options such as black text on clear tape, black text on yellow or black text on red tape.
4. Printed labels make you feel organized. Printed labels are easily identifiable and readable–close-up and from far away. They create order where they may be chaos.
5. You’ll be the envy of all your friends! They’re going to wish their files and bins could look as great and be as organized as yours with that labelmaker in your hand!
Did you make your decision–to buy or not to buy? If you said, ‘BUY!’ you won’t regret this purchase. Check online and in local stores for different models/features and the best price. I bought my label maker in Costco back in 2001–don’t forget to check in those type of stores, too. Buy the tapes in bulk from an office supply store or use a coupon to bring down the price.
Happy Labeling!
SaveSave
SaveSave
If you spend a good amount of your time surfing the web, I’m sure you’ve heard of Pinterest. If not, run–don’t walk to the site that is taking social media by storm.
According to their website, “Pinterest is a tool for collecting and organizing the things you love.”
As a user, I would say that, “Pinterest is a tool for collecting and organizing images of inspiration.”
A little over a year ago, I joined Pinterest–read all about it here: Organized Artistry is on Pinterest!. I’ve been having a great time with it.
On Pinterest, you create and categorize ‘pin boards’ according to your interests. After you create your themed-boards, you load your own visuals or ‘re-pin’ visuals posted by others to your boards. I created boards for my organizing business and some that have to do with the book I’m writing for brides. I thought that would be my only use for Pinterest, but it has much more to offer…
– When the time comes to make some major changes in my home, I’ll not only be flipping through decorating magazines, I’ll also be looking for decorating inspiration on Pinterest.
– I have found recipes to cook for my son who has multiple food allergies.
– There are tons of posts on clothing, makeup and health that I have learned from.
It is very easy to get sucked into the visual wonderland of Pinterest for HOURS at a time. There’s so much to see and learn!
Besides other categories, there must be thousands of ‘Organizing’ pins on Pinterest. So many great ideas to learn from and implement in your life!
Since time is precious, I would like to offer you some of my favorite organizing pins on Pinterest. Some I created myself and some I re-pinned from other boards.
Disclaimer: Although I love Pinterest, I think that there are many visuals on the site (especially the ‘Organizing’ visuals) that promote ‘perfection.’ Items in the photos are neatly lined up, labeled and look as if they are untouched by humans. Being organized is not about being perfect. It’s about being able to find what you need when you need it–plain and simple. I try to not promote or perpetuate the idea of perfection in my boards/pins, with my clients and in my own home.
I’ve seen some creative and mega-cool organizing ideas on Pinterest. Here are a few I think you will enjoy, appreciate and find inspiring…
From my ‘Kitchen Organizing’ Board
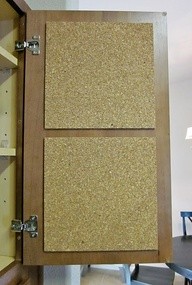
Thought this was a creative idea. Hang cork board squares on the inside of a cabinet to manage and also hide papers such as invitations, receipts and shopping lists.
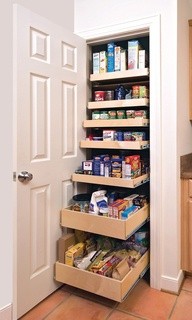
I dream of this in my kitchen. PULL OUT DRAWERS! LOTS of them! Never lose food in the back of your cabinet again.
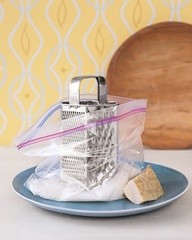
Thought this was a very organized way to grate and store cheese. Also perfect for grating cheese in advance. Store bagged cheese in the refrigerator until you’re ready to use it.
From my ‘Get Ready for Spring Cleaning’ Board
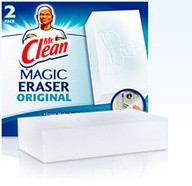
Spring Cleaning or all-year-round cleaning–this is my favorite cleaning product. With two little boys in the house, I use the Magic Eraser A LOT! Most of its use is in my kitchen with white appliances. It ‘erases’ dirt–yes, magically and is the only thing I have found that can cut through the greasy, sticky spots on my stove top.
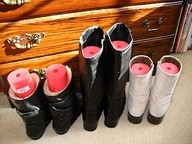
Though this idea was so smart. At the end of the winter, store your boots with cut up pool noodles inside of them. I bought pool noodles at the end of the season last year in Target for less than a dollar. That’s a very inexpensive way to retain the shape of your boots until next winter.
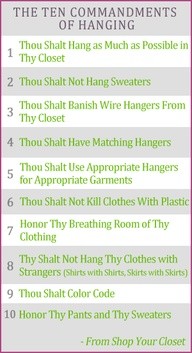
As soon as I saw this ‘pin’ I knew I had to add it to my
Get Ready for Spring Cleaning board. I work with a lot of clients in their closets and have seen many of these commandments broken. My personal favorites are #2 and #3.
From my ‘My Favorite Organizing Products’ Board
You won’t find this organizing product at The Container Store. It’s a productivity app called Evernote. From their website: “Evernote helps you remember, act upon (and share) ideas, projects and experiences across all the computers, phones and tablets you use.” Every time I get an idea or wish to record information about some aspect of my business or personal life, I store it in Evernote for future reference. My desk would have a zillion post-its strewn across it without Evernote.
I know that many people love and swear by ‘huggable hangers.’ I’ll be honest with you–they are not my favorite hanger. I use and recommend crystal hangers. Although they take up more space in a closet, they work well to prevent those ‘shoulder bumpies’ that can ruin a top very easily.
This is my Brother P-Touch label maker. I’ll admit–I love it…maybe even more than the Magic Eraser. It has been quite a workhorse–creating labels for clients and my personal usage for the past ten years. Labels just make things look more organized–don’t you think?
This is only a partial list of my Pinterest boards and pins. To see all of my boards and everything I’ve ‘pinned’, head on over to
Organized Artistry on Pinterest.
Did any ‘pin’ gave you organzing inspiration?
I’m guilty.
Guilty of not being able to keep up with reading my magazines. I’m now down to one subscription and I have a stack that I’m slowly chipping away at. See, even Professional Organizers get behind on tasks!
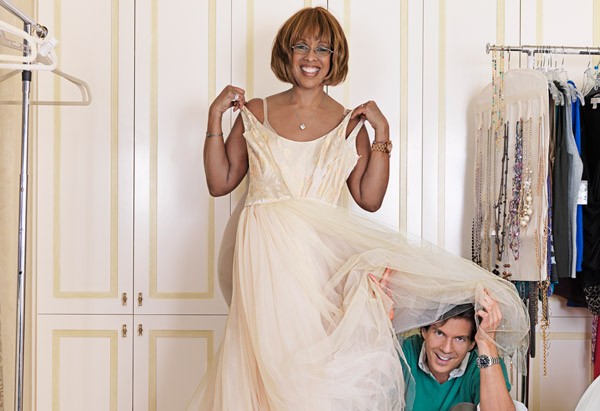
I just finished reading the March 2012 ‘De-clutter Your Life’ issue of O “Oprah’ magazine and really enjoyed reading an article called, “Journey to the Center of Gayle’s Closet.”
In the article, Adam Glassman, O Magazine’s Creative Director along with a small team of helpers assist Gayle King (Oprah’s ‘bestie’) with a closet intervention: sorting, purging and organizing her clothes closet.
It’s a great piece written by the very talented Lisa Kogan. She is so funny, I’d read the phone book if I knew she wrote it…
There’s a section at the bottom of the article showing products to help to organize a closet–that’s where I got the following quote from…
Quote: “What good are boxes and bins if you can’t easily tell what’s in them?” says Adam Glassman.
“People can last a day or two without food and water, but no one can live without a label maker!”
Loved that. Had to share. Who is running out and getting a label maker?

 Starting ‘small’ is the solution to dealing with clutter. De-cluttering a whole room is overwhelming. Starting small by focusing on one teeny-tiny part of that room is more manageable.