Twelve years of blogging! Could that really be true?
It feels like only yesterday when I attended the 2009 NAPO Conference in Orlando and signed up for a workshop called, “Become a Blogging and Podcasting Genius.’ I had no desire to start a podcast but a blog–yup, that was right up my alley.
I’ve always enjoyed expressing myself through the written word. I found writing to be an enjoyable creative outlet–writing about organizing was going to be FUN (and it still is…)!
Who would have thought there would be so much to write about on the topic of organizing?!? It’s twelve years later and I still haven’t run out of ideas. In fact, I keep a list of ideas in a file in one of my favorite productivity apps, Evernote. I’ll be checking my list over the next few weeks to plan out my blog post topics for 2022.
Happy blogiversary to me! As part of my blogiversary celebration, I set goals for my blog for the year ahead and I look back to see if I met the goals I set for myself the previous year. Here’s how I did…
Goals I had set for 2020-2021
Continue to Blog 1x a Month
I got off to a great start! Beginning with October of 2020, I published a blog post consistently every month and lined a guest blogger up for the month of March. Around that time, both of my parents became ill within a few weeks of each other. When a crisis occurs, it’s vital to focus on what’s most important and put non-essential tasks aside until the crisis passes and that’s what I did. They’re doing much better now and I started blogging again over the summer.
I also took time to complete three NAPO Specialist Certificates and a program that certifies me as a Certified Virtual Professional Organizer ( CVPO™ ). The timing was right so I put blogging aside to fulfill the requirements. Now that I’ve completed them all, I can focus more of my time on my blog. I’m looking forward to publishing my annual I ‘Heart’ Container Store Stocking Stuffer post next month!
Consider Using Tailwind
Due to the circumstances of the past year, I barely got to spend any time on Pinterest (insert sad face here). Thus, I didn’t even begin to think about Tailwind. It’s not totally off the table–it’s just not a priority. I’ll keep it on my to-do list and put a reminder in my calendar to learn more about it.
Create Canva Images for Older Posts
Started! I began blogging on the Blogger platform before I even had a WordPress website. WAAAAY back when, blog posts were more about the writing than the photos. Now, I’m starting to add images to some of those ‘vintage’ posts. Years ago, my website designer helped me migrate the old posts over to my new WordPress website. They have good SEO juice–they’re just not pretty enough yet for ‘prime time’ (Pinterest, Instagram, Facebook).
Continue to Tweak Content on Older Blog Posts to Make More Evergreen
Every so often, I’ll scroll through my blog posts to see if they need updating. I’ve made some tweaks along the way to ensure their status as ‘evergreen.’ In fact, the last one I tweaked was a roundup post I curated for Halloween.
Create a Second Blog Post Showcasing ‘Ted Talks’ on the Topic of Organizing
I did not get to write it this year, but I have been curating a list of Ted Talks on the topic of organizing that would work nicely for a second similar blog post. My first blog post titled, 3 Thought-Provoking Ted Talks That Will Inspire You to Get Organized was and still is very popular on Pinterest. It’s on my to-do list to create that second Ted Talk blog post for Winter or Spring of 2022.
Goals I’m setting for 2021-2022
Create a Round-Up Blog Post
I love reading ’round-up’ posts–so many creative and ingenious ideas all in one spot for the reader. I’m considering creating one for my blog in 2022–topic: To Be Decided…
Create Downloadable Printables for My Most Popular Blog Posts
My ‘Ted Talk’ blog post blew up on Pinterest and until a short while ago, it was my most ‘pinned’ post. Then, about nine months ago I started seeing a constant stream of people pinning my ‘Tales of a Town-Wide Garage Sale’ post. It seemed as if half the world wanted to read about my garage sale experience and use my garage sale tips. I get Pinterest notifications on our family iPad and at least a few times a week my son yells out, “Mom! More people pinned your ‘Garage Sale’ post today!”
In an attempt to gather more email addresses for my email list, I thought I’d create a *freebie* downloadable printable for this post. I recently created the printable and now I’m working on figuring out the technology part to make it downloadable and how to collect the email addresses. I hope to report in my next blogiversary post that I was successful!
Invite Guest Bloggers to Share their Posts
In the past, I used to invite guest bloggers to share their knowledge and ideas on my blog–usually around the times of the year when I’d be most busy with my kids (school holidays/summer vacation). I don’t recall why I stopped doing this, but I’d like to get back to it–perhaps having guest bloggers offering tips and advice on topics that are not my specialty. I had a very positive experience hosting a guest blogger in March–I think I’ll try it again this year.
Thanks for joining me on my adventures in blogging–onward to year thirteen!
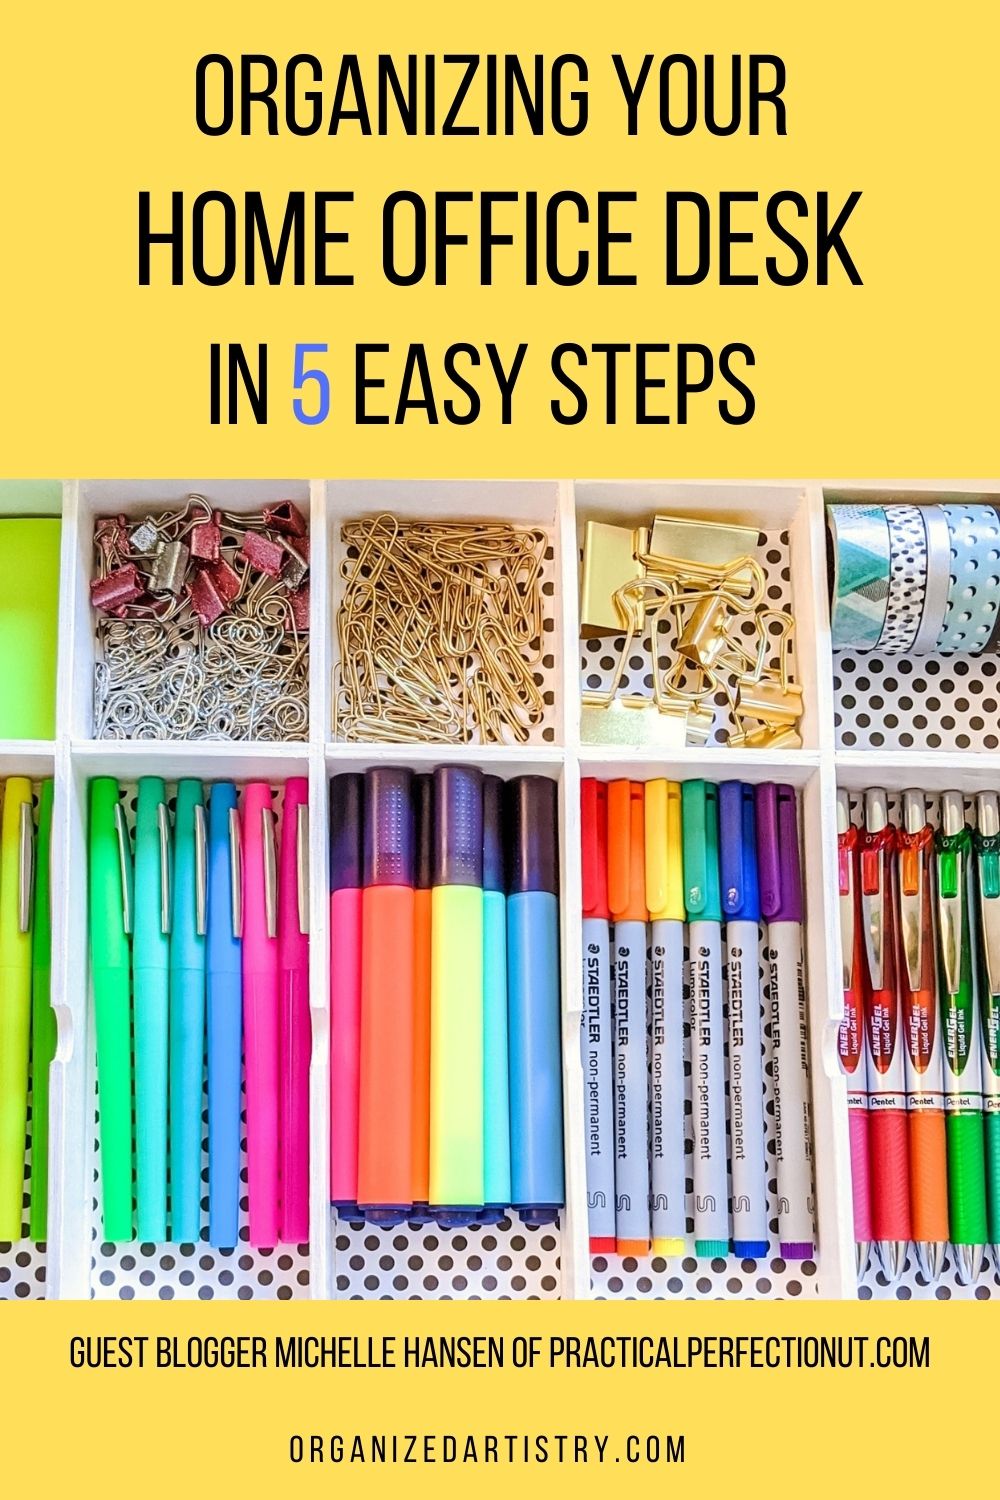
If you’ve been working from home this past year, you know how important your work area is to your productivity. Today, guest blogger, Michelle Hansen of Practical Perfection offers five easy steps to getting your home office desk organized so you can find what you need when you need it whether it be 9-5 Monday – Friday or after hours…
A home office desk sometimes feels like a disaster zone. With piles of untouched papers, a handful of broken pens, and half-used notebooks all crammed inside, it’s easy for your desk to feel untidy and chaotic. Plus, trying to find anything in those messy drawers seems impossible.
If you want to improve your home office experience (or even breathe a little easier at home), conquering that desk is a necessary evil. But, don’t worry, organizing your home office desk can be really simple!
Step 1: Declutter your desk drawers
The first step when you’re organizing anything is to declutter. Working one drawer at a time, go through every single item. With pens, markers, and highlighters, check to see if they even work. You may be surprised how many have dried out!
Be strict as you go through any planners, notebooks, and stationery. Do you have notebooks you never use? If there is any stationery you rarely use, there’s no sense in letting it take up valuable space in your desk. Donate any good notebooks or stationery you’re discarding.
Be realistic as you’re decluttering and only keep what you really use or need. If you have multiples of things like staplers, calculators, or scissors, choose your favorites and donate the rest. You probably don’t need more than 1-2 of each of these items.
Step 2: Separate your supplies into categories
Once you’ve gotten your office supplies whittled down to the ones you actually use, it’s time to separate them into categories.
Start making separate piles on your desk or the floor for writing utensils, loose-leaf paper, notebooks, binders etc. If you find one of your piles is too large, this is a good indication that you might not have decluttered enough, and you might need to reassess your supplies and purge the a bit more.
As you categorize, pay attention to what you use the most. This will help you when you start to put everything back.
Step 3: Organize your drawers strategically
Prioritize your drawer space when you’re putting everything back inside your desk. This is when it’s important to remember what you use the most.
Your top middle drawer is prime real estate, so you want to fill it with things you use all the time. It’s usually thinner than the other drawers, so it limits what you can fit, but it’s perfect for things like pens, pencils, scissors, tape, rubber bands, or paper clips. Any small items you’re always reaching for are made for your top middle drawer.
Be thoughtful as you organize the rest of your drawers. Do you tend to reach to your right side or your left side more? What feels more natural? If you reach for your right-side drawers more often, use the top drawer on that side for things you use the most. Then the drawer beneath that should be filled with your second most-used items, and so on, until you fill the desk!
I would also suggest organizing the inside of your drawer by most-used to least-used as well. In each drawer, decide what items in that category you use frequently and put those at the front. Then work your way back, so the items at the very back of the drawers are the ones you use the least.
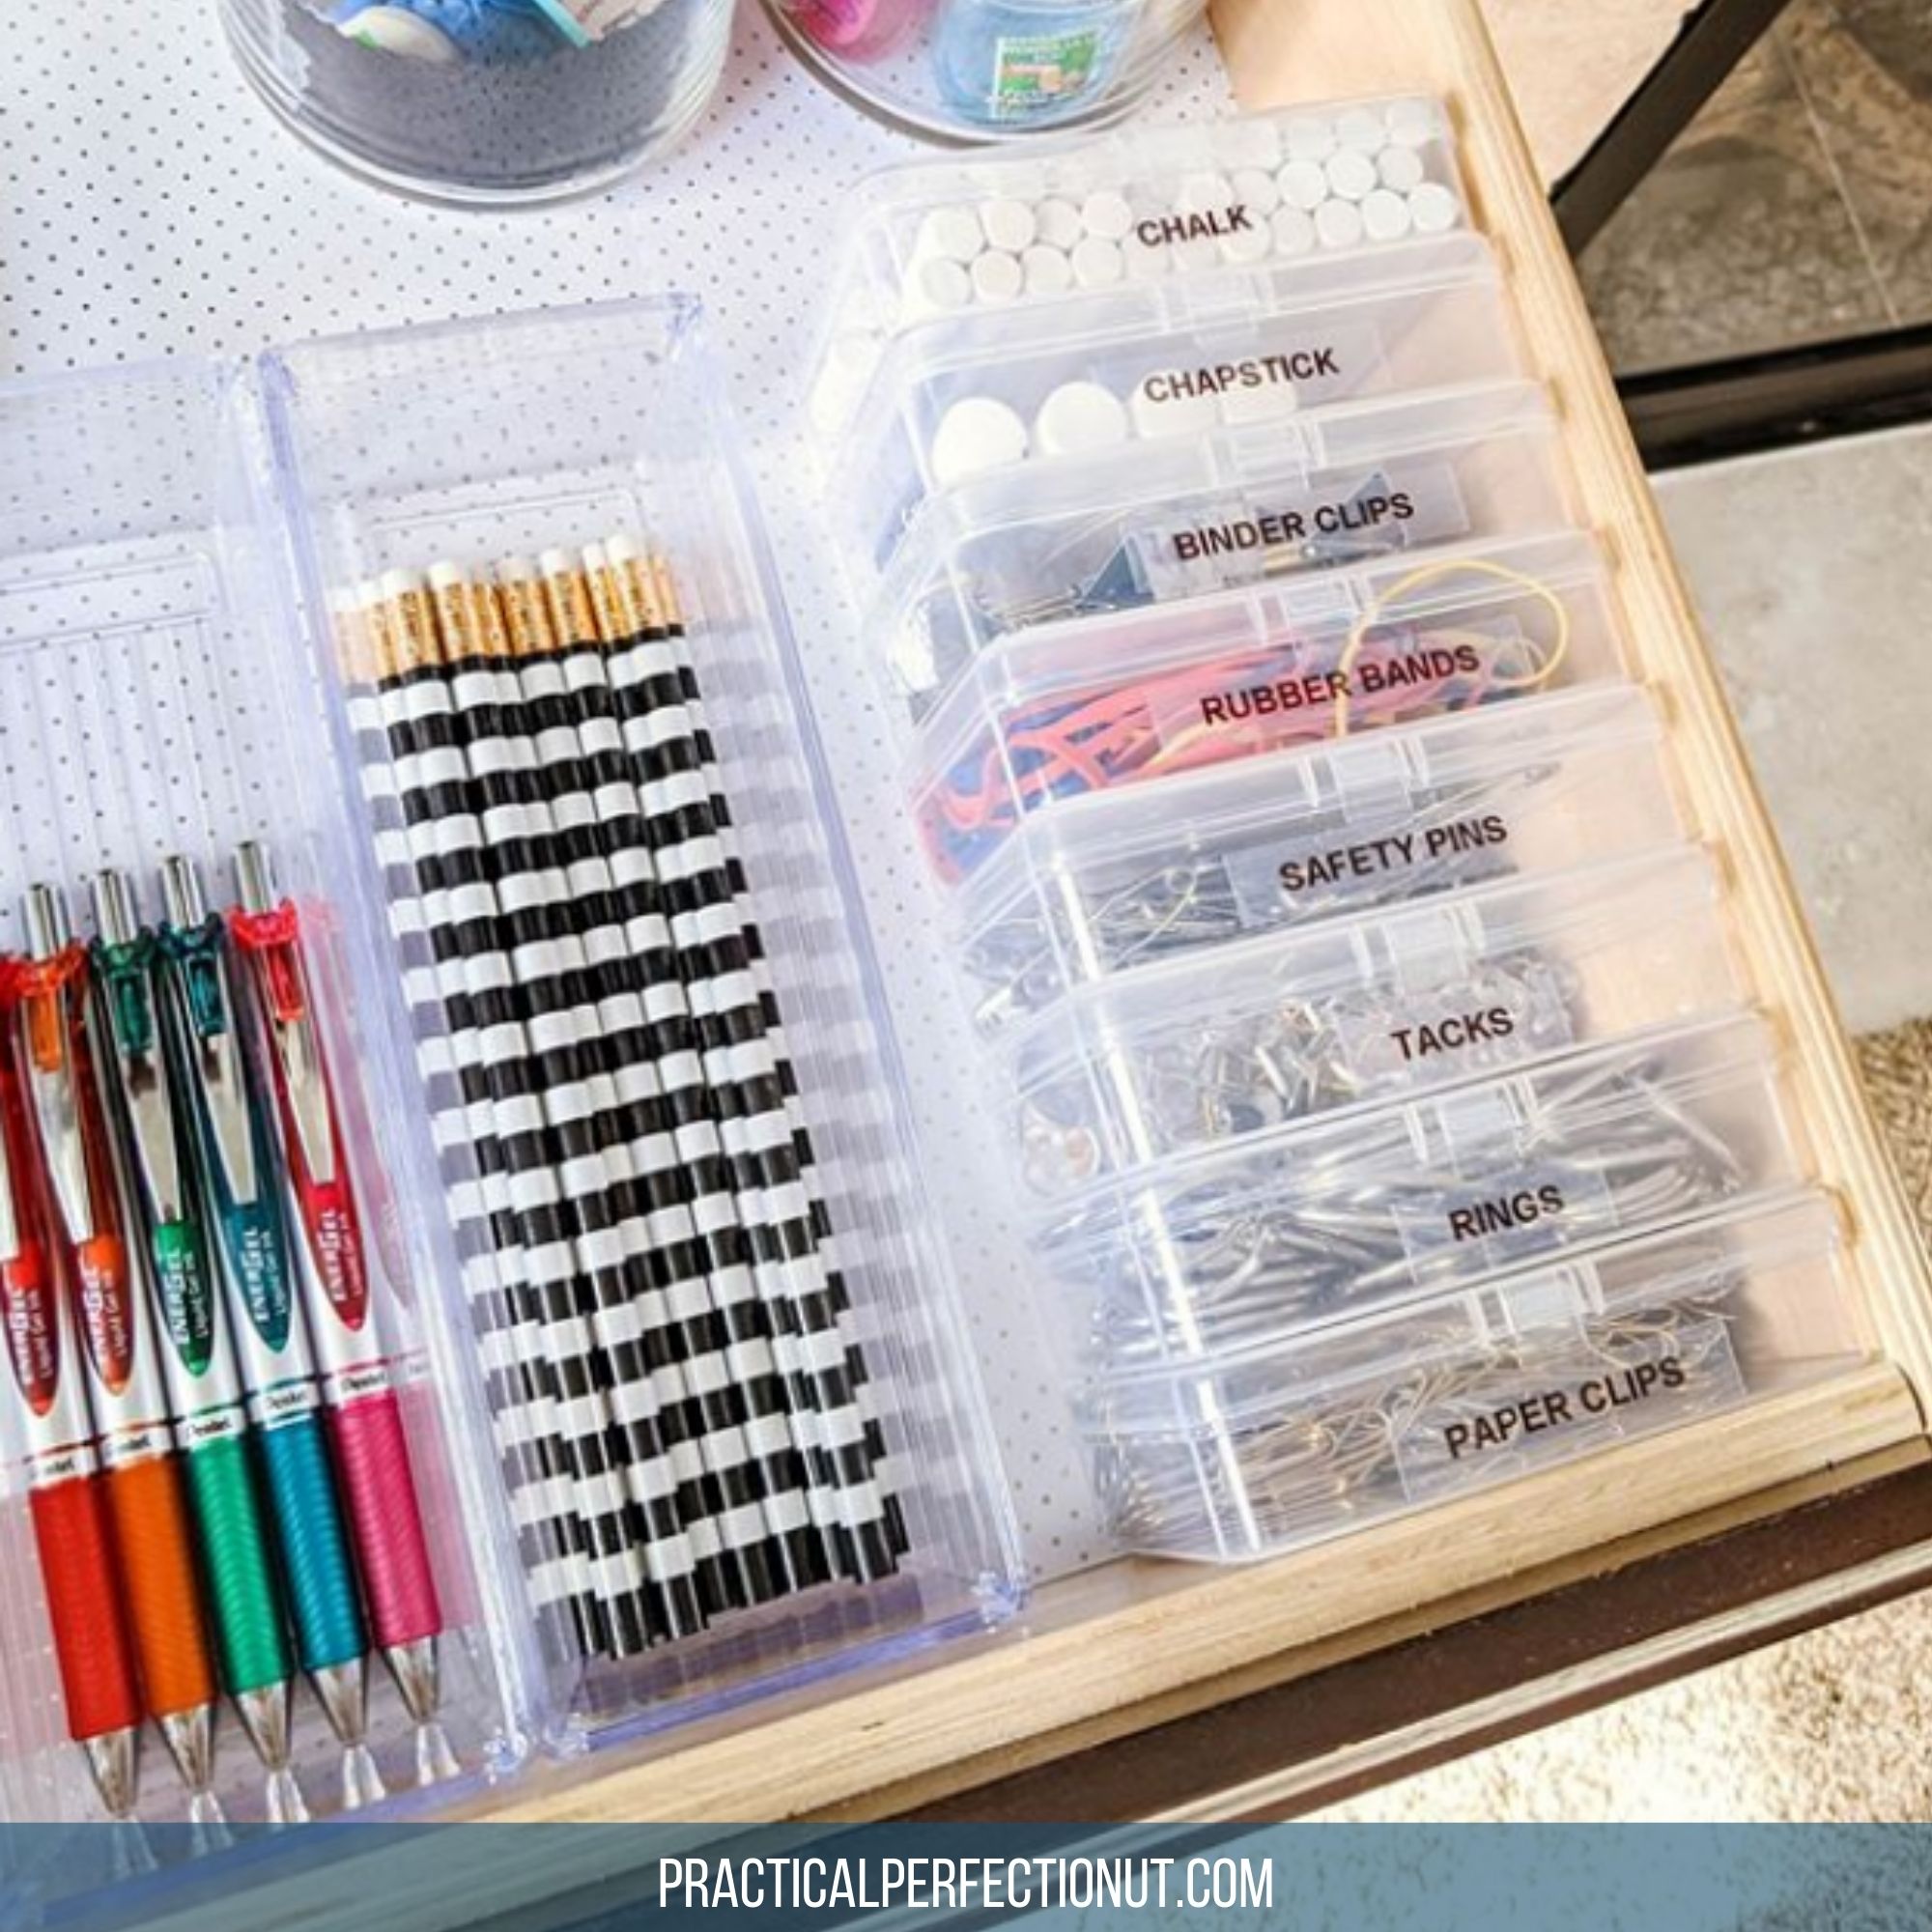
Step 4: Use dividers and small bins to keep your supplies contained
I love putting small containers or dividers in my desk drawer. First, it keeps everything tidy. Second, you never lose anything this way! (Unless you have kids who are always stealing the scissors…I’ve been there before.)
Find small, unlidded containers that fit in your desk and use them to separate as many items as you can. I keep sharpies, highlighters, and pens in separate containers, as well as safety pins, paperclips, and post-it notes.
Organizing your home office desk in this way is a game-changer. How often are you rifling through your drawer to find a paperclip or a rubberband? Keeping them in separate, contained areas means you won’t have any small items rolling around in your desk anymore and you’ll always be able to find them.
Step 5: Maintain your new organized desk with a few simple rules
After you’ve spent the afternoon organizing your home office desk, the last thing you want is for it to get untidy again, right?
Focus on maintaining your desk by implementing a few quick rules, like always putting things back where they belong. I know this sounds like common sense, but we often just throw things back in the drawer when we could take a few extra seconds to place it precisely in it’s container or zone.
I’d also suggest that you operate by the “one in, one out” rule when it comes to your desk. Home office desks have limited space, and if you’re bringing home lots of new stationery or pens when you never use the ones you already have, your desk is going to quickly get messy again. So, if you find a new notebook you just have to have, make sure you donate one you already have in your desk.
If you make it a rule to donate or discard items you already have when bringing home new items, it will either stop you from even buying that extra (and often unnecessary) stationery, or it will ensure that your desk stays organized no matter how much you buy.
Now, in five easy steps, you have an organized home office desk! All you have to do now is focus on step five, and you’ll never dread working from home again.
Michelle Hansen is a Wife, Mom of 3, and Professional Organizer. She has a passion for showing others how being organized can transform their lives for the better on her blog, Practical Perfection.
Some people blog about their small business, some blog about personal challenges and accomplishments, and some even blog about blogging!
Whatever you choose to blog about, it’s important for you to organize your blog. Why does your blog need to be organized?
• An organized blog is an easy blog to read
• An organized blog is a blog readers want to come back to (and isn’t that what we want our readers to do?)
• An organized blog represents YOU. You don’t want to look disorganized to your readers!
Whether you’re thinking about starting a blog or wish to tweak an existing one, here are a few tips based on basic organizing philosophies that will keep you on track and help you organize your blog:
Schedule It
We make appointments for the doctor, an oil-change, and the cable guy, Why not make an appointment for yourself to blog? Blocking out the time on your calendar gets you one step closer to accomplishing the task. Figure out how many times a week or month you are able to post and stick to that schedule. But, be realistic. Brainstorming, writing, taking photos/video and commenting takes more time than you think it does.
Sort It Out
Compile a list of topics you’ll want to discuss on your blog. Look at a calendar–are any of your topics seasonal? Plug them into the months they belong in. For instance, as a Professional Organizer, I would start blogging about Spring Cleaning in March. A chef might blog about the best foods to barbecue in May. Other topics may revolve around holidays, trade shows, milestones, or history.
Break It Down
Take your topics and create sub-topics for them. So, if the chef were to blog about Barbecuing in May and has decided to schedule one blogging ‘appointment’ per week, he or she might blog about the benefits to cooking on a clean barbecue the first week, do a hot dog review the second week, offer grilling tips the third week, and list his or her top ten recipes for summer grilling during the fourth week.
Delegate
Sometimes we need to take a break from blogging. Find other blogs of similar topic/interest and link to their information for your readers. Check out blogs that are pertinent to yours and invite their authors to be guest bloggers on your site. You get a break from writing while your guest blogger gets a whole new set of readers (and possibly followers). It’s a win-win!
Get Rid of the Clutter
Too many pictures, videos, or advertisements detract from what you’ve written. Keep the look of your blog simple and streamlined. You have to grab the reader’s attention within the first five seconds of their arrival at your blog. If they have to spend those five seconds looking for your latest blog post, they may not return out of frustration. (Nooooo!)
Maintain It
Stay on track with posting to your blog. If you know you’ll be on vacation or going through a life-changing event, write posts in advance or have a guest blogger fill in for you. Keep all photos and videos for your blog in one place on your computer. Once a month, review your topics and subtopics and make any necessary tweaks or changes.
After applying the above principles, your newly organized blog will be low-maintenance, a pleasure to post to, and a joy to read.
Which organizing philosophy would help you organize your blog the most?
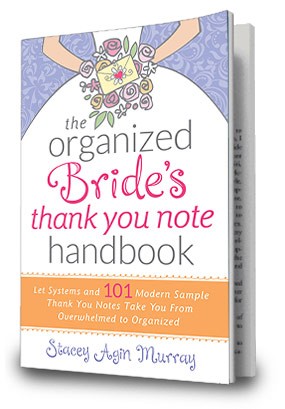
Shortly after it’s publication, I came across a quote that I now believe to be true: “If you thought writing a book was hard, try marketing it!”
It has been a challenge getting the word out about The Organized Bride’s Thank You Note Handbook, especially because it does not have much in common with my day-to-day home and virtual organizing business. I’m a Professional Organizer–not a Wedding Professional. With this book, I straddle the fields of organizing and weddings–marketing it has been quite a learning experience.
I’ve let the world know about my book via social media, Facebook Ads, giveaways, guest blogging, being included in ‘wedding product roundup’ articles, (and a little bit of begging–I’m not proud) and recently decided to give video a try. Articles on book marketing point to video as the way to go in marketing today. They say a book trailer is an important piece of an author’s media kit. I’ve done a few Facebook Live videos and I’m slowly growing my YouTube channel so I thought I’d give it a try. I had never used iMovie before but I thought, “If my twelve year old can use it, so, can I!”
It took about a week of learning from articles and YouTube videos and a few brainstorming sessions in solitude but I did it! I created my first book trailer using Canva, iMovie, and some loyalty-free music from YouTube.
Presenting…the book trailer for The Organized Bride’s Thank You Note Handbook.
Thanks for watching! If you know a bride with a house full of wedding gifts who could use some writing tips and help with their wedding thank you note wording, please share The Organized Bride’s Thank You Note Handbook book trailer with them. For more information, go to the Organized Artistry website or Amazon.com.
Download Our Gift Tracker Printables!
Track your engagement gifts, bridal shower gifts, and wedding gifts with our *free* Gift Tracker printables! Click the image below to download and print three gift trackers and valuable tips for keeping your addresses and gift lists organized.
Your thank you note tracking is about to get so much easier…
It’s been a bad winter. Really bad. Snow, ice, freezing temperatures for weeks on end have made life more challenging this season. Just like any other season, it’s important to be prepared with the tools to get through the changes in weather–shovels, rock salt, snow brushes, warm gloves and boots–the list goes on. My guest blogger, Moreen Torpy of De-Clutter Coach in Ontario, Canada knows a thing or two about being prepared for cold weather. Today she’s sharing with us ‘Southerners’ 25 ways to survive an ice storm. I hope we never have to use any of these tips, but they’re here for you just in case…
This winter has brought more than our fair share of ice storms and the resulting power outages, cold, inability to access transportation and all manner of other inconveniences.
After the realization sinks in that this might be a longer experience than you’d like it to be, after realizing you’re very cold will be the thought of what to do with food so it doesn’t become waste.
The following are lessons I learned from surviving the 1998 ice storm in Montreal:
Food:
1. Keep a few large plastic storage containers or clean garbage bins available to store your freezer contents outside without power. You can always chip off the ice to get into them when necessary.
2. Fill your BBQ propane tank at the end of summer so it can be used in case of winter emergency to cook whatever you have in your freezer, warm soup or boil water for coffee/hot chocolate/tea. Never use your BBQ or propane stove indoors. Set up in your garage if you have one, or outside
3. Use fresh food first, frozen food second and canned food last so you eliminate as much waste as possible. Cook whatever can be cooked when you can, then eat it cold if necessary. This will ensure less waste and provide as healthy a diet as possible under the circumstances.
4. Ensure you have a manual can opener and know where it is should you need it.
5. Don’t ever get rid of your fondue pot! It can be very useful to warm soup or water. Check now if you have fuel for it, and if not purchase a couple of bottles. Keep them with the pot so you know where they are.
6. Don’t cook anything that takes a lot of cleaning up, such as cheese. Remember, you don’t have hot water to do that right now.
Light/Heat:
7. Collect all candles and batteries from wherever you have them around your house and centralize them in one place. Inventory what you have and purchase what you still need—do you have D-batteries for your flashlight? C-batteries for your portable radio? What about candles? The dollar-store brand won’t last very long not to mention the mess they create when molten wax spills over. Keep something to light the candles with them, whether matches or a BBQ lighter.
8. Find any oil lamps you may have, purchase oil for them and keep them where they’re easily found when needed.
9. Find a mirror and put it with your candles. It doubles the light from lit candles as well as the heat produced. You might also toast marshmallows over the flames if you’re feeling adventurous. Maybe even assemble some s’mores!
Grooming:
10. Get used to the idea it may be a while until you can shower, shave or wash your hair. If there’s a shopping centre nearby with power, you could go to the hairdresser or take your hair dryer and wash your hair there. And perhaps even wash yourself as well. Hot water is better than cold any day for these personal care tasks. Home:
11. Turn off as many lights and anything else electrical as you remember having on before the power failure and turn on your front porch light. This way, when the power comes back on, you won’t be as much of a drain on the infrastructure, and you’ll know immediately from outside if you have light.
12. Close doors to rooms you’re not using to keep any available heat in those you are using. This is a good time to congregate in as few rooms as necessary to take advantage of each other’s body heat.
13. Close off the entrance to the room where your gas fireplace is, if you have one, and spend your time there. This will keep the heat in that room and not where it won’t be doing any good.
14. Before abandoning your home, pour windshield washer fluid into the drains and toilet to prevent the pipes from freezing when your home has no heat. Also open faucets to allow a small trickle of water to help keep it moving.
Vehicle: 15. Always keep your vehicle’s fuel topped up. If there’s no power, the gas pumps won’t work. Additionally there’ll be less space for moisture to form in the car’s gas tank.
16. Be very careful when removing ice from your vehicle. You don’t want to damage it by being too aggressive
17. Keep your vehicle’s trunk as empty as possible in case you need it to store used cookware that can’t be washed until you have plenty of hot water. You might also store frozen food in your car until you need it.
Varia: 18. Keep an amount of cash in your home—bank machines won’t work without power.
19. If your local shopping centre has WIFI, take your device charger(s) with you and use them there. You might also hang out there with your phone, e-reader or laptop. The food court, while mostly junk food, can provide a hot meal if this is your only choice for one.
20. Don’t bundle up in all your clothes to sleep. I know this sounds counter-intuitive, however you will warm up faster under the covers with just your usual nightwear or just something a bit warmer on. If you share a bed, take advantage of each other’s warmth. This is a good time for all the kids to pile in with parents so everyone stays warmer.
21. Remember Fluffy and Fido will be cold too, so allow them to cuddle with you.
22. Be as active as you can to build body heat if you’re staying in a cold house, but don’t work up a sweat or you’ll be colder than you were before.
23. Keep your medical prescriptions up-to-date, not waiting until you’re on your last pill. If you’re stuck without power, your pharmacy probably is as well and won’t be able to refill them.
24. If you intend to join others (family or friends) to wait out the power outage, select people you get along with and can hopefully find the humour in your situation.
25. Try to look on the experience as an adventure you can talk about and embellish in future telling of the story.
What’s your ice storm experience? Do you have any tips in addition to those above? I’d love to hear about both your experience and your tips. Please share!
We would be honored for you to reprint this article. If you do, please include the resource box below with the hyperlinks intact.
~~~~~~~~~~~~~~~~~~~~~~~~~~~~~~~~~~~~~~~~~~~~~~~~~
Moreen Torpy is the De-Clutter Coach, a Trained Professional Organizer, Author, and Speaker. Her new book is Going Forward: Downsizing, Moving and Settling In. See www.GoForwardDownsize.com for more about the book including where to purchase it, and www.decluttercoach.ca to learn about her organizing services and other books.
Some of your children may have started school already. Some may still be anticipating the first day. Despite their start date, my guest blogger, Linda Samuels of Oh, So Organized! wants to make sure your child’s school year is a happy and organized one. Read on for her top tips for creating simple systems for getting and staying organized throughout the school year.
It’s that time of year. Leaves are turning, classes are starting, and new school supplies are flying off store shelves. The other day I came across an old pre-printed pad, “A Note to School from Linda Samuels,” which I no longer use since our daughters are in college and beyond. Seeing the notepad made me think about all the years of excited anticipation we had preparing for school to begin. Are you and your kids ready for the transition? Take a deep breath. Getting that organizing piece working for you can make a big difference in having your days run more smoothly. Here are my top tips for an organized, joyful school year.
Cycle – Giving closure to the previous school year helps us get ready for this year. Sort through last year’s school papers (preferably with your kids.) It’s a great opportunity to review what was accomplished and what they were most proud of. It gives you a chance to create a mini time capsule representing last year. Be ruthless when you sort. Save what’s important and recycle the rest. Store the “keepers” in a large envelope. Write your kid’s name, grade and year on the outside. Store the envelope in a larger container. Add a new envelope at the end of each school year.
Capture – Establish a place to put the current school papers as they enter your home. You can use bins, binders, boxes, or any container that’s easily accessible. As artwork, graded papers, or programs come in, put them in their designated spot. You might want a separate container for each kid. When the container gets full, you can do some editing. Then the “keepers” can be stored in their year-end envelope, as described above.
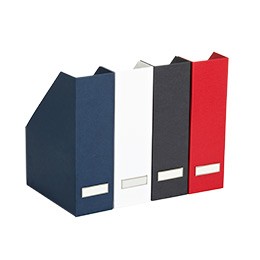
Classic Stockholm Magazine Files from the Container Store are helpful for organizing papers
Land – Create a place for backpacks, coats and notes to reside. When kids come home, they will know where to put their belongings. Cubbies work well, as do hooks. Make them easily accessible both in terms of their physical placement in the home and the heights that you place things. The easier you make it, the better chance you have for creating the “place it here” habit. Consider adding a white board or other communication center in this area to leave notes, messages and important items for kids to remember. Before bed, have your kids make sure that all needed items for the next morning are reading in the “land” area.
Center – One of the essential ingredients for school success is establishing a place to do homework and have school supplies readily available. When it’s time to do that science project, it’s no fun to have to hunt for the markers. Review your current supplies to see if there are any items that need to be replaced. Create a zone for the supplies to reside. If your kids like to move around to various locations for doing their homework, then put together a portable tote or crate to hold the supplies. Whether they prefer working on a desk, their bed or the kitchen table, the supplies can “travel” with your kids.
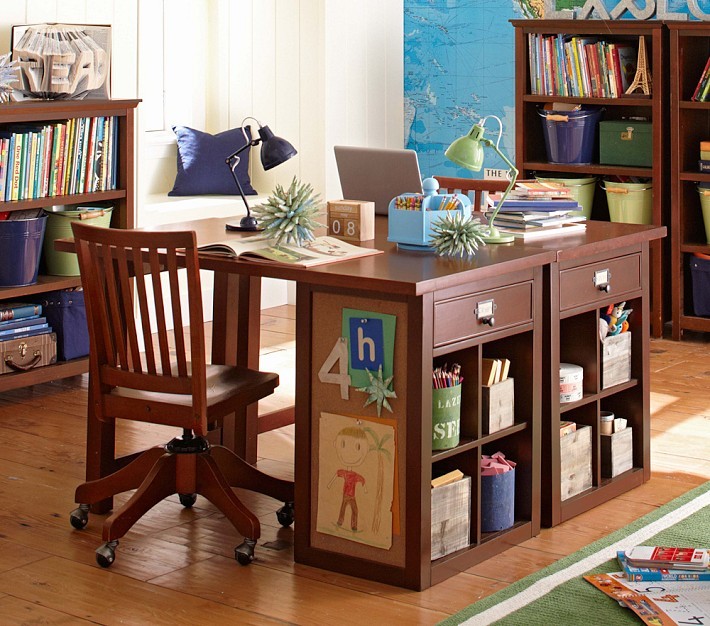
Pottery Barn Schoolhouse Craft Desk
Assess – Fall is a natural time to review clothing needs. Organize with each kid separately. Go through their closets and drawers. Remove any items that no longer fit, they won’t wear, or need repair or cleaning. With the “do not wants or fits,” donate or save for younger kids if appropriate. Make a shopping list of items that are needed. Remember that less is easier to maintain than too much. Factor in how often laundry is done. Especially if it’s done frequently, you many not need as many clothes. Getting dressed is so much easier and less stressful when everything fits, is clean, and organized.
Resources – This is the time of year when back to school tips and suggestions are abundant. Many of my organizing colleagues have great wisdom to share. Some of my favorite tips and posts are Lorie Marrero’s video about using a binder for organizing school papers and more, Leslie Josel’s Student Organizing Pinterest board, Clare Kumar’s 5 Tips for a Better Back to School, Helena Alkhas’ school paper organizing system, and Ellen Delap’s Back to School Tips to Organize Your Home.
Perspective – With transitions come new patterns, more to dos, and extra stress. Reminding our selves to enjoy the moments can be helpful. They go so fast. A few years ago I wrote a guest post for Working Mother, Moms’ ‘To Do’ Lists, about getting things done, parenting and appreciating the various stages of our children’s lives.
What are some of your favorite ways to stay organized for the school year? Come stop by to share your best tips and resources.
Linda Samuels, CPO-CD® is a compassionate, enthusiastic professional organizer and coach, founder of Oh, So Organized! (1993), author of The Other Side of Organized, and blogger on organizing and life balance. In July 2013, Linda joined the Institute for Challenging Disorganization (ICD) Board of Directors as President-Elect. She has been featured in The New York Times, Woman’s Day, Bottom Line Personal, Westchester Magazine, Everyday with Rachael Ray, and Enterpreneur.com. Connect with Linda on Twitter, Facebook, Pinterest, blog, or website. Sign up for a free monthly e-newsletter with bonus tips at ohsoorganized.com.
Students from preschool to college love to use backpacks. They come in a multitude of sizes, colors and price points and can hold a ton of books and supplies. My guest blogger, Amber Kostelny of Amber’s Organizing knows that a backpack has the potential to be a black hole or bottomless pit so she’s offering some of her best tips for organizing a backpack. Read on…
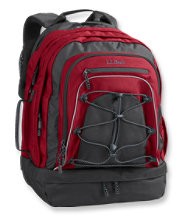
LL Bean Turbo Transit Backpack
Organizing a backpack and keeping it neat and tidy is not much different from organizing something else in your home or office. Similar principles apply. Here are my top tips! (and if you’ve got some to share- please comment! We’d love to hear them.)
• Use pouches that are colored and clear. This may sound confusing, so let me explain. Seeing through a container or pouch makes finding pencils, pens, and erasers a lot easier. If they are tinted a color, that’s even better. Over time, your child will for example associate blue for pencils and red for note cards. This makes it easier to grab a pouch out of the bag. Avoid loose crayons, highlighters and erasers. Everything should be in a pouch or small bag.
• Assign each pocket in the backpack its’ own function or use. For example, maybe the front small pocket will always contain the pencil case and the first large pocket- folders and paper, where as the second large compartment or pocket will house the books. Again, over time your student will instinctively associate certain pockets with certain contents. They’ll never have to guess where something is if everything “has a home”.
• Clean it out regularly. This step is the most important. I recommend each and every night, clean out and tidy up the backpack. This may not be realistic for your child but if you can get into this habit, it will really help. Otherwise, shoot for once a week. That will help keep the mess at bay.
• Label everything. Cases, pouches, books, folders and just about anything else you can think of- label it! Although kids like to write the label or title out themselves, encourage them to use your label maker. It will make it easier for everyone if the labels are clearly typed out.
• Color code folders, binders, and notepads. Choose one color to represent one subject. Perhaps your child’s math book has a book cover. Then stick to a blue folder or notebook to match it. All of these little changes can sometimes make a huge difference if you child identifies with colors to stay organized.
Amber has been serving the Chicago area as a professional organizer since January 2004. She is a Certified Professional Organizer® and specializes in residential and small business organizing. She especially enjoys working one on one with clients to customize the organizing solutions and systems to add efficiency to their space or business. Helping people problem solve difficult spaces and creating productive work spaces is very rewarding to her. Amber is a Golden Circle member of the National Association of Professional Organizers as well as local member of the Chicago chapter.
We remember to pack sheets, electronics, and posters for the wall when kids go to college but what about medicine? Yes, there’s usually a medical center on campus but my guest blogger, Professional Organizer Heather Ahern of The FUNctional Home believes that preparing college students for minor medical issues is equally as important as preparing them for academics (I agree!).
When packing a student to live away at college, don’t forget to assemble a comprehensive first aid kit.
Think beyond ibuprofen and Band-Aids when creating this kit for a dorm room. On campus the Health Services are often not available 24 hours a day and some things can be handled easily if the right supplies are on hand. Students need more than the typical pre-packed first aid kit that contains only one or two doses of medications and a few bandages. Also when stocking your own first aid kit, you can ensure the medications are your preferred brands and have a longer shelf life by checking the expiration dates.
A typical first aid kit should include the basic tools and equipment needed for cuts, bumps and bruises: •Adhesive bandages in all shapes and sizes •antiseptic wipe packets •antibiotic ointment •sterile gauze pads •adhesive tape •hydrocortisone ointment •scissors •eye wash •instant cold compresses •hot packs •elastic (Ace) bandage •thermometer •tweezers
This kit will also be an extension of your medicine cabinet at home so it needs to include: •Acetaminophen for aches and pains, •Ibuprofen for pain caused by inflammation and swelling •laxatives •anti-diarrhea pills •antacids in case of indigestion •Benadryl for allergic reactions •seasonal allergy medicine •some basic medications for cold and flu season. •Athlete’s foot medicine may come in handy as well.
A conversation on how to use all these new purchases will be helpful for many students living away from home for the first time.
Before my son left for his freshman year at college we took an unhurried trip to the drugstore. We walked up and down each isle collecting what he needed, discussing why he may need it, with an explanation on how to use it. Being in a new situation, having an altered schedule and eating different foods can bring on a variety of issues in the first few months that many students may have never dealt with before. Take some time to clarify why you included Imodium or Dulcolax for example and the difference between them. You may want to cover when the “kit” is appropriate and in what circumstances the Campus Health Services would be a better choice.
Purchase a durable box to contain all these supplies after you have amassed all the items to insure everything will fit.
Remove some items like bandages from their original boxes and use plastic zip-top storage bags to save space. Be sure to include a copy of their insurance card, the campus health center’s phone number, the phone number for your child’s physician and a list of any known allergies to medication.
Remember all first aid kits need to be restocked occasionally. Check expiration dates and replace any used or out-of-date contents each year before heading back to school. This is a good time to do an inventory of your own supplies at home too.
Heather Ahern is a Professional Organizer living in Bridgewater MA helping families and seniors “Make Sense of their Stuff and Create Peace in their Home”.
When I complete an organizing project with my clients, I remind them to give themselves a pat on the back for crossing the ‘finish line.’ My guest blogger, Rashelle Isip of the The Order Expert, believes in celebrating the completion of a successful organizing project. Read below to find out the five things she wants you to do after reaching your organizing goal.
“I finally organized my bedroom closet!”
“I filed away that giant stack of papers on my desk!“
“The cabinet under the kitchen sink is finally tidied up!”
Congratulations! You’ve finally completed an organizing project. You’re a bona fide success!
Before you happily rest on your laurels, consider these five pointers to help keep your project a success and let you bask in the glow of a job well done for many months to come.
Plan daily maintenance.
Now that you’ve finally gotten things in order, don’t be lazy and let all your hard work go down the drain! Figure out specific steps to take on a daily basis to help keep your organizing project in order. For example, let’s say you finally organized your bedroom closet. You might decide to place shoes and belts back on their shelves/racks at the end of the day, place dirty clothes immediately in the hamper and fold and store/hang clothes right after the laundry is done to keep things in order.
Take a photo.
You’ve worked hard to achieve your goal. Why not make a record of your achievement? Snap a photo on your cell phone or digital camera for posterity and save the image in an easy to access place. Refer to your photo on any organizing “rainy day,” that is, whenever you feel you’re sliding back into your old habits or are undoing your hard work for a bit of positive reinforcement and motivation to keep things organized.
Plan a smaller organizing project.
You’ll probably be feeling very good after completing your project so consider using this feeling of accomplishment into another organizing project. Keep in mind that your next project doesn’t have to be the same size as the one you just completed and certainly doesn’t have to be completed that same day or week. If you’ve just finished organizing the garage, planning to organize the basement right away probably isn’t such a wise choice. Instead of going whole hog, keep your plans to a smaller project such as cleaning out your wallet.
Share your story with others.
One of the best things in achieving a goal is sharing your accomplishment with others. Thanks to social media, it’s easier than ever share information and stories. Share your success with friends and family via your favorite social media network or tool with photos and a short story. Who knows, you might just inspire someone else to get started on or complete their very own organizing goal!
Celebrate!
Lastly, we can’t forget the importance of celebrating your achievements. Go out for a nice dinner, listen to your favorite music, buy yourself a small gift, relax with loved ones, smile, and of course, enjoy your newly organized space or materials!
Now to you…what do you think of the above? Have you ever given yourself a reward for an organizing job well done? Perhaps you have a reward in mind for the near future for an almost completed project?
Rashelle Isip is a blogger, time management, and productivity consultant and professional organizer. She is founder of The Order Expert, a site featuring practical and creative organizing, time management, productivity tips, inspiration and much more. For more information, visit http://www.TheOrderExpert.com. You can follow her on Twitter @theorderexpert, on Facebook at facebook.com/theorderexpert, and on Pinterest at pinterest.com/theorderexpert.
I’m always advising my clients to sort, purge and inventory their belongings before purchasing organizing supplies. My guest blogger, Moreen Torpy of De-Clutter Coach in Ontario, Canada thinks that sometimes organizing supplies that are supposed to help us are in fact cluttering our homes! Read on to see if you recognize some of the signs of this idea in your home…
Many times when I go into clients’ homes, I see they’ve purchased any number of organizing supplies and books. What they’ve actually bought is the dream of being organized, not the reality. This may seem a bit harsh, but stay with me for a bit.
Cubbies containing enough shoes to stock a shoe store isn’t organizing the shoes. It’s simply showcasing the quantity. Who really needs a hundred pair of shoes? My question is whether all this footwear is actually being worn, especially when there are large numbers of children’s shoes. Because kids grow so quickly, how do they even have time to wear all of them before they’re too small. In this case, the cubbies intended to organize are really contributing to the disorganization.
Empty bins stacked or not, intended to store off season clothes, are useless unless they contain something. Before buying bins, why not prune your wardrobe, holiday decorations, and anything else you intend to store, then decide what kind of storage is needed. Spending money on unnecessary bins adds to the clutter rather than reducing it.
Adding storage baskets to closets to hold clothing that hasn’t been worn in years isn’t the answer. I suggest weeding out items that aren’t being worn on a regular basis and reduce the number of storage baskets to de-clutter that closet.
Containers for gift wrap can be a trap. Paper deteriorates with time, so having a large supply, even if it wasn’t expensive, doesn’t serve in the long run. Carefully storing all that paper in containers made for gift wrap is often a waste of time, especially if you run out the day after Christmas to grab more gift wrap on sale to add to the collection. Decide on two containers, maximum. One for holiday wrap, and one for other occasion wrap. These will be plenty for a normal household.
And we can’t forget all those plastic food containers! Whether they’re fancy take-out ones or recycled ones (margarine, yogurt, etc.) or new ones, they’re still clutter if they’re not being used. A rule of thumb for food containers is to have only the number that will fit in your freezer. Logically more than that won’t be used because there’s no place for it. And I won’t even go into the containers with missing lids or the covers with no bottoms. The only thing to do with these is to get rid of them. It’s a well-known fact that they multiply behind closed cabinet doors. Beware the unattached pieces!
I’m not advocating adding anything to the landfill that can be diverted—just saying to think ahead and not bring them into your home at all. We can only repurpose so much in the existing space. To my mind, adding space to accommodate clutter is unproductive and wasteful.
So you have organizing supplies that have become clutter? What’s your plan to eliminate it/them? Please share your solutions—we’d love to hear from you.
We would be honored for you to reprint this article. If you do, please include the resource box below with the hyperlinks intact.
~~~~~~~~~~~~~~~~~~~~~~~~~~~~~~~~~~~~~~~~~~~~~~~~~
Moreen Torpy is the De-Clutter Coach, a Trained Professional Organizer, Author, and Speaker. Her new book is Going Forward: Downsizing, Moving and Settling In. See www.GoForwardDownsize.com for more about the book including where to purchase it, and www.decluttercoach.ca to learn about her organizing services and other books.
A blog by Professional Organizer Stacey Agin Murray bursting with cool products, 'gotta-tell-a-friend' ideas, and a whole lotta organizing know-how. Learn more...
Subscribe to the Blog
Subscribe to the blog and never miss a post!
About Stacey
When you grow up in a 5’x12′ bedroom, you learn to organize pretty quickly! I chose to take that knowledge and turn it into a business helping people find what they need when they need it. I’m also the author of The Organized Bride’s Thank You Note Handbook–a book that offers wedding thank you note-related organizing tips and how-to’s plus 101 unique sample thank you notes (what bride can’t use that?).