Archive for the ‘
Organzing Kids ’ Category
Students from preschool to college love to use backpacks. They come in a multitude of sizes, colors and price points and can hold a ton of books and supplies. My guest blogger, Amber Kostelny of Amber’s Organizing knows that a backpack has the potential to be a black hole or bottomless pit so she’s offering some of her best tips for organizing a backpack. Read on…
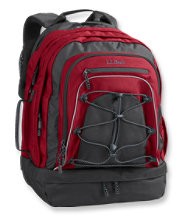 |
| LL Bean Turbo Transit Backpack |
Organizing a backpack and keeping it neat and tidy is not much different from organizing something else in your home or office. Similar principles apply. Here are my top tips! (and if you’ve got some to share- please comment! We’d love to hear them.)
• Use pouches that are colored and clear. This may sound confusing, so let me explain. Seeing through a container or pouch makes finding pencils, pens, and erasers a lot easier. If they are tinted a color, that’s even better. Over time, your child will for example associate blue for pencils and red for note cards. This makes it easier to grab a pouch out of the bag. Avoid loose crayons, highlighters and erasers. Everything should be in a pouch or small bag.
• Assign each pocket in the backpack its’ own function or use. For example, maybe the front small pocket will always contain the pencil case and the first large pocket- folders and paper, where as the second large compartment or pocket will house the books. Again, over time your student will instinctively associate certain pockets with certain contents. They’ll never have to guess where something is if everything “has a home”.
• Clean it out regularly. This step is the most important. I recommend each and every night, clean out and tidy up the backpack. This may not be realistic for your child but if you can get into this habit, it will really help. Otherwise, shoot for once a week. That will help keep the mess at bay.
• Label everything. Cases, pouches, books, folders and just about anything else you can think of- label it! Although kids like to write the label or title out themselves, encourage them to use your label maker. It will make it easier for everyone if the labels are clearly typed out.
• Color code folders, binders, and notepads. Choose one color to represent one subject. Perhaps your child’s math book has a book cover. Then stick to a blue folder or notebook to match it. All of these little changes can sometimes make a huge difference if you child identifies with colors to stay organized.
Amber has been serving the Chicago area as a professional organizer since January 2004. She is a Certified Professional Organizer® and specializes in residential and small business organizing. She especially enjoys working one on one with clients to customize the organizing solutions and systems to add efficiency to their space or business. Helping people problem solve difficult spaces and creating productive work spaces is very rewarding to her. Amber is a Golden Circle member of the National Association of Professional Organizers as well as local member of the Chicago chapter.
Links:
ambersorganizing.com
chicagoprofessionalorganizer.com
facebook.com/ambersorganizingllc
twitter.com/luvtoorganize
I know it’s summer, and no one likes to mention the word ‘school’ during the summer, but I want to prepare you for what is coming. I bring up the topic of ‘school’ because just like kids, parents need to start the school year with tools to make their lives easier.
I’ve started using an app for de-cluttering my house and I wanted to share it with you so you’re ready for the day your child brings home this:
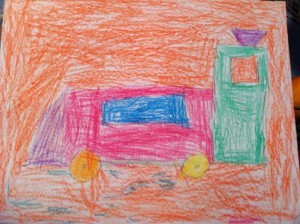
and this:
And enough three-dimesional pieces of art to fill an exhibition space at the MOMA.
The app is called Artkive…
Their tag line is: ‘The clutter free way to save and enjoy your child’s artwork’
I read about it in an article on apps for Moms about a year ago and decided to give it a try. I’m so glad I did–I LOVE IT!
True Confessions: Despite the fact I’m a Professional Organizer, I still have to deal with the influx of my children’s artwork just like you do. What I’ve done in the past was display some of my son’s artwork, have him sort and purge all of it with me at the end of the year, photograph him with some of it, keep his best pieces and toss the rest. We still take pics of his artwork if he no longer wants to keep it but Artkive has made the process a much easier and organized one.
Now, artwork comes home from TWO children and as it comes out of their backpacks, I ‘Artkive’ the work of art and place them in each child’s room either for display or storage.
If you’d like to see the top of your horizontal surfaces this school year, read on–you can thank me later…
How to start…
• Download the Artkive app (for
iPhone and Android).
• Set up an account with the name(s) of your child(ren) and their grade in school.
• Take a picture of your kid’s artwork or upload from your camera roll.
• Tag the photo with your child’s name, grade, date and title of artwork.
• Share with family and friend or turn into a book (coming soon: other products).
It’s just that simple. I haven’t created a book of my kids’ artwork yet, but it’s something I would definitely try out in the future. Currently, there are two options: 8″x8″ or 8″x11.” The cost is $25 for the first 20 pages–$1.00 for each additional page. Before holiday time, Artkive plans to expand to gifts like mugs, calendars and the like.
Why I love Artkive…
• It’s EASY to use.
• I can quickly email artwork to my husband or parents without having to first download the pictures to my computer and emailing them from there.
• All artwork is backed up in the ‘cloud.’
• It helps eliminate artwork clutter.
• It’s free. Go download it and set it up before the first day of school.
You’re welcome.
After you’ve used it for a while, come back and let me know what you think about Artkive!
CLICK HERE to sign up for Organized Artistry’s motivating monthly newsletter!
“I want to watch TV!”
“I want to play with my toys!”
“I’ll brush my teeth later!”
Have you heard these cries from your kids in the morning? They are direct quotes from my two children. And on occasion, I have been guilty of giving in to them. What did it get me? Some prodding, pleading and yelling, a mad dash out the door, and no one starting out their day in a good mood.
I like to start my day in a good mood–I want the same for my kids. It’s important to start the day off with a smile–especially at back-to-school time.
How did I turn our morning routine around?
My secret weapon:
The ‘Business Before ‘Pleasure’ Method for Morning Routines
What does the ‘Business Before Pleasure’ Method involve? Its basic philosophy is that all morning routine ‘business’ must be taken care of before ‘pleasure’ (playing, watching TV, using an iPad). Morning routine ‘business’ includes (in no particular order):
• Using the bathroom and washing face/brushing teeth
• Selecting clothes (if it wasn’t done the night before)
• Getting dressed
• Eating breakfast
• Cleaning up after breakfast
• Putting on shoes
• Checking school bag for everything needed for the day
My kids are 7 and 3. My big guy can do most of the ‘morning business’ himself by now but still needs a bit of prodding. My little one can be a bit of a ‘wild card.’ You never know what he’s going to do. For these reasons and more, it was important to create a set of ‘rules’ to dictate what needs to happen before they could play/watch TV and so I can get them to school on time.
What makes the ‘Business Before Pleasure’ Method an easier way of getting ready in the morning?
• Lunches and school bags are prepared the night before
• The weather report is checked and clothes are picked out for the next day before bedtime
• The kids know what they are responsible for accomplishing in the morning
• They are learning how to manage their time
• Their desire to have that extra ‘pleasure’ time in the morning motivates them and ensures me a little extra time in case of an emergency or glitch (ex. full diaper/last-minute requests/faulty coat zipper)
Thanks to the ‘Business Before Pleasure’ Method, our mornings are more smooth and less hectic now. And, yes–most mornings my guys get to do what they want to do before leaving the house.
By the way, just saying the phrase ‘Business Before Pleasure’ drives my 7 year old crazy. But, better it drive him crazy for a fleeting moment than have Mommy crazy the whole morning!
Update: I originally wrote this blog post when my kids were younger. They’re now 13 and 9 (!?!) and I still use this ‘secret’ in the morning. And, yes it still drives them crazy…

We remember to pack sheets, electronics, and posters for the wall when kids go to college but what about medicine? Yes, there’s usually a medical center on campus but my guest blogger, Professional Organizer Heather Ahern of The FUNctional Home believes that preparing college students for minor medical issues is equally as important as preparing them for academics (I agree!).
When packing a student to live away at college, don’t forget to assemble a comprehensive first aid kit.
Think beyond ibuprofen and Band-Aids when creating this kit for a dorm room. On campus the Health Services are often not available 24 hours a day and some things can be handled easily if the right supplies are on hand. Students need more than the typical pre-packed first aid kit that contains only one or two doses of medications and a few bandages. Also when stocking your own first aid kit, you can ensure the medications are your preferred brands and have a longer shelf life by checking the expiration dates.
A typical first aid kit should include the basic tools and equipment needed for cuts, bumps and bruises:
• Adhesive bandages in all shapes and sizes
• antiseptic wipe packets
• antibiotic ointment
• sterile gauze pads
• adhesive tape
• hydrocortisone ointment
• scissors
• eye wash
• instant cold compresses
• hot packs
• elastic (Ace) bandage
• thermometer
• tweezers
This kit will also be an extension of your medicine cabinet at home so it needs to include:
• Acetaminophen for aches and pains,
• Ibuprofen for pain caused by inflammation and swelling
• laxatives
• anti-diarrhea pills
• antacids in case of indigestion
• Benadryl for allergic reactions
• seasonal allergy medicine
• some basic medications for cold and flu season.
• Athlete’s foot medicine may come in handy as well.
A conversation on how to use all these new purchases will be helpful for many students living away from home for the first time.
Before my son left for his freshman year at college we took an unhurried trip to the drugstore. We walked up and down each isle collecting what he needed, discussing why he may need it, with an explanation on how to use it. Being in a new situation, having an altered schedule and eating different foods can bring on a variety of issues in the first few months that many students may have never dealt with before. Take some time to clarify why you included Imodium or Dulcolax for example and the difference between them. You may want to cover when the “kit” is appropriate and in what circumstances the Campus Health Services would be a better choice.
Purchase a durable box to contain all these supplies after you have amassed all the items to insure everything will fit.
Remove some items like bandages from their original boxes and use plastic zip-top storage bags to save space. Be sure to include a copy of their insurance card, the campus health center’s phone number, the phone number for your child’s physician and a list of any known allergies to medication.
Remember all first aid kits need to be restocked occasionally. Check expiration dates and replace any used or out-of-date contents each year before heading back to school. This is a good time to do an inventory of your own supplies at home too.
 Heather Ahern is a Professional Organizer living in Bridgewater MA
helping families and seniors “Make Sense of their Stuff and Create
Peace in their Home”.
For more information, tips and inspiration
visit TheFUNctionalHome.com or follow Heather on Facebook at https://www.facebook.com/TheFUNctionalHome.
It’s hard to believe but Organized Artistry is heading into it’s 11th year in business. The time has certainly flown! In that time, I’ve written organizing tip articles for my website and almost four years ago, I started this blog.
In honor of 11 years of organizing, I share with you the top ten most popular posts of this blog–plus one bonus post to make it 11. I hope at least one of them will offer you an idea or a resource for creating and maintaining an organized life.
Curious as to what readers liked most?
Top 3 blog posts:
Best Products for Organizing Your Car
This post was the most popular by a landslide! Maybe I need to add ‘car organizing’ to my list of services…
Organizing Inspiration from Curious George
Who would think that a mischievous monkey could teach us a lesson on organization?
Peter Walsh Organizes Rachael Ray’s Kitchen
She’s got a smaller kitchen than one would assume. Peter Walsh makes cooking at home a more stress-free activity for the famous cook.
Cool Product blog posts:
Cool Product – Jewelry Organizer
Not your usual jewelry holder…
Cool Product – Cable Turtle
Wires! Wires! Wires! No more unsightly wire messes thanks to cable turtles.
Cool Product – Fridge Binz
If your fridge need organizing, check these out…
Other popular blog posts:
De-Cluttering Tips
Simple, basic steps to follow for de-cluttering…
Top Ten Helper Shelf ‘Hot Spots’ for Your Home
This was a popular post, too. I love helper shelves! See how they can transform your closets and cabinets.
Organizing Up and Down–a Vertical Makeover
My motto: “If you can’t go outward, go UPWARD!”
Organizing on the Cheap: Target Dollar Spot
Love the Target Dollar Spot. You never know what organizing products (or other goodies) you’ll find there.
New Baby? Time to Get Organized
These little people have a lot of stuff and require a ton of organization!
Bonus post: Some organizing humor…
Professional Organizer Humor
Yes, there’s a bumper sticker for our profession, too!
My blog posts are written with the intention of providing information, tips, resources and sometimes a good laugh. I hope they have provided you with all that and more. Thanks so much for supporting Organized Artistry!

Got kids?
Me, too.
Ever feel like you are constantly trying to pick up after them and maintain their stuff?
Hey, guess what–me, too. It’s kind of like shoveling snow during a blizzard.
At my first NAPO Conference in 2004 (a few years before I started having children) I took a workshop called ‘Organizing the Family.’ In that terrific workshop, I learned something that I still remember years later. I’m sharing this with you in the hopes that you will use it to make your life as a parent a little easier.
In the workshop, I learned the five steps to follow to teach your kids mastery of almost any task.
Woo-hoo! Hallelujah!
Write these five steps on a post-it and stick it where you can see it. Or, write them in an app on your smartphone. Jot them down somewhere you can access them easily. You’re going to want to refer to these steps often. Remember, they’re going to make your life as a parent easier (If you’re reading this and you’re not a parent, pass them on to someone who is!). Here they are…
To Get Your Kids to Master ______________ …
Step 1. Demonstrate the task you’d like your child to master
Step 2. Do the task with them
Step 3. Supervise your child doing the task
Step 4. Let them do the task alone
Step 5. Supervise your child occasionally
What are some skills your kids can master using these five steps?
• Putting away their toys
• Doing/folding their own laundry
• Setting the table for a family meal
• Using a knife
• Sorting and purging their school papers
• Household cleaning/gardening chores
Each step you teach your kids will take some time, effort and patience on your part but in the end, the investment of time will be worth it. And believe me–your future sons and daughters-in-law will thank you.

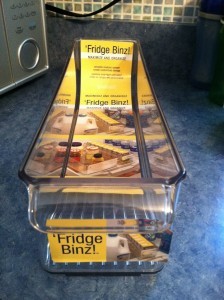
A year and a half ago, I discovered a product that revolutionized my sandwich-making abilities. No, I didn’t hire a chef–I bought a Fridge Bin for my refrigerator.
My food, especially my bread products, was getting lost, smushed and squashed. While strolling through the aisles of The Container Store one day (Yes, that’s where Professional Organizers stroll…) I happened upon the Fridge Bin. I thought the concept was great–but would it function well in my fridge?
If you read my first Fridge Binz post you know that it was a success. And, I’m happy to report that almost a year and a half later, it still holds my bread products and saves them from being mutilated on a daily basis.
 |
| That’s some of my bread products safely nestled in the Fridge Bin… |
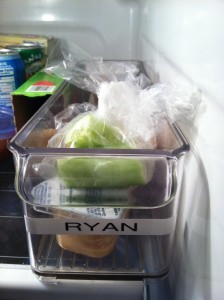
I was so happy with how it functioned in my refrigerator, I bought another one! This one wasn’t for keeping my bread organized–it was for baby food. Those dang jars and little containers are very good at hiding! And when they hide, the food inside of them goes bad. Can’t feed that to a baby…
I had tried organizing my youngest son’s food on the top right shelf of our refrigerator but somehow, it would all migrate across the shelf, and start hiding behind and mingling with other foods–not to be seen for days.
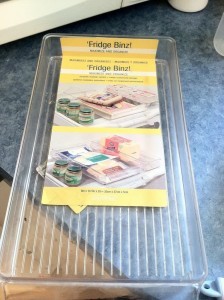
Back to The Container Store I went and here’s what I came home with…
It’s deeper and more narrow than my first purchase. It’s perfect for corralling my little guy’s food items and it’s BPA free, too.
It lives on the right side of the top shelf of my refrigerator–the spot where I had begun my organizing process. It’s a place for me to throw my son’s little containers, baggies of leftovers or anything I’m defrosting for him. No more lost toddler food which means the Fridge Bin is saving me money and time. I like that!
Another Fridge Bin success story!
I’m not sure what happened in the universe nine months ago, but it seems as if everyone is having babies this spring. I have bought a bunch of baby gifts over the past few weeks and my mother just took three pink and blue packages to the post office.
It’s raining babies!
Babies are cute and sweet and smell great but they come with A LOT of stuff–A LOT of stuff that needs organizing! Clothes, toys, gadgets, and equipment are only the tip of the baby-belongings iceberg. Papers, feeding/sleeping schedules, and the baby gift/thank you note list need to be organized, too.
Whether you’re expecting or your bundle of joy has already arrived, what parent can’t use a few baby organizing tips?
|
With that in mind, I’d like to offer a few valuable pre-baby organizing tips and “can’t-live-without-them” organizing products to assist in creating a clutter-free environment for you and your new arrival.
Pre-Baby Organizing Tips
Sort and Purge—your own stuff
Get rid of the old to make room for ‘the new’ (your little one needs a lot of room!). Sort and purge through your own clutter in your:
Closets
Discard or donate any clothes no longer worn or usable. The clothes in your closet (whether they’re maternity or regular-sized clothes) should fit and flatter you and be easily accessible. There’s no time to pull together an outfit when your baby is crying in the next room. In addition, if there’s stuff in the closet that is designated for your child, sort and purge that one, too.
Kitchen cabinets
Clear out items such as old containers and expired food and relocate anything you use once a year to make room for bottles, baby food and sippy cups.
Linen closet or bathroom
Toss expired medicine and remove worn out linens to make room for baby’s linens and medical supplies.
Create lists
Whether your ‘womb-mate’ is depleting you of your brain cells or not, you still have plenty to remember. Write down everything you need to recall. Make lists. Here are a few examples of lists you may wish to create prior to your due date:
To-Do List
There’s so much to do! Register for necessities, write thank you notes, interview pediatricians, look at baby furniture and keep up with the rest of your life at the same time. Keeping a to-do list will help keep you focused on what must get accomplished before baby arrives.
Gift list
Unless you have many enemies, your child will receive gifts. It’s important to have a ‘gift’ list ready so keeping track of who gave you what and writing thank you notes will be a less chaotic task. Create the gift list on a legal pad or on the computer. Designate one place to store it so can find it when the UPS guy rings your doorbell.
Birth announcement list
If you’re planning on sending out a birth announcement, generate an address list of people you’d like to send an announcement to. The addressing of the envelopes is a perfect task to delegate. When friends and relatives ask how they can help you—hand them a pen!
Guest list
If you’re having a religious or non-religious post-birth celebration create a list of people you wish to invite along with their contact information.
Set up a filing system for your child’s papers
You’re probably thinking—papers? For a baby? Yes, not only do babies create a lot of dirty diapers they also create a lot of paperwork. These papers need a home so they’re not cluttering up your desk or kitchen counter. Their home could be a space in your file cabinet or a separate file box.
Examples of files for new baby are:
Birth certificate/Social Security card
Medical records/Pediatrician notes
Bank account/College savings account information
Baby equipment instruction booklets (yes—you should keep them…)
Gift list
Buy bins/tubs
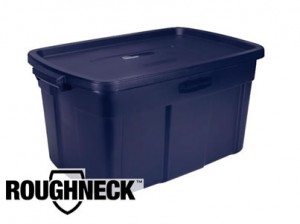
Purchase a minimum of 5-7 bins large enough for ample storage but small enough for you to lift if necessary (to an attic space or to stack in your basement). My personal favorite are the Rubbermaid Roughneck bins. Label them as follows 0-3, 3-6, 6-9, 9-12 months.
People are going to give your child clothing as a gift, You may also receive ‘hand-me-downs’ from friends or relatives with older children. If the clothes you receive don’t fit your newborn yet, place them into the bin marked with the appropriate size for future use. Also, designate a bin for maternity clothes storage. As you drop the baby weight, drop the maternity clothes in the bin.
If you don’t have the space for bins/tubs, use Ziploc brand L-XXL bags for storage. They can be easily stored under a bed or at the top or bottom of your child’s closet. A Few “Can’t-Live-Without-Them” Organizing Products:
Diaper Organizer
You’d be surprised to discover how many different products need to be handy while your baby is on the changing table. Depending upon what type of changing table you have, either one of these diaper organizers will work for you:
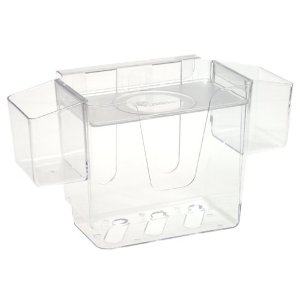
Prince Lionheart Dresser Top Diaper Depot Organizer sits on top of a changing table or dresser converted to a dressing table
Prince Lionheart Diaper Depot Organizer attaches to side of changing table
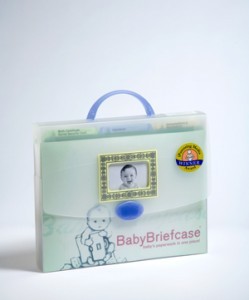
Baby Briefcase
If you have no time or desire to set up a filing system for your baby, check out the Baby Briefcase. It is a baby paperwork organizer created by a mom amazed by the amount of documents her new baby generated.
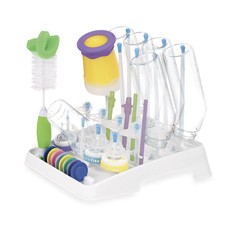
Bottle Drying Rack
Whether you breastfeed or bottle feed, a bottle drying rack comes in very handy. It helps to keep all of your baby’s bottles, nipples and breast pump supplies in one place post-cleaning. As your child gets older, it can be used for kiddie plates, spoons and sippy cups.
Getting organized is essential as you prepare for the arrival of a new baby. You’ll want to be able to find what you need when you need it—quickly—and sometimes in the dark! After your first sleepless night, you’ll be glad you took the time to create an organized environment you and your new bundle of joy.
Share this with someone who is about to have a baby or just had one. Knowledge makes a great gift…
|
A while ago, I wrote a blog post called, “Ready for Spring Cleaning?” In that post, I talked about a basic organizing principle: Make an Appointment With Yourself to Get Organized.
The process of getting organized can be overwhelming. Most people are unsure as to where or how to begin. Making an appointment with yourself to get organized is a starting point. Carving out that time to chip away at a pile of papers or sort through your sock drawer is a necessary step towards de-cluttering your home and reaching your organizing goals.
A few weeks ago, I got an email from my friend, Deb–the subject line said ‘Photo Albums.’ The email stated that she was blocking out some time one night to work on her photo albums–did anyone want to bring theirs and join her at her dining room table?
I read that email and later responded, “I’ll be there…”
You know the phrase, ‘The shoemaker’s son has no shoes?’ Well, sometimes Professional Organizers spend so much time organizing others, that projects of their own fall by the wayside. In my case, it would be photos and photo albums.
I have two small children and I take a ton of pictures and videos of them on my camera and iPhone. I download them but haven’t always kept up with the ordering of pictures and placing them in albums. My relatives are constantly asking me for pictures of my kids. I’ve bought picture frames but don’t have the pictures to put in them. The signs were there–it was time to make an appointment with myself to organize my photos and albums.
A few days before the photo album gathering I took inventory of what I had:
• one broken photo album (wear and tear from 2 kids flipping pages)
• two new photo albums (ordered months ago and still in the box they shipped in)
• pictures I had printed but not put in albums yet (already separated by child)
To prepare for ‘Photo Night’, I removed all the pictures from the broken album and sorted through and purged a few out. I removed all pictures from my first child’s second album, too. I loaded all my photo albums and pictures into a large shopping bag and was ready to go.
I only worked on my albums for an hour and a half but got a lot accomplished. I managed to put all pictures from birth to two years old in the albums designated for my eldest child. Making this appointment with myself motivated me to keep working on this important project. The next night at my own dining room table, I finished putting the pictures of my oldest child in his albums.
My next steps are to:
• Sort and purge through pictures of my youngest child.
• Put them in chronological order
• Place them in the designated album
• Check the end of each album to see the last pictures I ordered. Go on iPhoto and order copies for relatives and the albums
• Give out pictures and place the rest in albums
My goal is to finish this project by the end of May. I will be making an appointment with myself each week to make that happen and I’ll keep you posted on my progress.
Thanks, Deb for giving me the jumpstart I needed to organize my photos!

Long commute?
Live far from your family?
Got kids?
Then you probably spend a lot of time in your car.
Our cars are like a home-away-from-home. Sometimes we eat in our car. Sometimes we sleep in our car. We have TV screens and stereos and storage spaces in our cars. Yup–sounds like home to me…
So, if it’s important to keep our homes organized, it is equally important to keep our home-away-from-home organized, too.
I drive a big SUV and if I didn’t organize it, it would resemble a dumping ground on wheels. I have to organize my belongings, stuff for my kids, supplies for my business and supplies for the car just like I would organize any space in my home. When you’re ‘on-the-go’ you have to be able to find what you need quickly.
Your first step towards organizing your car is to sort and purge the items currently living in it. Once you know what is staying you’ll need a few organizing products to help you keep your home-away-from- home neat and tidy and of course–organized.
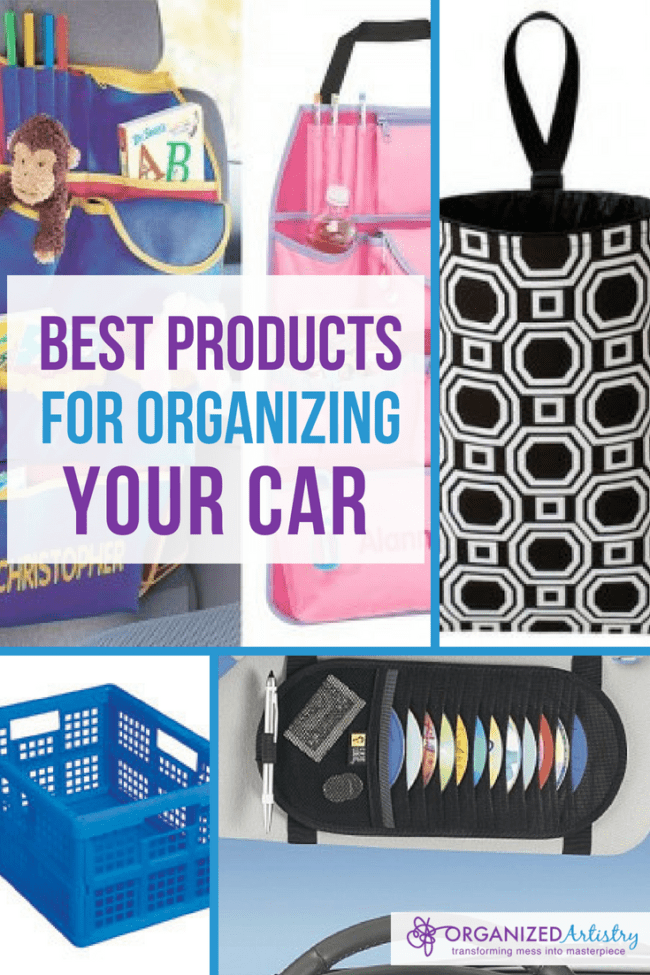
Here are a few products I use in my own car and a few that might be useful in special situations:
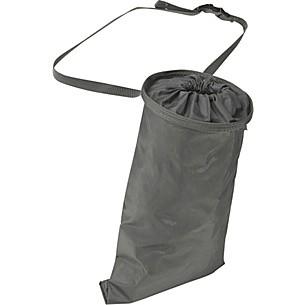
Trash receptacle – If you don’t want your car looking like the city dump. I highly recommend purchasing a trash receptacle for your car. This is the one I have by Case Logic and it works well for me. Unfortunately, it’s so old, the company doesn’t make it anymore:
I keep it thrown over my gear stick and hanging into the passenger side. It’s easy to stuff the garbage into the top and the velcro bottom opens easily to release the trash. I own this in tan to match my old car’s interior but when it has seen better days (the time is coming soon!), I’m getting one like this:
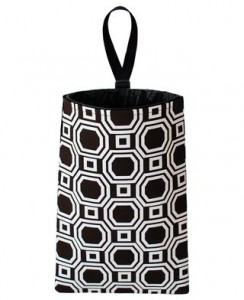 |
| Auto Trash Bag by The Mod Mobile |
There are so many fun, colorful and cool designs, I’m not sure which I would pick! Check all of them out on Allyson Hill’s The Mod Mobile Etsy site.
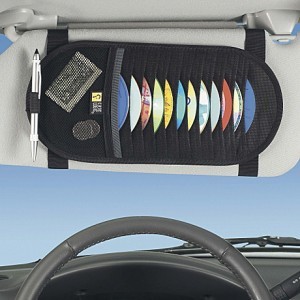
Visor CD Organizer – Downloading songs to my iPhone is on my long list of ‘Things I’d Like to Do Someday.’ So in the meantime, I’ve purchased a CD organizer for my visor–also from CaseLogic. My music, kiddie music–it’s all stored neatly and at arm’s reach.
Collapsible Crate – I got mine at a discount home store a bunch of years ago but you can find them at some office supply stores and The Container Store.
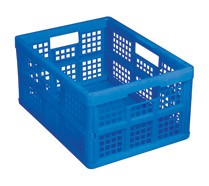 |
| Photo Courtesy of Office Max |
This is what is in mine: box of manila folders for organizing jobs, plastic bags, extra umbrella, and the ‘restaurant’ bag I’ll be discussing next. Other items that can fill the crate are groceries, car accessories, and random items that might otherwise float around your trunk or back of car.
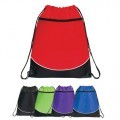
“Restaurant” Bag – I got a drawstring backpack as a promotion from a store I was making a large purchase at a few years ago. When I saw it, I knew what it would be perfect for–a ‘restaurant bag.’ I call it a ‘restaurant bag’ because it is filled with items to keep my kids occupied when we go out to eat. I keep it stocked with paper, crayons, stickers, and a package of wipes. This is kept in the crate so I’ll always know where to find it when we pull into the restaurant parking lot.
Other Organizing Products for Your Car:
The people from Tote Buddy were at the NAPO Conference 2012 EXPO with all of their beautiful designs. It would make a great gift for someone who prefers to use recycle bags when they go shopping.
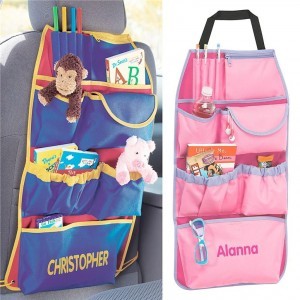
Organizer for Kids: Kids come with a lot of STUFF and they like to bring some of that STUFF with them when they go in the car. To prevent all that STUFF from being all over your car, consider an organizing product that hangs over the driver/passenger seat and faces the child. Many styles have room for crayons, hand-held games, books, DVDs and other STUFF kids like to have with them in the car.
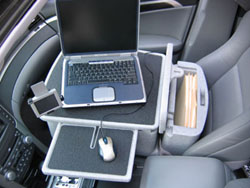
Desk: Do you or someone you know work out of their car? This product is a very good solution for those with mobile office needs. The Car Go Desk secures in the passenger seat with a seat belt and offers space for files, mobile equipment and peripherals.
OK–next time you get into your car, take a good look inside. Would any of these products make your car more organized? Do you currently use any of these products? Tell me–I’d love to know!

SaveSave
SaveSave
SaveSave
SaveSave
















 Contact Stacey to Get Started!