Archive for the ‘
Photos ’ Category

It’s summer! The sun, the water, the shade of a leafy tree and the smell of a BBQ–it’s all calling your name.
But, wait…
You say you need to get organized. Your kitchen, your closet, your papers from the last three months–all need organizing.
It’s a dilemma. Spending time outside means you’re not organizing inside.
I’m a Professional Organizer and even I don’t want to spend much time organizing when it’s 85 degrees and sunny!
The solution for the summer (as well as the other three seasons)?
Get organized in 5 minutes.
No, I’m not crazy. It IS possible to get organized in 5 minutes. You’re not going to organize your entire closet or kitchen in 5 minutes but there are teeny-tiny tasks that you can complete that will move you one step forward towards your organizing goals. And, I’ve said it a bunch of times–it’s those baby steps that will motivate you and keep your eye on the organizing prize.
Here are 10 ways you can get organized in 5 minutes:
Declutter your wallet
A bulging wallet isn’t always a sign of wealth–it can sometimes be a sign of a wallet in need of decluttering! Cash, receipts, business cards, and random scraps of paper multiply like bunnies in between clean-outs. Take 5 minutes to make space in your wallet for money to flow into it!
Create a home for an item that doesn’t have one
We’re always bringing new items into our homes whether it’s children’s artwork, a plant, a picture frame, or a new piece of technology. If the item will be sticking around for a while (or permanently), it’s going to need a place to ‘live.’ Spend 5 minutes thinking of the best ‘home’ for the item and place it in that spot.
Create a file for a new document
Papers also need ‘homes!’ Perhaps you opened a new bank account or you just received your child’s school directory. Those papers need to live somewhere (not your dining room table!). Take 5 minutes to label a file folder, place the papers inside, and store it in a spot that guarantees you’ll always be able to find it.
Delete blurry or duplicate photos from your phone
I was telling my kids the other day about how cameras used to use something called film and you could only take either 24 or 36 shots at a time. And then we had to pay to develop the whole roll regardless of what the pictures could potentially look like. And you had to carry an extra roll of film in case you ran out of shots (and flash cubes, but that’s a whole other story…).
It’s so easy to take multiple pictures of the same thing on our phones. But, that takes up precious space on our little hand-held computers. Ever spend time waiting in a line for 5 minutes? Waiting for the water on the stove to boil? Waiting for the laundry to stop spinning? All of these scenarios and many other 5-minute pockets of time are perfect for deleting blurry and duplicate photos on your phone.
Plan one meal
Does this scenario resonate with you? You come home from work or school or from taking your kids to activities and discover you have nothing in your pantry that comes close to resembling a meal. Taking 5 minutes to plan one meal in advance will save you hours in the supermarket and at the stove, put money back in your wallet, and time back in your day. You won’t feel ‘hangry’ and it may even help trim your waistline, too…
Toss expired food from your fridge, cabinets, or pantry
While you’re planning that one meal, take another 5 minutes to dispose of food that has expired or that resembles a science experiment. Sort through and purge one shelf at a time. Check expiration dates and if you’re brave enough, give leftovers the ‘sniff test.’ By doing this for 5 minutes at a time, you’ll stay on top of your food inventory and keep your refrigerator fresh and clean. Best time to do this? The night before your garbage collection.
Unsubscribe to emails from businesses/organizations you no longer make purchases from/donations to
Imagine if all of those unsolicited emails you receive daily were actual physical pieces of mail. You would have one clogged up mailbox and a whole lot of recycling to do! Get organized in 5 minutes by unsubscribing from unwanted email solicitations. It may take a few days for the ‘unsubscribe’ to take effect but those 5 minutes will have been worth it when you’re no longer using your time to sort through so many ‘junk’ emails.
Test pens and markers
Is your junk drawer overflowing with pens, highlighters, and markers? If so, spend 5 minutes finding out if they still work. This is an ideal job for kids! Give them a pad of paper and a bunch of pens and markers and have them scribble and sort–anything that still works stays and anything that is out of ink or isn’t writing as well as it should gets thrown out or recycled.
Create your to-do list for the next day
Take 5 minutes to write out your next day ‘to-do’ list before you turn in for the night. This technique has multiple benefits. It will help you sleep well–you’ll wake up knowing exactly what needs to be done. It gives your brain an opportunity to think about what needs to be accomplished and places that information elsewhere when you write it down (using paper or tech). Now you can use those morning hours to plan and prioritize your tasks instead of spending time wondering what you should be doing next.
Make your bed
It’s one of the first chores of the day and the first accomplishment of the day. It starts your morning off in a calm and organized fashion. No need to make your bed look picture perfect. Cover the bed with your blanket/comforter, smooth it out, and tidy up your pillows. Unless you sleep restlessly it should take you less than 5 minutes to make your bed. If you have a partner, split the task with them–it will take even less time!
5 minutes making your bed = Time.Well.Spent.
You CAN get organized in 5 minutes!
What 5 minute organizing task will you accomplish today?
Want to stay current and connected to Organized Artistry? Follow us on Facebook, Pinterest, YouTube, LinkedIn, Instagram, and Goodreads!

I know it’s summer, and no one likes to mention the word ‘school’ during the summer, but I want to prepare you for what is coming. I bring up the topic of ‘school’ because just like kids, parents need to start the school year with tools to make their lives easier.
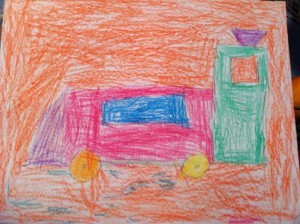
I’ve started using an app for de-cluttering my house and I wanted to share it with you so you’re ready for the day your child brings home this:
and this:
And enough three-dimesional pieces of art to fill an exhibition space at the MOMA.
The app is called Artkive…
Their tag line is: ‘The clutter free way to save and enjoy your child’s artwork’
I read about it in an article on apps for Moms about a year ago and decided to give it a try. I’m so glad I did–I LOVE IT!
True Confessions: Despite the fact I’m a Professional Organizer, I still have to deal with the influx of my children’s artwork just like you do. What I’ve done in the past was display some of my son’s artwork, have him sort and purge all of it with me at the end of the year, photograph him with some of it, keep his best pieces and toss the rest. We still take pics of his artwork if he no longer wants to keep it but Artkive has made the process a much easier and organized one.
Now, artwork comes home from TWO children and as it comes out of their backpacks, I ‘Artkive’ the work of art and place them in each child’s room either for display or storage.
If you’d like to see the top of your horizontal surfaces this school year, read on–you can thank me later…
How to start…
• Download the Artkive app (for
iPhone and Android).
• Set up an account with the name(s) of your child(ren) and their grade in school.
• Take a picture of your kid’s artwork or upload from your camera roll.
• Tag the photo with your child’s name, grade, date and title of artwork.
• Share with family and friend or turn into a book (coming soon: other products).
It’s just that simple. I haven’t created a book of my kids’ artwork yet, but it’s something I would definitely try out in the future. Currently, there are two options: 8″x8″ or 8″x11.” The cost is $25 for the first 20 pages–$1.00 for each additional page. Before holiday time, Artkive plans to expand to gifts like mugs, calendars and the like.
Why I love Artkive…
• It’s EASY to use.
• I can quickly email artwork to my husband or parents without having to first download the pictures to my computer and emailing them from there.
• All artwork is backed up in the ‘cloud.’
• It helps eliminate artwork clutter.
• It’s free. Go download it and set it up before the first day of school.
You’re welcome.
After you’ve used it for a while, come back and let me know what you think about Artkive!
CLICK HERE to sign up for Organized Artistry’s motivating monthly newsletter!
When I complete an organizing project with my clients, I remind them to give themselves a pat on the back for crossing the ‘finish line.’ My guest blogger, Rashelle Isip of the The Order Expert, believes in celebrating the completion of a successful organizing project. Read below to find out the five things she wants you to do after reaching your organizing goal.
“I finally organized my bedroom closet!”
“I filed away that giant stack of papers on my desk!“
“The cabinet under the kitchen sink is finally tidied up!”
Congratulations! You’ve finally completed an organizing project. You’re a bona fide success!
Before you happily rest on your laurels, consider these five pointers to help keep your project a success and let you bask in the glow of a job well done for many months to come.
Plan daily maintenance.
Now that you’ve finally gotten things in order, don’t be lazy and let all your hard work go down the drain! Figure out specific steps to take on a daily basis to help keep your organizing project in order. For example, let’s say you finally organized your bedroom closet. You might decide to place shoes and belts back on their shelves/racks at the end of the day, place dirty clothes immediately in the hamper and fold and store/hang clothes right after the laundry is done to keep things in order.
Take a photo.
You’ve worked hard to achieve your goal. Why not make a record of your achievement? Snap a photo on your cell phone or digital camera for posterity and save the image in an easy to access place. Refer to your photo on any organizing “rainy day,” that is, whenever you feel you’re sliding back into your old habits or are undoing your hard work for a bit of positive reinforcement and motivation to keep things organized.
Plan a smaller organizing project.
You’ll probably be feeling very good after completing your project so consider using this feeling of accomplishment into another organizing project. Keep in mind that your next project doesn’t have to be the same size as the one you just completed and certainly doesn’t have to be completed that same day or week. If you’ve just finished organizing the garage, planning to organize the basement right away probably isn’t such a wise choice. Instead of going whole hog, keep your plans to a smaller project such as cleaning out your wallet.
Share your story with others.
One of the best things in achieving a goal is sharing your accomplishment with others. Thanks to social media, it’s easier than ever share information and stories. Share your success with friends and family via your favorite social media network or tool with photos and a short story. Who knows, you might just inspire someone else to get started on or complete their very own organizing goal!
Celebrate!
Lastly, we can’t forget the importance of celebrating your achievements. Go out for a nice dinner, listen to your favorite music, buy yourself a small gift, relax with loved ones, smile, and of course, enjoy your newly organized space or materials!
Now to you…what do you think of the above? Have you ever given yourself a reward for an organizing job well done? Perhaps you have a reward in mind for the near future for an almost completed project?
Copyright © Rashelle Isip and The Order Expert, 2011-2013.
Rashelle Isip is a blogger, time management, and productivity consultant and professional organizer. She is founder of The Order Expert, a site featuring practical and creative organizing, time management, productivity tips, inspiration and much more. For more information, visit http://www.TheOrderExpert.com. You can follow her on Twitter @theorderexpert, on Facebook at facebook.com/theorderexpert, and on Pinterest at pinterest.com/theorderexpert.
About two months ago I blogged about how I made an appointment with myself to get my photos organized.
To recap: My friend Deb, in an attempt to get HER photos organized sent an email out to a bunch of friends saying that she was blocking off time one night to organize her photos–who wants to join her?
Me!
I took this opportunity to gather all the loose photos I had (some from a broken album), sort and purge them and put them into some new and existing photo albums.
After that fun photo organizing session, I created some mini photo organizing goals for myself to complete by the end of May. Well, life gets in the way sometimes even for a Professional Organizer. With June being a busy family time and a computer crisis that required my Mac to have major surgery at the Apple Store, I was unable to meet all of my mini-goals.
To add to the situation, my family took a vacation in June…to Disney. MORE PICTURES! Ahhhhh!
 |
| Me eating Mickey ice cream at Disney–Mmmmmm! |
The day we came home from Disney, another ‘lets-organize-our-photos-again’ email from Deb appeared in my inbox. I took that as a ‘sign’ and ordered pictures from iPhoto (from Spring 2012), gathered some random prints that had yet to see the inside of an album and spent another two hours at her dining room table. I’m happy to say that even though it took me longer than expected, I met all of my mini-goals.
It was that night at Deb’s dining room table that I decided to use the summer to make sure my family photo albums were up-to-date. My goal is for all of my photo albums to be finished before Labor Day weekend. I am also considering creating a photo book for our trip to Disney. That, too will be done by the beginning of September.
In an attempt to reach my goal, I tried to place an order with iPhoto this morning but it wouldn’t go through–a problem I had encountered before my computer had ‘major surgery.’ I may have to upgrade my iLife package (which I have been avoiding). That may be the solution. Or I’ll have to visit the Apple Store again. I’ll let you know in my next photo album update…
Have you made an appointment with yourself to catch-up on updating your photo albums, too? Tell me some of your mini-goals–I’d love to hear them!

A while ago, I wrote a blog post called, “Ready for Spring Cleaning?” In that post, I talked about a basic organizing principle: Make an Appointment With Yourself to Get Organized.
The process of getting organized can be overwhelming. Most people are unsure as to where or how to begin. Making an appointment with yourself to get organized is a starting point. Carving out that time to chip away at a pile of papers or sort through your sock drawer is a necessary step towards de-cluttering your home and reaching your organizing goals.
A few weeks ago, I got an email from my friend, Deb–the subject line said ‘Photo Albums.’ The email stated that she was blocking out some time one night to work on her photo albums–did anyone want to bring theirs and join her at her dining room table?
I read that email and later responded, “I’ll be there…”
You know the phrase, ‘The shoemaker’s son has no shoes?’ Well, sometimes Professional Organizers spend so much time organizing others, that projects of their own fall by the wayside. In my case, it would be photos and photo albums.
I have two small children and I take a ton of pictures and videos of them on my camera and iPhone. I download them but haven’t always kept up with the ordering of pictures and placing them in albums. My relatives are constantly asking me for pictures of my kids. I’ve bought picture frames but don’t have the pictures to put in them. The signs were there–it was time to make an appointment with myself to organize my photos and albums.
A few days before the photo album gathering I took inventory of what I had:
• one broken photo album (wear and tear from 2 kids flipping pages)
• two new photo albums (ordered months ago and still in the box they shipped in)
• pictures I had printed but not put in albums yet (already separated by child)
To prepare for ‘Photo Night’, I removed all the pictures from the broken album and sorted through and purged a few out. I removed all pictures from my first child’s second album, too. I loaded all my photo albums and pictures into a large shopping bag and was ready to go.
I only worked on my albums for an hour and a half but got a lot accomplished. I managed to put all pictures from birth to two years old in the albums designated for my eldest child. Making this appointment with myself motivated me to keep working on this important project. The next night at my own dining room table, I finished putting the pictures of my oldest child in his albums.
My next steps are to:
• Sort and purge through pictures of my youngest child.
• Put them in chronological order
• Place them in the designated album
• Check the end of each album to see the last pictures I ordered. Go on iPhoto and order copies for relatives and the albums
• Give out pictures and place the rest in albums
My goal is to finish this project by the end of May. I will be making an appointment with myself each week to make that happen and I’ll keep you posted on my progress.
Thanks, Deb for giving me the jumpstart I needed to organize my photos!









 Contact Stacey to Get Started!
