Archive for the ‘
Kitchen ’ Category
It isn’t always easy to make a decision.
It takes time as well as brain power to consider options, weigh pros and cons, and collect information. Decision-making can be stressful–you’re responsible for the outcome and your decision often affects more than just you.
It’s easier to not make a decision. But that doesn’t work in real life–especially when it comes to getting organized. If you want your home to be an organized space, it’s vital to start exercising your decision-making muscles!
Barbara Hemphill, a pioneer in the field of Professional Organizing says…
“Clutter is nothing more than postponed decisions.”
If you take a moment to think about that statement, it makes total sense.
Picture your kitchen countertops, your dining room table, your clothing closet and other areas of your home that may be cluttered. Bills, kid toys, old socks–have you been making decisions on those items or avoiding them in the hope that you’ll wake up one morning and the necessary decisions will have been made for you?
Maybe you’re putting off making decisions on items in your home because…
– you need more information or guidance before deciding.
– you need to ask another person for permission first.
– your decision may hurt someone’s feelings.
– you’re busy, you don’t have time, or it’s too emotionally taxing to think about it clearly.
By not making decisions, your belongings stay where you’ve placed them and will become clutter. They’ll keep your home cluttered and keep you stuck. Making a decision will ‘unstick’ you and move you forward.
The easiest way make a decision about physical items that are cluttering up your home is to make those decisions as easy as possible to make. Keep it simple–especially in the beginning.
How to start simply and easily? Use three words: Keep, Toss, Donate. Pick a category–shoes, books, toiletries, donation requests (or whatever is causing clutter in your home) and apply those three words to making decisions on items in that category.
Don’t think about decluttering a category or a space in your home any more deeply than that at this moment. Don’t think about where an item will live or where it should be donated to. Don’t think about how you’ll get it to the thrift shop or whether or not it will fit in your cabinet, drawer, or closet. Just look at the item you need to make a decision on and ask Keep? Toss? or Donate? Start there.
That’s your first decision–Keep, Toss, or Donate. Making that basic decision is the first step to clearing your clutter and moving you and your home in a less cluttered and more positive direction.
If you’re feeling overwhelmed by your clutter, take a deep breath and repeat out loud, “Keep, Toss, or Donate.” That’s the only decision you have to make right now–Keep, Toss, or Donate. If it helps, make it your organizing mantra! Write it on a post-it. Make it your laptop’s screen saver–whatever works for you.
To help you visualize those decisions while decluttering and keep your decluttering process organized, I’ve created a free downloadable ‘Keep-Toss-Donate’ printable for you to use. Designate three spaces (or bins/bags/boxes) in the area you’re working in–one will be for the ‘Keep’ items, one for the ‘Donate’ items and one for the ‘Toss’ items. Use the printable ‘Keep’ ‘Toss’ and ‘Donate’ tags to clearly designate your spaces and decisions. You don’t want to accidentally donate your trash or trash your donations!
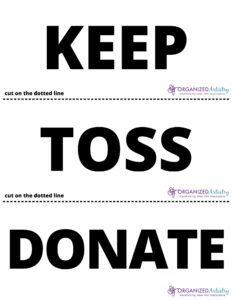
Start with the easy stuff–junk mail, pens that may/may not work, old clothes and shoes. As you practice using your decision-making muscles, move onto magazines, sheets and towels, and seasonal clothes. Use “Keep, Toss, or Donate” as the first step toward making space in your home for items that you want, use, and love.
Make a decision and watch your clutter disappear…
What decisions have you been postponing?
Want to stay current and connected to Organized Artistry? Follow us on Facebook, Pinterest, YouTube, LinkedIn, Instagram, and Goodreads!


It’s summer! The sun, the water, the shade of a leafy tree and the smell of a BBQ–it’s all calling your name.
But, wait…
You say you need to get organized. Your kitchen, your closet, your papers from the last three months–all need organizing.
It’s a dilemma. Spending time outside means you’re not organizing inside.
I’m a Professional Organizer and even I don’t want to spend much time organizing when it’s 85 degrees and sunny!
The solution for the summer (as well as the other three seasons)?
Get organized in 5 minutes.
No, I’m not crazy. It IS possible to get organized in 5 minutes. You’re not going to organize your entire closet or kitchen in 5 minutes but there are teeny-tiny tasks that you can complete that will move you one step forward towards your organizing goals. And, I’ve said it a bunch of times–it’s those baby steps that will motivate you and keep your eye on the organizing prize.
Here are 10 ways you can get organized in 5 minutes:
Declutter your wallet
A bulging wallet isn’t always a sign of wealth–it can sometimes be a sign of a wallet in need of decluttering! Cash, receipts, business cards, and random scraps of paper multiply like bunnies in between clean-outs. Take 5 minutes to make space in your wallet for money to flow into it!
Create a home for an item that doesn’t have one
We’re always bringing new items into our homes whether it’s children’s artwork, a plant, a picture frame, or a new piece of technology. If the item will be sticking around for a while (or permanently), it’s going to need a place to ‘live.’ Spend 5 minutes thinking of the best ‘home’ for the item and place it in that spot.
Create a file for a new document
Papers also need ‘homes!’ Perhaps you opened a new bank account or you just received your child’s school directory. Those papers need to live somewhere (not your dining room table!). Take 5 minutes to label a file folder, place the papers inside, and store it in a spot that guarantees you’ll always be able to find it.
Delete blurry or duplicate photos from your phone
I was telling my kids the other day about how cameras used to use something called film and you could only take either 24 or 36 shots at a time. And then we had to pay to develop the whole roll regardless of what the pictures could potentially look like. And you had to carry an extra roll of film in case you ran out of shots (and flash cubes, but that’s a whole other story…).
It’s so easy to take multiple pictures of the same thing on our phones. But, that takes up precious space on our little hand-held computers. Ever spend time waiting in a line for 5 minutes? Waiting for the water on the stove to boil? Waiting for the laundry to stop spinning? All of these scenarios and many other 5-minute pockets of time are perfect for deleting blurry and duplicate photos on your phone.
Plan one meal
Does this scenario resonate with you? You come home from work or school or from taking your kids to activities and discover you have nothing in your pantry that comes close to resembling a meal. Taking 5 minutes to plan one meal in advance will save you hours in the supermarket and at the stove, put money back in your wallet, and time back in your day. You won’t feel ‘hangry’ and it may even help trim your waistline, too…
Toss expired food from your fridge, cabinets, or pantry
While you’re planning that one meal, take another 5 minutes to dispose of food that has expired or that resembles a science experiment. Sort through and purge one shelf at a time. Check expiration dates and if you’re brave enough, give leftovers the ‘sniff test.’ By doing this for 5 minutes at a time, you’ll stay on top of your food inventory and keep your refrigerator fresh and clean. Best time to do this? The night before your garbage collection.
Unsubscribe to emails from businesses/organizations you no longer make purchases from/donations to
Imagine if all of those unsolicited emails you receive daily were actual physical pieces of mail. You would have one clogged up mailbox and a whole lot of recycling to do! Get organized in 5 minutes by unsubscribing from unwanted email solicitations. It may take a few days for the ‘unsubscribe’ to take effect but those 5 minutes will have been worth it when you’re no longer using your time to sort through so many ‘junk’ emails.
Test pens and markers
Is your junk drawer overflowing with pens, highlighters, and markers? If so, spend 5 minutes finding out if they still work. This is an ideal job for kids! Give them a pad of paper and a bunch of pens and markers and have them scribble and sort–anything that still works stays and anything that is out of ink or isn’t writing as well as it should gets thrown out or recycled.
Create your to-do list for the next day
Take 5 minutes to write out your next day ‘to-do’ list before you turn in for the night. This technique has multiple benefits. It will help you sleep well–you’ll wake up knowing exactly what needs to be done. It gives your brain an opportunity to think about what needs to be accomplished and places that information elsewhere when you write it down (using paper or tech). Now you can use those morning hours to plan and prioritize your tasks instead of spending time wondering what you should be doing next.
Make your bed
It’s one of the first chores of the day and the first accomplishment of the day. It starts your morning off in a calm and organized fashion. No need to make your bed look picture perfect. Cover the bed with your blanket/comforter, smooth it out, and tidy up your pillows. Unless you sleep restlessly it should take you less than 5 minutes to make your bed. If you have a partner, split the task with them–it will take even less time!
5 minutes making your bed = Time.Well.Spent.
You CAN get organized in 5 minutes!
What 5 minute organizing task will you accomplish today?
Want to stay current and connected to Organized Artistry? Follow us on Facebook, Pinterest, YouTube, LinkedIn, Instagram, and Goodreads!

Even as a kid, I could spot an organizing product from a mile away…
I have a clear memory from my childhood of walking into a Chinese restaurant and noticing in the back corner–a sizable round table with a small, round piece of wood on top of it. While my family ate, a large group of people were seated at that table and what happened next made my ten-year-old eyes go wide.
The patrons ordered. The waiters brought out platters of food and placed them all on the round piece of wood. Then, that round piece of wood started moving. And people started serving themselves from it. Holy-moly–it spins!
I went home after dinner and wrote in my diary:
Dear Diary, Tonight at dinner I got a really disappointing fortune cookie BUT, I saw the coolest thing at the Chinese restaurant. I MUST someday sit at one of those tables with the spinny-thing on it. It was too cool for school. But I’m going to have to find nine other people to join me at the table because they won’t seat me there by myself…
As an adult, I eventually found nine other people who enjoyed Chinese food and were equally intrigued with the spinning table top. And, yes–it was a fun time. Childhood life goal fulfilled!
When it comes to writing about cool organizing products, I often focus on a singular item. This time, I’ve chosen to declare a category of organizing products as today’s ‘Cool Product.’ If you haven’t guessed already, I’m talking about the Lazy Susan.
I know–you have the same question I do. Why is it called a Lazy Susan?
I went looking for a definitive answer and came up with a bunch of educated guesses from educated people…
In my research and reading, I found that no one really knows for sure where the term ‘Lazy Susan’ comes from. There are more myths and conflicting reports than fact.
Here are a few facts and a few theories about the Lazy Susan:
• It dates back to 13th century China and 18th century England and was probably created to replace household help.
• Some historians say that Thomas Jefferson and Thomas Edison both had daughters named Susan and both had a hand in it’s invention (not at the same time in history, of course). There is no credible proof of that theory.
• In 1891, Elizabeth Howell was granted a patent for improvements to the ‘self-waiting table’ that included making the moveable portion less noisy and preventing crumbs from getting between the table and the revolving part.
• The Lazy Susan first appeared in an advertisement in Vanity Fair magazine in 1917.
• The phrase ‘Lazy Susan’ was added to the Webster’s Dictionary in 1933.
• It found it’s way into Chinese restaurants in the 1960’s–referred to as a ‘hygienic dining tray.’
• It found it’s way into Lechter’s (who remembers the former kitchen-supply store?), The Container Store, Target, Bed Bath and Beyond, HomeGoods, and other stores many years later!
The Lazy Susan has evolved over time and has recently become a staple organizing product in many homes–and not just for use on the dining room table.
Benefits to using a Lazy Susan and why it’s such a ‘cool product.’
• A Lazy Susan offers easy access to hard-to-reach spaces
• A Lazy Susan creates storage space in awkward spaces
• A Lazy Susan easily bring items from the back of a space to the front
They come in plastic with rubber grip material, clear plastic (oh, so popular now), metal, wood, marble–so many styles, colors, and sizes. They’re flat, they have raised edges, high-sides, they have compartments. Something for everyone!
And let’s be real. Objects that spin have novelty (who doesn’t love to spin around in a chair???). And in the case of the Lazy Susan, novelty = fun. We’re more likely to use an organizing product if it does something fun–like SPIN! Just another reason why I’m declaring it a ‘Cool Product.’
Where to use a Lazy Susan?
Refrigerator
A Lazy Susan works well in a refrigerator that is deep so items don’t disappear and die in the back of your fridge. Stick your hand in, spin it, and easily retrieve what you need. Less wasted food = less wasted money and less time spent running to the supermarket.
Upper and Lower Cabinets
If you’ve ever searched for a can of soup or a box of macaroni and cheese on the top shelf of an upper cabinet, you know the struggle is real. You can’t install a pull-out drawer in most upper cabinets so how do you easily reach what you need? Install–you guessed it–a Lazy Susan. This will provide an easy-to-access rotating storage system that will allow you to access anything that would otherwise cling to the back wall of the cabinet. Similarly, install one in a lower cabinet in a kitchen or bathroom in lieu of a pull-out drawer or basket.
Corners
Corners can be difficult to access but there’s no reason why we can’t use this awkward space more efficiently. Make the most of a corner where two shelves meet or a blind corner in a lower L-shaped corner cabinet by adding a Lazy Susan. And if you have the height, consider using one with multiple tiers. I always say, “If you have run out of room to organize outward, then organize upward!”
Homework/Art Station
The ladies of The Home Edit really know how to make a Lazy Susan look fab. But don’t despair if the contents of your Lazy Susan are not arranged in rainbow order (thank you Mr. ROY G. BIV). Make homework and art-time more fun with a Lazy Susan filled with pencils, crayons, scissors, glue sticks, etc. Yes, a ‘spinny thing’ can motivate your kids to do their homework and channel their inner Picasso. Whatever works–right, parents?
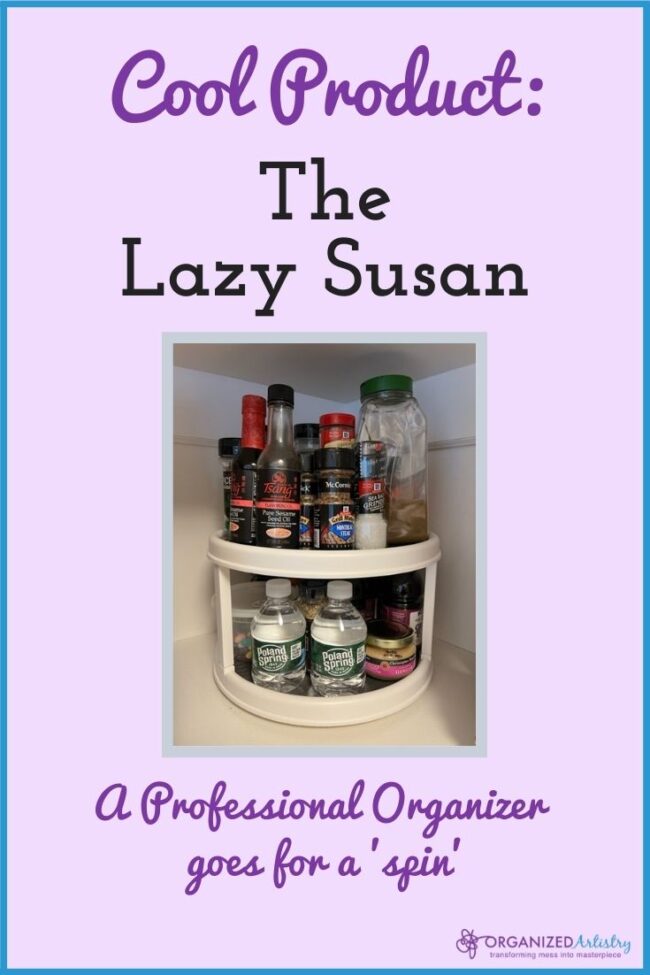
I use a few Lazy Susans in my own home. I currently have one in a corner of my pantry closet for small items such as extra spices, cans of ginger ale, and small bottles of infrequently used condiments (it’s the one in the photo above). I also use two in a narrow upper kitchen cabinet to group all of my family’s vitamins in one location.
In thinking about it, the memory in the Chinese restaurant was not my first encounter with a Lazy Susan. It was one in my mother’s kitchen. It was a lovely 1970’s gold (who remembers THAT?). It lived in a cabinet close to the cooktop and held a variety of spices. It’s probably the first Lazy Susan I ever saw but did not pay much attention to it until I was old enough to start cooking.
That Lazy Susan worked in our kitchen for close to FORTY YEARS! I recently asked my mother about it and she told me it unfortunately broke some time ago and had to be replaced by a newer 2-tiered version–NOT in gold.
So, if you’re having trouble reaching items in your closets, cabinets, or pantry OR the thought of using an organizing product that *spins* makes you giddy, give the Lazy Susan a try.
If you are the proud owner of at least one Lazy Susan in your home, share in the comments how you’re using it and how it makes your life easier. I’d love to know!
Want to stay current and connected to Organized Artistry? Follow us on Facebook, Pinterest, YouTube, LinkedIn, Instagram, and Goodreads!

As a Professional Organizer, mom of two, and former first grade teacher, I have spent much time organizing kids.
Guess which age range has the most stuff that needs organizing?
The smallest of children! For little people, they sure have a lot of things to organize!
And because they’re ‘tiny tots,’ (a name I adopted from my son’s former preschool class) they’re not as independent as a teen, tween, or even eight year old would be.
If you’re responsible for one or more of those tiny tots, you’re probably very busy. And tired. Mmmmm…more like exhausted. You have very little time or energy to keep their lives organized. When you have tiny tots, it’s rare that you have more than ten minutes to spare–especially if you have more than one child!
In the interest of saving you time, money, space, and stress (and your sanity?!?), here are 10 ten-minute tasks to tackle for organizing your teeniest of tiny tots:
10 Ten-Minute Tasks
• Purge photos from your smartphone. I KNOW you have a ton of pics of your tiny tots on your phone. I did, too (and still do…)! Take ten minutes a week to delete any blurry, red-eye, duplicate photos. You don’t want to run out of digital space and not be able to capture future milestones and adorable moments.
• Gather and carve out a small space (a lower cabinet, drawer, or basket) for kid-friendly dishes, bowls, and cups. Taking ten minutes to set this up will save you hours in the future. Creating a space for a child to retrieve a bowl or cup by themselves (and put it back after being washed) encourages independence and teaches them beginner organizing skills.
• Organize food storage containers. Purge out containers with missing lids or those that have gone through the dishwasher one too many times. With a little direction, some children as young as two or three can help match lids to bottoms and group similar-shaped containers together.
*This task is especially important if you pack your child a lunch every day for day care or preschool.
• Before heading to the market or placing an online order, take inventory of baby food, formula, and diapers. Depending upon how many kids you have, this should take you less than ten minutes but save you a lot of time, energy, and grief.
• Scan your kid’s play area for sticky, broken, or infrequently used toys and take a few moments to wash them, repair or toss them, or donate them.
• Using strips of low-tack blue tape, create ‘parking spots’ in your play space or garage for large toy trucks, doll carriages, or ride-on toys. This designates a ‘home’ for these bigger toys and just like you park your car in a lot, on the street, or in a driveway your child will park their toy in these designated spots. And if they don’t, you can play a game I like to call, ‘Mommy Meter Maid…’
(For some of my other toy organizing ideas for your tiny tots, read more here.)
• Create a ‘home’ for your kid’s favorite bedtime books. When bedtime isn’t going as smoothly as you’d like, at least you’ll know where their ‘sleepy-time stories’ are!
• Grab diapers, cream, wipes, and a mat and set up a ‘satellite’ diaper changing station in an area you spend the most time in with your tiny tots. Doing this will save you time from having to run to your changing table, from having to clean up a blowout (you know what I’m talking about…), and then having to do some messy laundry.
*Spend less than ten minutes a week refilling both diaper changing stations with more ‘supplies.’
• Similarly, use a ten minute pocket of time to take note of and re-stock the contents of your tiny tot’s diaper bag. Jot down a checklist of must-have and nice-to-have items and keep it in the pocket of the bag for reference–a real time and brain-space saver! It’s important to have a diaper bag prepared for when you want to leave the house, when you have to leave the house, or in an emergency situation.
• Take ten minutes to brainstorm more ideas for organizing your tiny tots in under ten minutes. I would say, “Take ten minutes on Pinterest to to look up more kid organizing ideas but let’s be honest–who can be on Pinterest for only ten minutes?!? So, instead please–take ten minutes to yourself. Organizing your tiny tots is important but so is self-care. And if Pinterest is part of your self-care routine–take at least fifteen if you’re able to…
Little kids are unpredictable–be realistic with your ten minutes. If you have a task you think will only take ten minutes but it really takes more, split the task in two parts and tackle them at different times of the day. And if you don’t have ten minutes one day, you’ll have it tomorrow or over the weekend. Keep these tasks as simple as possible and enlist help from a friend, family member, or kid-loving teenager.
Put these 10 ten-minute tasks into practice to make parenting ever-so-slightly easier. You’re on your way to modeling and teaching your tiny tot the how-to’s and benefits of being organized.
Want to stay current and connected to Organized Artistry? Follow us on Facebook, Pinterest, YouTube, LinkedIn, Instagram, and Goodreads!

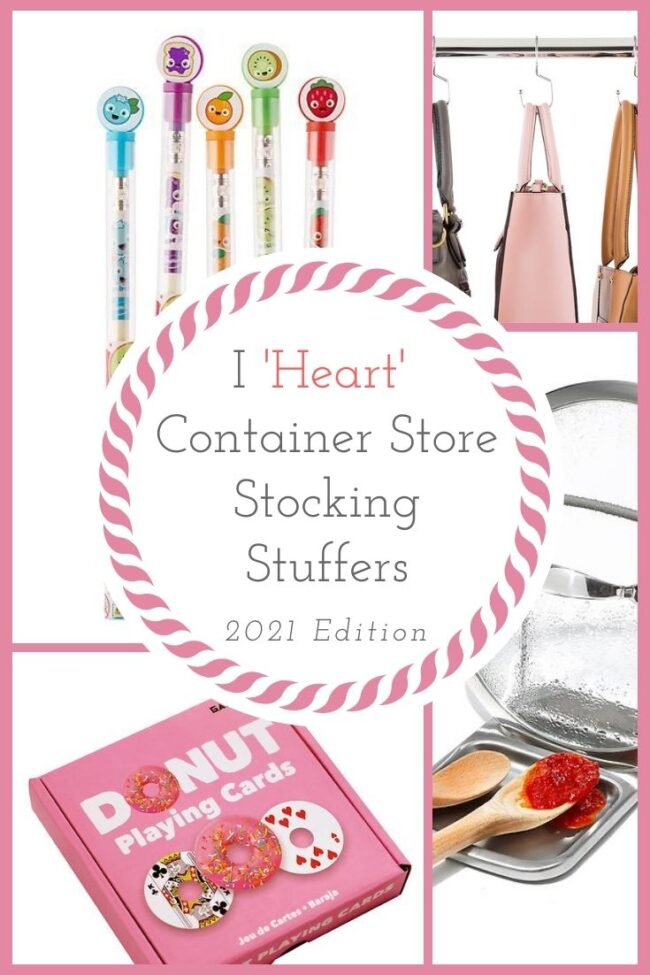
You know how some kids wait by the mailbox for the Target/Amazon (former Toys R Us) holiday catalog to arrive? For me, it’s the Container Store Stocking Stuffers catalog. I know the holiday season has begun when it appears in my mailbox nestled between bills, requests for donations, and holiday-themed junk mail.
My usual reaction to it’s arrival is to jump up and down with excitement, run to get a pen, and plop myself down in a comfy spot to peruse the pages (I consider this routine to be an act of self-care…). After flipping through the pages once or twice, I then take that pen and start circling the items I may want to talk about in my annual I ‘Heart’ Container Store Stocking Stuffers post. I also draw a big star next to the few items I’ll consider purchasing for myself.
For the past five years (plus one post in 2013), I have done the jumping, the running, the plopping, flipping, circling, and starr-ing. and the writing of the I ‘Heart’ Container Store Stocking Stuffers post.
This year, except for the writing, none of the above occurred. Like Charlie Brown checking his mailbox for a valentine, I checked my mail pile every day for a Stocking Stuffers catalog. In the past, it usually arrived in the middle of November but as I prepped for Thanksgiving, it never showed.
Sadness.
Maybe it got lost in the mail?
Maybe The Container Store chose to be ecologically responsible and didn’t print the catalog this year?
Maybe The Container Store decided NOT to curate a stocking stuffer collection for the holiday season?
FORGET I even SAID that!
Maybe all the stocking stuffer items fell victim to ‘supply chain-itis!’
I’m not crying–you’re crying!
OK, it wasn’t really that dramatic but I was still concerned about the stocking stuffers.
I decided to ask Google to take me to the Container Store website. Stocking stuffer page, please–and step on it!
And then, it took about 2.3 seconds for my fears to disappear. There were the stocking stuffers–all six pages of them. No circling items on my iPad or putting stars next to the ones I thought I might buy. I plopped on the couch, clicked instead of flipped, took notes on a scratch pad, and drew a big star next to the few items I considered purchasing for myself.
After all that drama, here is a list of some of my favorite Container Store Stocking Stuffers. They’re useful, great for organizing, perfect for the kitchen or kids of all ages, cute and fun, and one is an improvement over last year’s choice:
Organizing
Chrome Metal Purse Hanger
$9.99 pkg/6

If you own handbags and have the room to hang them in a closet, this product would be worth a try. They’re similar to an ‘S’ hook but the bottom half can twist, offering great flexibility. And they’re not just for handbags! People who have purchased this product posted pictures of the hooks being used for holding kitchen utensils, boots, and holiday decor.
OXO Spoon Rest with Lid Holder
$20.99
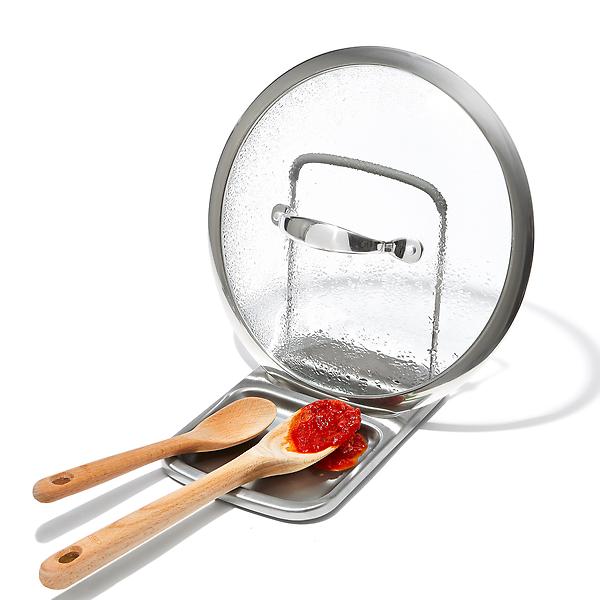
I am a big fan of OXO products. They are thoughtfully crafted and designed with the user in mind. To me, this product screams, ‘Necessity is the mother of invention.’ I can imagine that someone working at OXO had the experience of cooking a big meal with many pots and nowhere to place the lids while tasting, stirring, or sautéing. They came into work the next day and said to their boss, “I have an idea for a new product!”
I know that I am often looking for a place to put my pot lids–especially when I have four or five burners going at once. It’s a little pricey, but I may have to try this. And bonus–it folds flat for easy storage. Thank you OXO!
Kikkerland Wood Hammer Multi-Tool
$19.99
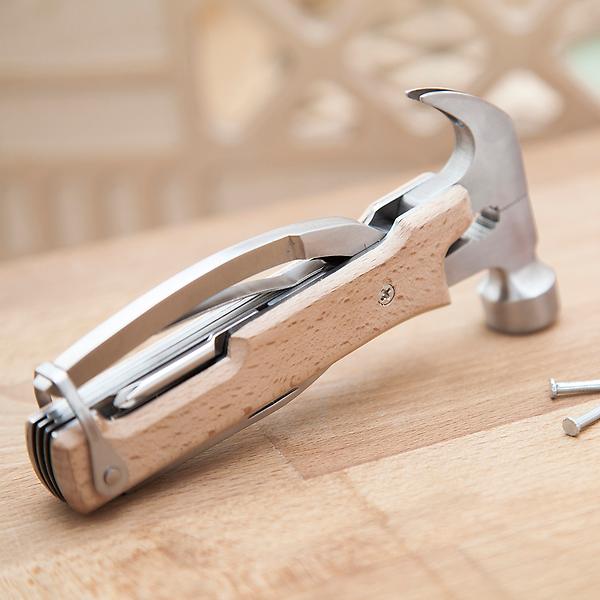
Every apartment dweller or homeowner should own a tool box filled with basic tools. This 10-in-1 multi-tool fits the bill for someone who may not have room for a tool box or the resources (or desire) to fill one. Includes a hammer, wire cutter, pliers, flat and Phillips head screwdrivers, knife blade, file, saw blade, reamer and bottle opener.
At a bit over eight inches long, it’s portable enough to carry to a friend or family member’s house to assist them with a basic repair. And, you’re the hero!
Otherwise, Useful
Vlogging Mini Tripod
$9.99
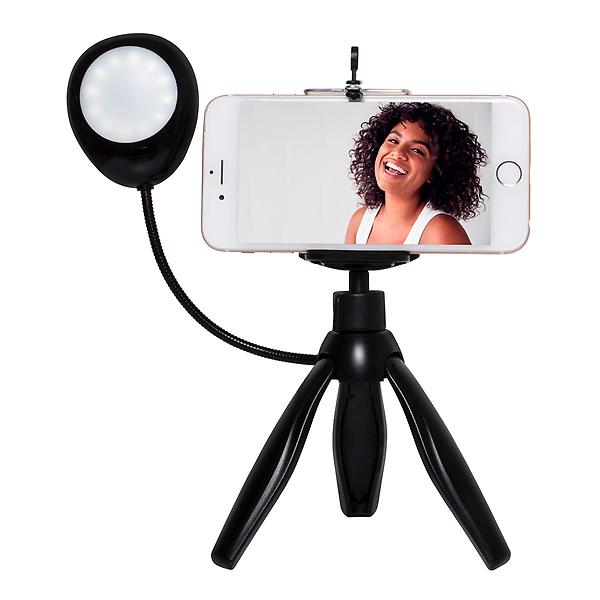
Unless you live in a cave with no wifi, it’s most likely you’ve spent the better part of the last eighteen months using your phone to communicate via video. And after all that time, if you haven’t invested in a product to create a hands-free spot for your phone, this could be the time to make a small investment.
No more leaning your phone against a tissue box or precariously placing it on a shelf. Something as small as a tripod can offer big rewards in terms of keeping your phone from falling and allowing you to move freely while on video. And–a bonus ring light!
Thumb Scraper
$4.99
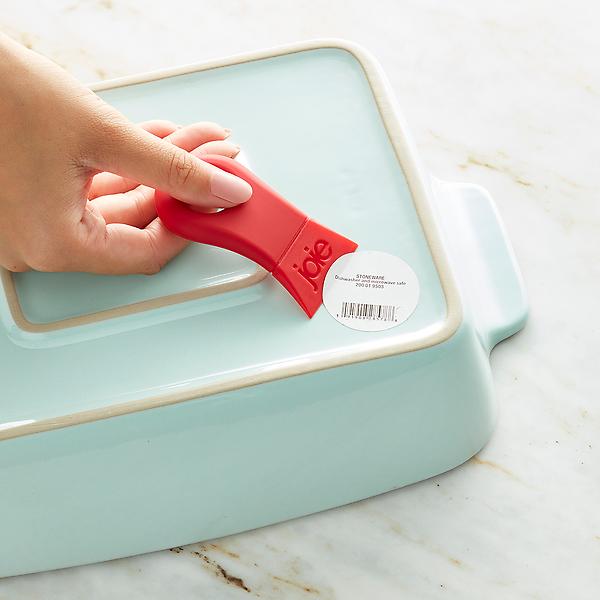
This type of product piqued my interest when I profiled the Thumb Scraper Tool in last year’s Stocking Stuffer post. Although I haven’t had a manicure in a while, I still don’t enjoy chipping a fingernail while removing a price tag. I bought this to have in my home to try and view it as a small, yet worthwhile investment. I think it will come in handy whether I’ve painted my nails or not!
Kitchen
Rainbow Scrub Sponge
$6.99
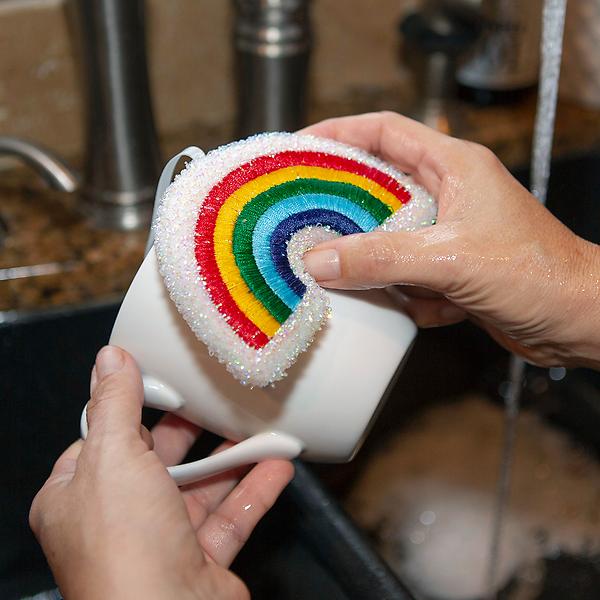
I am not the biggest fan of washing dishes. But, if I had to stand and scrub a bunch of dirty pots, I think this brightly-colored sponge would make the task a little less distasteful and a whole lot more joyful. It comes in a two-pack and it’s safe to use on non-stick cookware. They even have a loop at the top so you can hang them to dry easily.
OXO 4-Piece Mini Measuring Beaker
$10.99
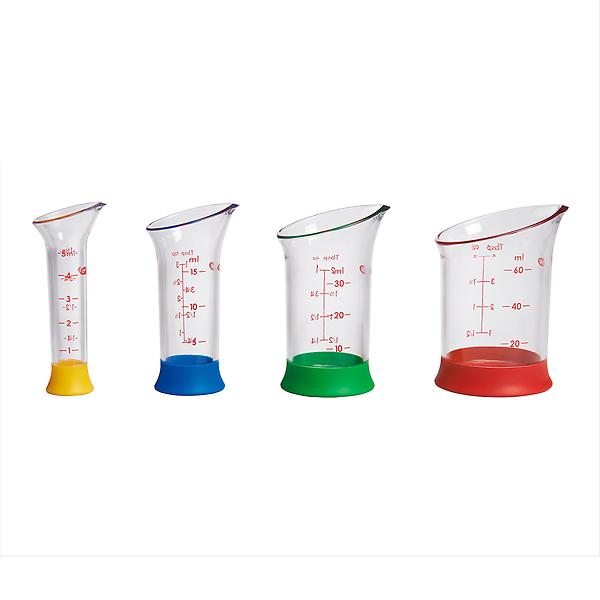 As I wrote earlier, I am a big fan of OXO products. I have a bunch in my kitchen such as spatulas, tongs, peelers, and one of my faves–OXO POP containers. They have all lasted for years and make the cooking part of my life more manageable and less energy-sucking.
When I saw these, I thought, ‘Do I need them? Because, they sure are cute!” Cooking for a family of four (with a teen and tween boy) doesn’t usually lend itself to such small measurements so I passed on purchasing them. But, aren’t they adorable? And they nest, too! Even when they’re next to each other, they barely take up much space.
Each set includes 2-oz, 1-oz, 1-Tbsp and 1-tsp measuring beakers and they’re dishwasher safe (top rack). And colorful! And, they match perfectly with the Rainbow Sponges! Ok, maybe I need to take a ride to The Container Store…
Rocket Dog Bites Baking Tray
$13.99
 Raise your hand if you love pigs-in-blankets! (Ooooh, me me me!)
In 2018, I profiled a similar product called ‘Little Pigs in Blanket Mold.’ The Rocket Dog Bites Tray appears to be a comparable product–insert rocket ships instead of pigs.
Yes, you can buy pre-made pigs-in-blankets (or as they’re called in my household:’ little hot dogs’) but you might have a blast (off) making your own rocket ship-dogs. Looks like a fun product to use with kids to teach early cooking (and cleaning up) skills. It’s oven-safe and made of easy-to-clean silicone. So easy-to-clean, you probably don’t even need the above Rainbow Sponge…
For Kids Big & Small
Balloon Animals Kit
$4.99
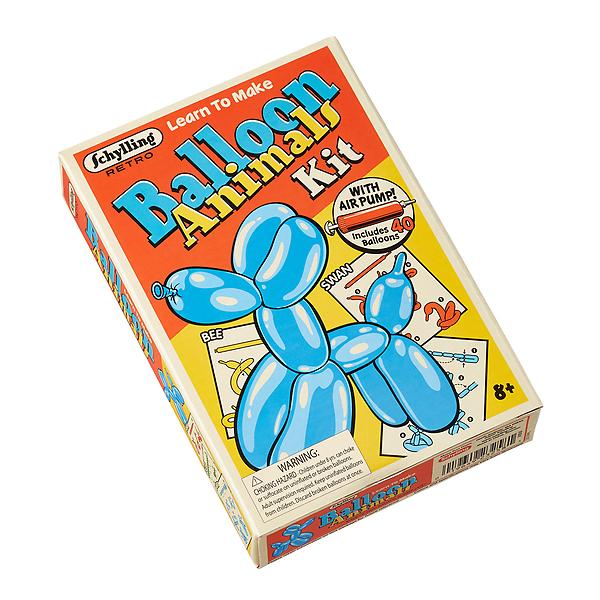
No time to enroll in Clown School? Here’s the next best thing!
It’s amazing how much joy a balloon animal can bring to a child (and many adults, too!). Learn to make six different animals. This kit includes 20 balloons, an air pump and an 80-page instruction book with photos. With this kit, your days of only being able to create a balloon snake are over!
Smencils
$6.99
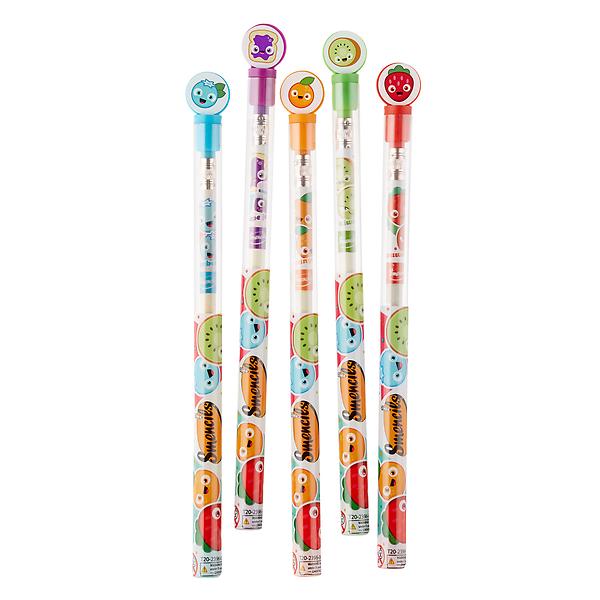
Just looking at these brought me back to my childhood. There was always one kid in my class who had fruity-smelling magic markers and didn’t mind sharing them. I loved sniffing them (admit it–you know you did, too…)!
Now, there are sweet-smelling pencils! Made from recycled newspaper, they’re packaged in their own recyclable tube and topped by a cute character cap. The set of five color-coded scents include grape jelly, orange, kiwi, blueberry and strawberry. If your kid shudders at the thought of eating fruit, using these pencils may bring them one step closer to tasting the real thing…
Cute & Fun
Donut Playing Cards
$9.99
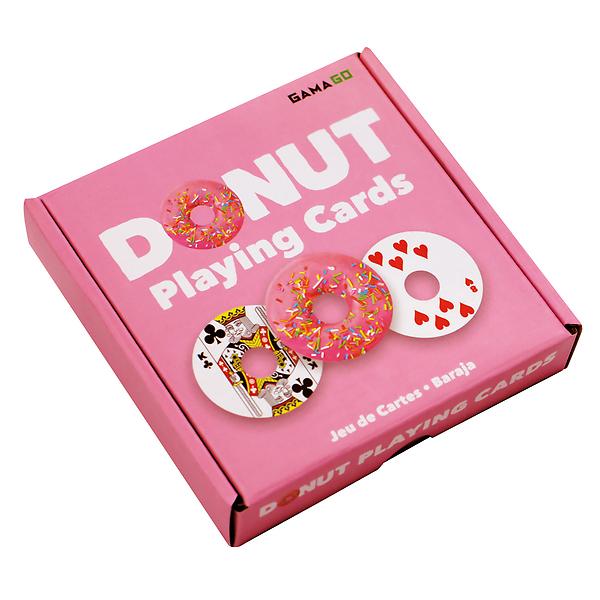
Would you care for some sprinkles with those poker chips?
Perfect for when a boring rectangular-shaped deck of cards just won’t do. Goes well with a cup of coffee!
Fred & Friends Ramen Sticky Notes
$8.99
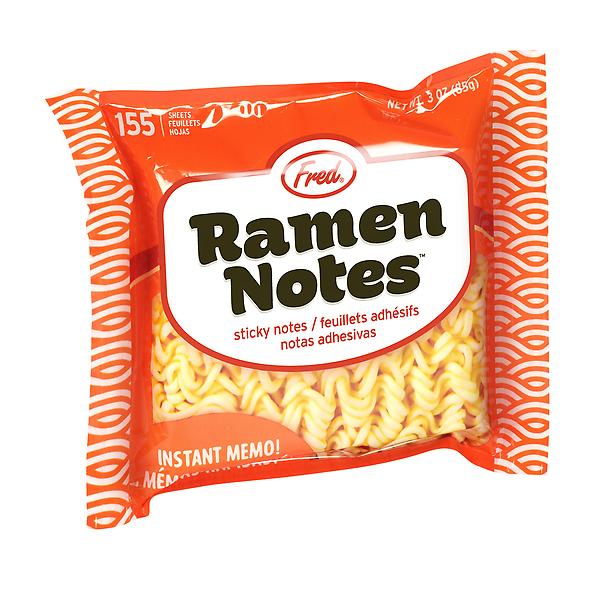
I’m not a fan of ramen noodles, but I looooove post-its. And I love the fun and whimsical products made by the Fred & Friends company. It’s the post-it note with the most amount of sodium I’ve ever seen!
If you have a friend or family member who enjoys ramen noodles, this would be a cool stocking stuffer for them. The pad has 155 sticky notes and comes in a resealable zipper storage bag. A great addition to one’s kitchen counter or desk.
Better, But Still Not a Winner in My Book…
Shoe Pourri
$9.99
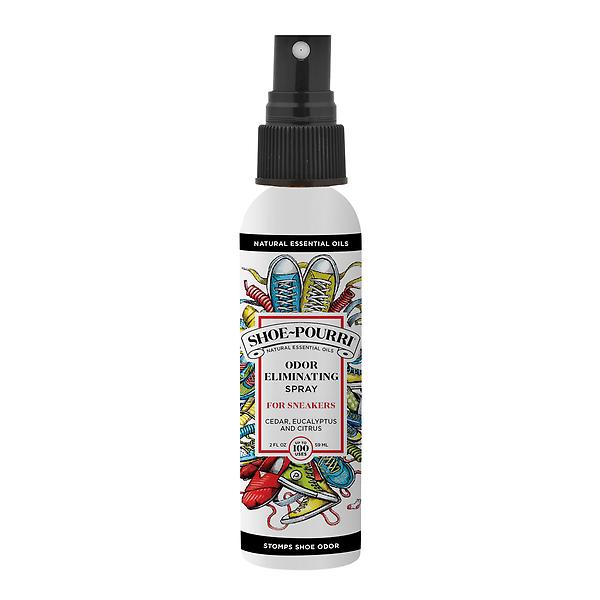
WHY is this a STOCKING STUFFER??? Is it just me or does anyone else feel that this is just NOT appropriate to give as a ‘gift?’
Doesn’t this kinda ‘reek’ of telling someone that their feet smell? “Hey! Here’s some Shoe Pourri–and Happy Holidays to you, too!”
If you must, try gifting this to the active spouse or teen in your life. Just make sure they won’t be offended by it. The last thing you want during a holiday celebration is a surly teen or horrified family member. #howtoruinaholiday
Interested in seeing the rest of The Container Store Stocking Stuffer Collection. They’re all right here!
If you received a Container Store Stocking Stuffer catalog this year, please let me know in the comments section below!
Want to stay current and connected to Organized Artistry? Follow us on Facebook, Pinterest, YouTube, LinkedIn, Instagram, and Goodreads!


If there’s one thing I hear over and over from my clients and others, it’s that one of the most challenging parts of getting organized is starting. Many people don’t know where or how to start. And we all know what happens when you don’t know where or how to start. You.Don’t.Start. (Insert sad face here)
I want you to start! And I want you to succeed. But there are a few steps you’ll need to take before you can even begin to contemplate setting an organizing project in motion. Don’t toss anything in the trash. Refrain from buying cute bins and baskets. Read on.
In order for you to get organized and stay organized, it’s necessary to ask yourself two important questions.
What is my WHAT?
and
What is my WHY?
Yup. Ask yourself those two questions. And grab either your phone or paper and pen to help you remember your answers. Let’s start with ‘your WHAT.’
Your WHAT = What do I want to get organized?
Is it…
-your clothing closet filled with multiple sizes?
-your basement filled with thirty years of accumulation?
-your overstuffed file cabinets?
-your overstuffed kitchen cabinets?
Coming up with answers to ‘What is my WHAT?’ is the easier of the two questions to answer. Your WHAT is the part that is usually easy to determine because you come in contact with it all the time in your home. You see your WHAT on a daily or weekly basis so it’s easy to name. Write it down.
Next, consider your WHY.
Your WHY = WHY do I want it to be organized?
also know as…
WHY do I want to get my ‘WHAT’ organized?
This is the more challenging of the two questions. Asking yourself WHY requires that you dig deep for answers. The answers may not be simple ones and may require the examination of past habits and patterns as well as the reflection of past decisions and choices. Pay attention to your feelings and take time to understand them. I know–easier said than done. But, being honest with yourself and your struggle to get organized will benefit you short-term and in the long run.
Let’s get back to figuring out your WHY…
WHY do YOU want to get organized? You might say…
“I’m tired of running late because I can’t find the clothes in my closet that fit me. I want to organize my closet in order to be able to get dressed in less than ten minutes. I want to look good and feel good and not start my day off stressed out anymore.”
or…
“I’ve been spending a lot of money in credit card late fees. I want to create an organized bill paying system so I can pay my bills on time, stop wasting money, and eventually raise my low credit score. I can’t save for a down payment on a house if I’m letting money slip through my fingers. I’ll never be able to buy a home if my credit score prevents me from getting a mortgage.”
or…
“I’m exhausted from always running to the supermarket at the end of my work day. I want to organize my kitchen cabinets for meal planning. I don’t want to do the ‘5 o’clock scramble’ anymore! Knowing in advance what my family and I are eating for dinner will save me time and money and may even help me eat more healthily and lose weight.”
Whatever your WHY is, write it on a post-it and hang it somewhere you’ll see it often. Make it your screen saver or your phone’s wallpaper. Keep it on a card in your wallet. Don’t lose sight of it. During the organizing process, you might feel stuck, frustrated, or overwhelmed. Go back and look at your WHY.
Your WHY will focus you and keep you on track to complete your organizing tasks.
Your WHY is there to remind you WHY you’re working hard to get organized.
Your WHY will motivate you to move forward towards your personal organizing finish line.
Just by knowing your WHAT and your WHY, you’re ready to take the next step on your path to a more organized life.
What is your WHAT and what is your WHY?
Click the image below to print a *free* worksheet to help you think about more than just your WHAT and your WHY!

This blog post is the fifth in a series of posts designed to teach you how to meal plan during times of crisis and in your every day life (post-coronavirus). If there was ever a time to consider practicing the Art of Organized Meal Planning–it’s now.
We eat every day–many times a day. When we’re not eating, most of us are probably thinking about food. When I dream about food, those dreams usually consist of mouth-watering meals and decadent desserts that I have not shopped for, prepared, or cleaned up after. When I need to think about food, it’s more like what I’ll be cooking every night for a week, what produce is on sale at my local market, and what recipe can successfully use up the leftovers in my fridge.
If I chose to keep all that cooking, recipe, and shopping list knowledge in my head, my brain would probably explode!
As I mentioned in my first post in this Organized Meal Planning series, it’s important that you use your brain for generating ideas–not as a storage device. Planning out your meals on paper or a digital device takes the everyday decision making out of your brain and places it outside of your head. This ‘write-it-down’ system is especially helpful if you’re in charge of feeding a family or you have food-related needs to consider such as food allergies, diabetes, or a low-sodium diet. Even if you’re only in charge of feeding yourself, it’s still a worthy idea to write down the food-related knowledge you need to reference on a daily or weekly basis.
For the purpose of meal planning, I’d like to discuss three types of meal planning knowledge to be organized:
Shopping Knowledge
Recipe Knowledge
Planning Knowledge
Shopping Knowledge
A lot has to happen before walking into a supermarket. We need to think about what foods we like to eat and when we want to eat them. We need to see if those foods are in our pantry and take a close look at what foods are languishing in the back of our fridge. How can we keep all of this information from turning into a food knowledge jumble?
Lists, lists, and more lists!
Lists
Why do people use lists?
Lists:
• help us to remember things
• declutter our brains
• reduce anxiety
• bring order and organization to our efforts (including meal planning)
What are some types of lists that would help take Shopping Knowledge out of your head?
• What I’ll Be Cooking this Week list (7 days of dinners or whatever # of days works for you)
• What I Need to Buy Next Time I Go to Trader Joe’s list
• What’s on Sale at Whole Foods this Week list
And the Big Daddy list: The Everything-I-Need-to-Buy-for-the-Week-at-the-Supermarket Shopping List
I would advise against trying to remember everything you need to buy when you head to the supermarket–even if it’s just a few items. Write them down on paper or in your phone–your preference. This is not the time to be testing your memory. Creating lists will keep you organized and ready to shop. The fewer trips you need to take to a supermarket, the better–virus or no virus!
Recipe Knowledge
I have been cooking for many years and have collected more than my share of recipes. No matter how often I’ve cooked certain meals, I still haven’t completely memorized any of them. I always refer to a recipe when I cook. Here are three ways I keep my recipe knowledge organized:
Paper recipes
Grandma’s handwritten apple pie recipe, a recipe ripped out of a magazine, and a print-out of your favorite Julia Child recipe all need a home–a place ‘to live’ while waiting to be used. In the organizing world, we call this place to live a ‘container.’ A container can be anything from a ziplock bag to a basket to a bin. Since printed recipes are flat, storing them in a ‘container’ that organizes paper is a smart idea. A few examples:
• A two pocket folder if you don’t have many paper recipes
• A poly paper sorter for a few different recipes across many categories
• A recipe box for recipes written on index cards
• A binder with plastic sleeves for many recipes across a variety of categories
It’s time to cook! Take the recipe out, use it, then return it back to it’s folder, sorter, box, or binder. Next time you’re planning to make Grandma’s apple pie, you’ll know exactly where to find the recipe.
Cookbooks with post-its
One would think that the abundance of recipes found on the internet would eliminate the need for the traditional cookbook, but people still buy and use cookbooks. I have a bunch and reference them often. For quick and easy retrieval of your favorite recipes, use post-its to mark the pages you wish to refer back to. No need to search the index or table of contents every time–you’ve got the page and recipe marked off. Paper post-its work perfectly, but if you’d like something sturdier, try writeable tabs that can be repositioned.
Pinterest
OMG, Pinterest. How do I love thee? Let me count the ways.
When I first started using Pinterest, I mostly looked for and curated articles about organizing. Then, I noticed there were also recipes appearing in my Pinterest feed. Lots of recipes. Recipes for family dinners, holidays, food allergies, school lunches, and more.
Early on in my admiration for Pinterest, I realized that I could create ‘Boards’ not just for topics in organizing, but also for the recipes I thought might work for me and my family. It was then that I realized Pinterest could be a valuable recipe organizing tool. At first, my Pinterest recipe board titles were pretty vague such as “Recipes – tried” and ‘Recipes – haven’t tried yet.” Now, the titles are more specific which makes it quicker and easier to find the recipe I’m looking for.
Part of the beauty of using Pinterest to organize recipes is that the recipes you want to save don’t always have to come from the Pinterest platform. Let’s say you just read an article on BuzzFeed about 5-ingredient dinners or you just watched a show on the Food Network and wish to save one of the recipes without printing it out. Most recipes found online have a ‘Pin It’ button. Click the ‘Pin It’ button or hover over and click on the main image for a clickable Pinterest logo to appear. This will prompt Pinterest to open and ask you what board you’d like to save the article/recipe to (If you have a Pinterest account, try it out on the graphic at the top of this post…).
If you appreciate Pinterest even half as much as I do, I think you’ll find it to be a fairly effortless way to organize recipes you discover online and on Pinterest.
Planning Knowledge
Meal planning takes more time and effort than most realize. Here are a few ways to keep all of your meal planning knowledge organized and ready when you are:
Evernote
Much like the above-mentioned Pinterest, I have the same feelings of love and affection for Evernote. It’s a note-taking app that stores every piece of information you could ever need to keep track of and retrieve for yourself or others. Before I started using Evernote, my brain was a whirling dervish of details and data and my surfaces were dotted (more like–covered) with post-it notes.
How has Evernote revolutionized the way I organize my meal planning knowledge? Two main ways…
• Everyday dinners
• Holiday meals
Everyday dinners
I have about 30-40 different meals I make for dinner and rotate them over a series of 4-6 weeks. Keeping a list of them in Evernote frees up space in my brain. Organizing the meals by categories that are helpful and meaningful to me cuts down on the time spent thinking about what to cook on a particular day. One category is food type (poultry, meat, vegetarian), one category has to do with occasions (easy meals for busy afternoons with kids) and one category is for the food allergies we monitor in our household (meals with no allergens, meals with one allergen, etc.). When I’m meal planning dinners for the week, I open this file and my choices based on my family’s schedule and what’s on sale at the market are right in front of me.
Insert *sigh of relief* here…
Holiday Meals
Since we renovated our home over four years ago, we have taken on the hosting of more holiday meals. All of my notes, links to recipes, seating arrangements, and shopping lists are in Evernote. They are listed individually by holiday by year with a post-mortem included so I have a note of what worked and what didn’t. This has made hosting the holidays infinitely easier. No more trying to remember how many pounds of chicken I bought for twenty people. No more wondering what recipe I used for the Thanksgiving sweet potato casserole. It’s all in Evernote.
Insert a ‘happy holidays’ *sigh of relief* here…
Meal Planning Apps
Have you ever considered using a meal planning app? There are meal planning apps for families, for those with dietary restrictions, those who need a little help in the kitchen, and those who wish to connect with food bloggers and ‘foodies.’ If you think a meal planning app will help keep you organized, check out the information in the articles below. You just may find one that works for you!
The 8 Best Meal Planning Apps of 2020.
The Best Meal Planning Apps to Download Right Now
10 Meal Planning Apps You Need to Have to Get Healthier Easily
Meal planning notebook
I’ve been meal planning and cooking for my family for years. I know what dinners my family enjoys (they’re all listed in Evernote!) But, like I’ve said above–I can’t hold the list of dinners I cooked last week or last month all in my head. I don’t always remember the last time I made spaghetti and meatballs for dinner or how many times we did ‘take-out’ in a month. We are a food allergy household and I find it helpful to know what I’ve served for dinner and when.
That’s where my meal planning notebook comes in handy. Since the beginning of coronavirus lockdown, I started using a spiral notebook to track what I cooked for dinner. I wrote the days of the week down the left side of the page and next to each day, jotted down what I cooked for dinner that night. At this point, I have pages and pages of what I’ve made for dinner for the past five months. Having this information at my fingertips has saved me time and mental energy at meal planning and list-making time. As I plan meals for the week ahead, all I have to do is turn back a few pages to see what I’ve prepared and when I’ve served it. This has made meal planning so much simpler for me at this time. I appreciate the fact that my brain has room to think about what’s most important right now–staying safe.
Ready to make lists, take inventory, and plan for shopping and eating? I know you are!
What shopping, recipe, and food planning knowledge will you take out of your head and organize today?

This blog post is the fourth in a series of posts designed to teach you how to meal plan during times of crisis and in your every day life (post-coronavirus). If there was ever a time to consider practicing the Art of Organized Meal Planning–it’s now.
*Note – This is not a Sponsored Post. I’m blogging about a ‘cool product’ that works for me. All words, photos, and opinions are my own.
My kids are fourteen and ten years old now but I remember a time when they were little and I carried around A LOT of stuff for them. I owned a stroller with a large basket so I would have plenty of space to store extra diapers, toys, snacks, and anything else we would need when away from home.
There are a million and one products marketed to new parents but one that I found to be most useful was The Mommy Hook. David Abels, dad of three and the inventor of The Mommy Hook, knew that he and his wife could not be the only parents that couldn’t push a stroller, keep an eye on a child (or two), and carry a multitude bags at the same time. In 2006, The Mommy Hook was born and millions have been sold worldwide. I remember hanging everything from a diaper bag to shopping bags to whatever I needed handy for my young children from that giant hook on my stroller’s handle.
If you’re unfamiliar with the product, learn more about it here.
I own three Mommy Hooks plus a mini one that must have come packaged as a bonus.
OK–you’re probably thinking, ” What does all this have to do with getting organized for meal planning?”
I’m so glad you asked. Here’s my story…
Before the schools closed in mid-March due to the coronavirus, I had a feeling that we would be heading into some kind of lockdown situation. My husband and I took a deep dive into our pantry, fridge, and freezer, then made shopping lists, and split up to hit 4-5 different markets in our area in the span of a few days. I went into meal-planning mode and planned out our meals so I wouldn’t have to go to a supermarket or rely on delivery for a while unless absolutely necessary. I went three weeks straight without food shopping–only using what I had in the house to feed my family.
With four people continuously home and continuously eating for three weeks, it was eventually time to head to the supermarket. Trying to avoid crowds, I ventured out in the late evening to my local 24-hr. ShopRite. Since I hadn’t food shopped in almost a month, my huge order overflowed my shopping cart at checkout. Even with carrying some of the bags on my arm and pushing the cart to my car, a few bags fell off and some cans and boxes got dented. As I stood in the parking lot, exhausted from shopping under coronavirus-conditions at midnight, I knew there had to be a better way. It was in that moment that I remembered The Mommy Hook.
I hadn’t used one in years but I knew that it was exactly what I needed to ensure my trips to the supermarket were easier and more organized. I thought, “If it could work on the handle of a stroller, it could work on the handle of a shopping cart!”
Even though I hadn’t used a Mommy Hook in about six or seven years, I located them, dusted them off, and placed them with my recycle bags to take with me on my next food shopping trip.
Fast forward three more weeks. Time to do another big late evening shop at ShopRite. I brought two Mommy Hooks with me and at checkout, placed 3-4 bags with ‘like’ items on each–light stuff such as chips, pretzels, and bread products, and hooked them to the handle of my shopping cart. Easy-peasy! I got some strange looks from people but I didn’t care. I breezed out of the store, pushed the cart to my car confident that this time, nothing would fall out. I unhooked the Mommy Hooks from the shopping cart handle and placed both with the shopping bags still attached to them, straight into the front seat of my car. When I got home, I grabbed each hook and brought the bags of groceries into my garage.
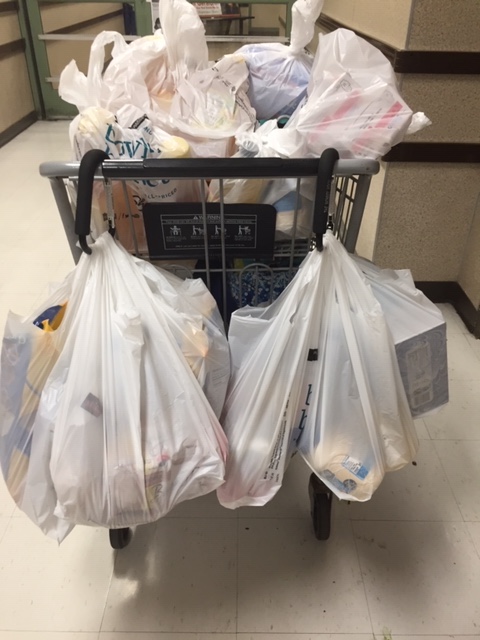
So.Much.Easier.
Remember–I was doing all this around midnight–when you’re tired, everything needs to be easy!
But, The Mommy Hook isn’t just for use on the way out of a supermarket. You can also use The Mommy Hook on the way in to the supermarket. Clip it to the handle of your shopping cart and hang your recycle bags from it while you’re shopping. If you’re buying as much as I am lately, you need all the space in the cart you can get!
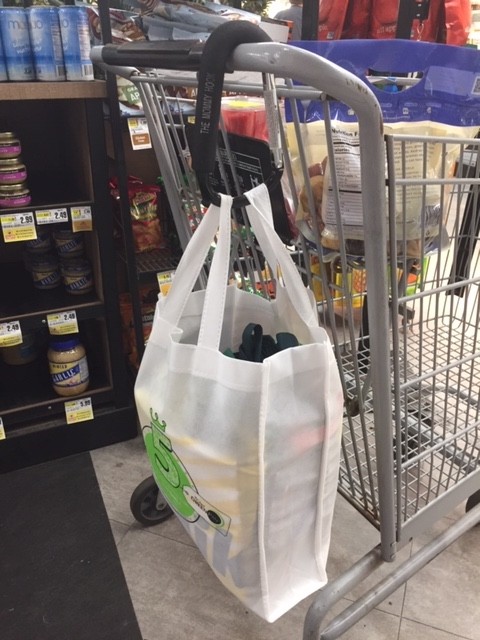
Mommy Hook features:
• Made from lightweight but heavy-duty aluminum
• Soft foam rubber grip prevents slipping and sliding on a shopping cart handle
• Soft foam rubber grip can be grasped comfortably as a handle
• Large enough to hold many grocery bags at once
• Fits most shopping cart handles
Mommy Hook benefits:
• can be used to organize bags of ‘like’ food items together
• creates more space for groceries and bulk items in the main section of a shopping cart
• can be used as a central location for anything you need to access quickly while shopping
Price: from $7.99 – $9.99 depending upon where you buy it.
Worth.Every.Penny.
Years ago I purchased mine at BuyBuyBaby in New Jersey but a quick Google search showed me that they can be purchased at Target, Walmart, Bed Bath and Beyond, and of course, Amazon. If you’d prefer to shop local, check stores in your neighborhood that cater to babies and young children.
Think The Mommy Hook would work for you as one of your organized meal planning tools? Let me know in the comments section below!

This blog post is the third in a series of posts designed to teach you how to meal plan during times of crisis and in your everyday life (post-coronavirus). If there was ever a time to consider practicing the Art of Organized Meal Planning–it’s now.
Do you have a mantra?
A mantra is a statement or slogan that is repeated frequently. It’s often a positive phrase used to motivate, encourage, and inspire yourself or others to achieve a particular goal.
You may have a personal mantra for meditating, feeling empowered, or for living your life. You may even have mantra or two to help you get through this pandemic we’re currently living through.
But, do you have a mantra for meal planning?
I’ve been ‘head chef’ of my household for almost twenty years. That’s twenty years of breakfast, lunch, dinner, snacks, holiday meals, brunches, and the occasional barbecue. Since going on lockdown in mid-March due to the coronavirus pandemic, I’ve done an inordinate amount of meal planning and cooking. Three meals a day plus snacks for my family of four has kept me (and our dishwasher) very busy. I’ve mostly stuck to ‘crowd-pleaser’ meals and familiar foods to help make this time in our lives dare I say–more palatable.
The more time I spend in my kitchen, the more I find myself repeating a few food-related sayings. I say these phrases so often, they’ve become my meal planning mantras. I sometimes even hear my husband and kids repeating them!
BTW…While I was composing this blog post in WordPress, my 10 year old son walked into the room. He looked at my desktop screen and the image quotes below and asked me what a mantra was. After I told him, he looked at me and said, “Mommy you say ALL of these–a lot!”
Here are my top three favorite meal planning mantras for crisis time or any time:
MANTRA #1: Cook Once. Eat Twice!
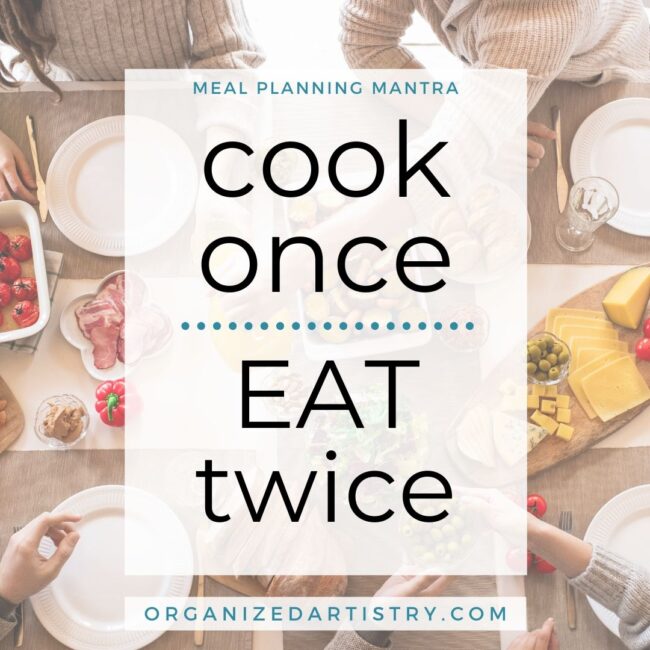
Many of us are spending more time than usual eating at home. That’s a lot of meals–especially if you are feeding a family day after day, week after week (and now month after month).
I have been saying Mantra #1 for years. It brings me great joy to cook once and eat twice. It’s a major time saver to not have to prepare each component for each meal every day! The ‘cook once and eat twice’ philosophy requires thought and meal planning but not a lot of extra prep time.
A few ways to ‘cook once and eat twice’ during crisis time or any time:
• Cook enough of a protein at one time for two different meals. For example, cook enough chop meat to be used for tacos one night and bolognese sauce a few days later. Make roasted chicken for dinner and shred the leftover chicken for chicken tortilla soup to be eaten over the weekend.
• Cook enough for two complete meals. Take out those large pots you use at holiday time and double your recipes!
• Use a crockpot. A crockpot makes a ton of food. And you can ‘set it and forget it’ while you’re spending your time working, cleaning your home, keeping your kids occupied, and of course–meal planning.
Think about it: What foods would you like to ‘cook once and eat twice’ this week?
MANTRA #2: Keep it Simple with Kit Meals
If you’ve been a fan of the Food Network for over two decades like I have, you’ve watched a whole lotta cooking shows. One show from 2005 that inspired the above mantra is called ‘Cooking Thin with Kathleen Daelemans.’ It wasn’t just an in-studio how-to show demonstrating low-calorie recipes. Chef Kathleen helped ordinary people with food challenges and taught them about meal planning, goal setting, and gave them tips on cooking lighter. One tip I recall and use in my home is the basis for Meal Planning Mantra #2.
Chef Kathleen often spoke about how keeping a pantry filled with healthy foods would support a healthier way of eating. She would pull items off the shelf that worked together to create a healthy meal and referred to them as ‘kit meals.’ I started using that phrase more often after I had children. Having to come up with fairly healthy dinners without using much brain power (sleep deprivation will do that to ya) led me to create ‘kit meals’ for my family. A box of fish sticks with a box of mac and cheese and a steam-in-bag of mixed vegetables was a ‘kit meal.’ A package of chicken cutlets, one lemon, a bag of Trader Joe’s kale and a box of Near East Toasted Almond rice was a ‘kit meal.’ As long as I had all of the components to the kit meal and a way to keep on top of my pantry inventory, I could feed my family simply and easily. Thanks, Chef Kathleen!
Think about it: What kind of ‘kit meals’ could you make for your family?
MANTRA #3: The ‘L’ in Lunch Stands for Leftovers
Of the three meal planning mantras, I think this one is my favorite. It’s also the most recent one I’ve come up with. If I’m not running errands after working with a client, I come straight home and eat lunch. So as not to waste food, I try to make sure I eat leftovers at lunch time.
At the moment, I am not working with clients in their homes. I am in my own home eating lunch with my family every day and going food shopping as infrequently as possible. In an attempt to make sure none of our food went to waste, I created Mantra #3. It’s actually a take-off of a mantra I’ve chanted to my children over the past few years:
“The ‘M’ in “Mommy’ Does Not Stand for MAID!”
It’s a great title for a children’s book. I’ll keep that in mind when I’m not so busy meal planning…
To prevent food waste, I have been managing the leftovers in our home for the past few months #likeaboss. During the early days of lockdown, I would stand in front of the refrigerator and tell my family that if there were leftovers in the fridge, they had to be eaten for lunch. That’s when I would say (OK–yell) “The ‘L’ in Lunch Stands for Leftovers.” I think if my family put a dollar in a jar every time I repeated this mantra over the past few months, we’d have enough money to pay off our mortgage. It has gotten to a point where my husband and kids won’t think about making something for lunch without looking for leftovers first!
When planning your meals, consider cooking enough to have extra servings for leftovers. Even if there’s one portion of food left from dinner, that’s one meal someone can eat for lunch.
Leftovers: Plan for them. Eat them. Don’t forget about them!
Think about it: What leftovers can you eat for lunch tomorrow?
Tell me! What are some of your favorite meal planning mantras?

This blog post is the second in a series of posts designed to teach you how to meal plan during times of crisis and in your everyday life (post-coronavirus). If there was ever a time to consider practicing the Art of Organized Meal Planning–it’s now.
With most of the country required to adhere to ‘stay at home’ orders, it’s just not practical or safe to be running out to the grocery store on a whim for today’s lunch or dinner. It’s time to start planning out the meals you prepare for yourself and your family. In my last blog post, I discussed the benefits to meal planning and shared my seven step system for meal planning success.
Ask anyone who has been meal planning for awhile whether they think it’s worth doing and I’m sure a majority would agree with a resounding, ‘YES!’ Meal planning saves you time, money, energy, and stress. It automates the process of what you and your family will eat every day. Three times a day. Not including snacks. That’s a lot of thinking about food that your brain doesn’t need to do on a daily basis! Meal planning prepares you with fuel for your body and brain and in unpredictable times such as these, meal planning will keep you safe.
To assist in keeping your tummies full, your brain less stressed, and your health in check, I’ve gathered some meal planning do’s and don’ts to help you reach your meal planning goals:
Organized Meal Planning Do’s and Don’ts
General Organized Meal Planning Do’s and Don’ts
Do pick a day of the week to do your meal planning. Many people choose a Saturday or Sunday but it doesn’t matter what day you set aside for meal planning as long as your meal planning gets done.
Don’t worry about meal planning on the same day every week. Just make sure you meal plan before leaving for the grocery store.
Do start small, start easy, and start where you are. No one learns to meal plan for a week at a time overnight. It takes practice, know-how, and desire.
Don’t become overwhelmed with meal planning. If you’re new to the concept, start by meal planning for one day. When you become more comfortable with meal planning, try doing it two days a week. Baby steps eventually reap big rewards.
Do your meal planning when your energy levels are at their highest. You need a good amount of brain power to meal plan successfully.
Don’t meal plan when you’re tired, frustrated, or hungry!
Do inventory your pantry closet and cabinets before buying more food and household goods.
Don’t forget to check your fridge for any foods about to turn green. ‘Almost-green’ food items can be turned into a meal with a bit of creativity.
Organized Meal Planning During Crisis Time or Anytime Do’s and Don’ts
Do block out at least one hour for the task. In the first post in this series, I discuss the process for meal planning. It takes time to check your pantry, look at recipes, and make your list–I promise you it will be time well spent.
Don’t rush through the meal planning process. Meal planning will save you time, money, stress, and energy. Giving meal planning the time it requires for success will make your life easier when you go to prepare meals and feed your family ALL DAY LONG. EVERYDAY. For the UNFORSEEN FUTURE…
Do choose recipes/meals that members of your family enjoy eating. This is a stressful time already. Planning and preparing what I call ‘crowd-pleaser’ meals keeps family members happy and willing to eat leftovers!
Don’t deprive yourself of certain indulgences if they are in your budget. Our bodies crave certain foods–even more so in times of crisis. If a more expensive cut of meat or a cake from your favorite bakery will make you or a family member happy, then plan for it.
Do check your store circular for sale items to build a meal around. Meal planning from the sale circular is a tried-and-true money-saver!
Don’t cook many meals that require expensive or ‘for-one-recipe’ ingredients. Save these recipes and ingredients for a time when the economy is more stable. You’re going to want to celebrate when this is all over, anyway!
Do plan out at least 3-5 days of meals with a week’s worth being optimal.
Don’t run to the supermarket every day. At the time of writing this, we are still being advised to leave the house for essential items as infrequently as possible. For this reason alone, it is imperative to jump on the meal planning bandwagon and make it a part of your weekly routine.
Do check your calendar before planning your meals for the next few days. Maybe you have a late afternoon Zoom meeting on Thursday or an early evening birthday drive-by on Sunday? You’re going to want to plan for quick-cook or easy-to-serve meals for those days.
Don’t think your calendar is just for jotting down events and reminders! Write the meals you’re cooking in your calendar to keep track of what you’ve cooked and when. You’ll know exactly which Tuesday you made tacos and which Sunday you chose to indulge in take-out. No need to strain your brain thinking about what meals you’ve prepared in the past–it’s all in your calendar.
Organized Meal Prep and Cooking Do’s and Don’ts
Do review your recipes before heading to the store. Write all ingredients on your shopping list to ensure you’ll have what you need when you start cooking.
Don’t think you can keep it all in your head. Recipes, ingredients, family favorites–take that information out of your head and write it on paper or in your phone/tablet. Use your pantry or cabinets as storage space–not your brain!
Do consider doubling your recipe or making a bit extra while you’re cooking (if you can). This will save you time in the future when you’re looking for a quick lunch or an easy-to-reheat meal for the family.
Don’t let leftovers go to waste! Not eating leftovers is a waste of money as well as the time it took you to cook it. Organize your leftovers on one side of your fridge or at eye level so you don’t forget about them.
Do plan to cook with fresh vegetables within the first few days of bringing the home from the supermarket. Unless they are a hearty vegetable like squash, carrots, or onions, there’s the possibility that your veggies will wilt or become mushy if not used quickly.
Don’t forget that frozen vegetables have similar amounts of nutrients as fresh. They are often harvested when they’re at their freshest. So, go ahead and buy some for your freezer. They’ll be there when you need them.
Meal planning may seem challenging and time-consuming but like any other task, the more you do it, the easier it gets. Remember to start small, start easy, and start where you are. Your meal planning efforts will become effortless in no time.
Which set of Do’s and Don’ts do you think you’ll find most helpful? Leave a comment–I’d love to hear from you!


 As I wrote earlier, I am a big fan of OXO products. I have a bunch in my kitchen such as spatulas, tongs, peelers, and one of my faves–
 Raise your hand if you love pigs-in-blankets! (Ooooh, me me me!)




 Contact Stacey to Get Started!