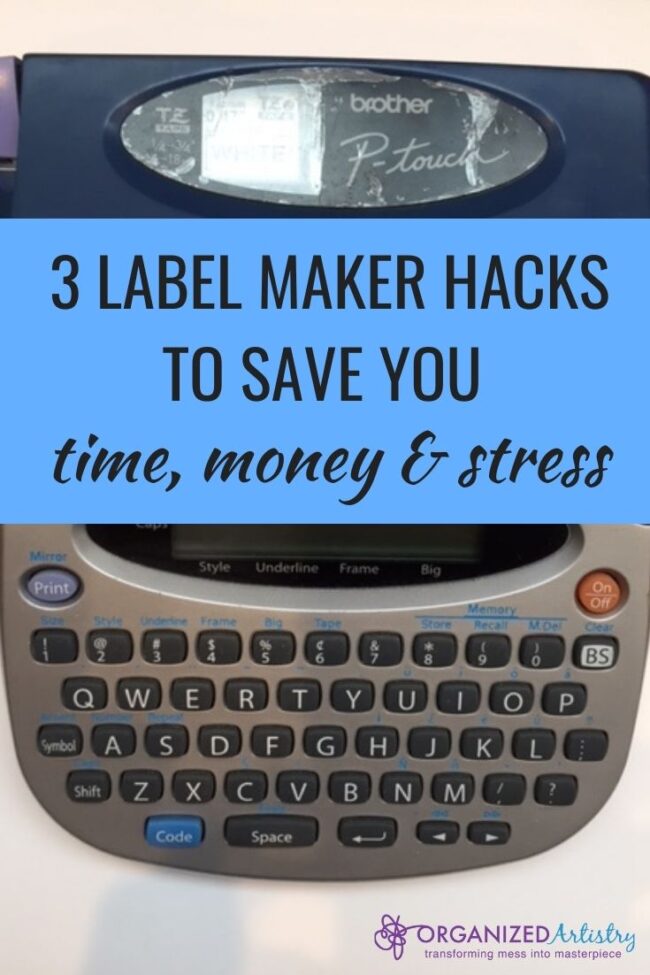
Good morning, class! Welcome to Label Maker Hacks 101. I’m Professor Murray and in today’s lesson we’re going to be discovering 3 label maker hacks to save you time, money, and stress.
Please take out your label maker, place it on the desk in front of you, and make sure the batteries are working. We’ll start off with some fingertip exercises, a quick review of the QWERTY keyboard, and then move on to today’s lesson.
If you have walked into my lecture hall by mistake but wish to stay and learn, please refer to my blog post: 5 Reasons Why You Should Own a Label Maker. It is required reading for the Label Maker Hacks 101 course…
No need to take any notes–I have all the label maker hack details outlined for you below. Let the learning begin!
Todays Lesson: 3 Label Maker Hacks to Save You Time, Money, and Stress
Hack #1: How to Save Tape
If you do not own a label maker you may not be aware of the fact that although a new label maker often comes with one ‘starter’ tape cartridge, in order to print more labels, you must purchase more tape cartridges. They can be purchased individually, in 4-packs, and in bulk.
When printing a label, the label maker leaves the first approximately half to three-quarters of an inch of tape blank and then starts printing the word(s) or phrase. After it has been printed, the label maker leaves another half to three-quarters of an inch blank on the right side of the word/phrase.
That’s A LOT of WASTED label tape. Wasted label tape = wasted money
For those who own label makers, you know how quickly a tape cartridge can run out of tape–usually in the middle of typing a long phrase or when you need to it to print out quickly (not that I have any experience with either of those…ahem…).
I’ve been using my label maker on the job and in my home for close to twenty years and in that time, I’ve discovered a way to save label maker tape. This works especially well when needing to print many related labels such as for folders in a file cabinet or for kid’s school supplies.
Here’s how you do it:
1-Think about your needs. What are you labeling? Spice jars? File folders? Pantry shelves?
2-On paper or on your phone, write the words or phrases you wish to create labels for.
3-Type those words/phrases into your label maker. As you type, press the space bar 5-6 times between each word/phrase. This will create a small blank space between each word/phrase.
4-Press the ‘Print’ button and watch your label maker miraculously give birth to one long label with all of your words/phrases on it.
5-Use the built-in cutting tool to separate the label from the label maker.
6-Use a scissor to cut in between each word/phrase.
Look how much label maker tape you’ve saved!
This label maker hack will eliminate a bulk of the wasted tape on both ends, saving you inches of tape and piles of money.
Hack #2: Keep Your Font Sizes and Styles on Display
Every label maker is different but most offer the user multiple font styles and font sizes to choose from.
Depending upon how old or new your label maker is determines how many font styles and font size options it has. I own a nineteen year old label maker so I only have 5 font sizes and 9 styles. Newer models have upwards of 14 fonts and 10 font styles.
When creating labels for a project, I like to be able to offer my clients some size and style options. Sometimes the nature of the project dictates what size and style font to use. Attic bins need the largest font while small objects require the use of the smallest font. But, sometimes we’re able to use any size and style–that’s when I ask my client to consider their choices.
In order to show my clients their style and size choices without printing all of them out on the spot (and repeatedly using an excessive amount of label tape), I devised a system that would save me precious time and precious label maker tape.
Here’s what I did–I advise you to do the same:
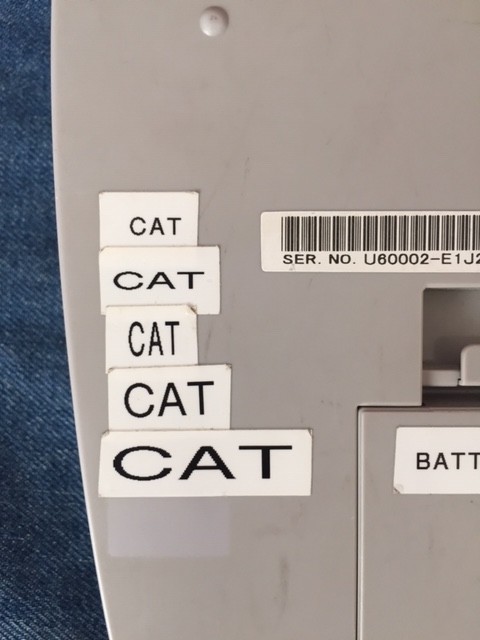
1-Select a short word (I chose cat because it’s short and hey, I like cats…)
2-Print out one label of that word for each size and style your label maker can create.
3-Stick the labels to the back of your label maker or on a large index card for easy reference. Keep the index card in the same place where you store your label maker.
Taking time to set this up takes the work of remembering all the font styles and sizes out of your brain and onto the back of your label maker or on an index card.
After creating the font display almost two decades ago, I now just turn my label maker over, show my client the selection and say, “Pick the font you want!” Happy clients!
Hack #3: Split it Down the Middle
Label maker tape has two parts to it–the label itself and the backing that covers the stickiness.
If you’ve had a label maker for as long as I have, you may remember that label tape was not that easy to work with. When I started using a label maker almost twenty years ago, it was very challenging to get the backing off the label. And frustrating. The backing was about a hairline larger than the actual label. With a keen eye, a few long fingernails, and a lot of practice I was able to remove the backing fairly easily and look like a label maker rock star to my clients.
People must have filed complaints because Brother (the label maker company) eventually changed the backing of the label tape. Hallelujah! Now, the backing of the label splits in two horizontally allowing for MUCH EASIER removal. On the Brother website, it’s called ‘easy-to-use and easy-to-peel-off split-back’ tape.
Less stressed customers = happier customers!
No more struggling to remove the backing of the label. Here’s what to do:
1-Take the label with the words facing away from you and gently bend it in half away from you on the horizontal. You’ll notice a line that will divide the backing in two.
2-Remove both backing strips and apply the label to your surface.
Now you know how to take the backing off the label–what a time (and fingernail) saver!
I hope you enjoyed today’s class. There will be no final exam on the material. Your homework is to practice what you’ve learned and share these hacks with other label maker owners.
Now, go forth and share your new-found knowledge. Class dismissed!






 Contact Stacey to Get Started!


I’m laughing Stacey because I loved this so much! I have been using one for decades. So I guess it’s official. I’m part of the label maker geek fan club. I have several models- one for my car, one for my office, and a few that I inherited from my parents. So I don’t have to worry about having a label maker emergency any time soon. Phew! 🙂
I love the “cat” hack. So clever. The first label maker I bought came with a manual and carrying case. There are type samples printed in the book, so that’s what I used to show clients. But for the newer labelers that don’t have a manual, your idea is awesome.
I have a tape splitter that came with my label maker. So for the old tapes where the backing didn’t split into two pieces, there was a small, plastic gizmo that you threaded the printed tape through, flipped the tape in the other direction, and then easily separated the tape from the backing. But with the newer tapes, it’s easy to peel without using the gizmo.
I’m so glad you got a good laugh from my label maker hack ‘class.’ You have quite a collection of label makers! Label maker geeks unite! 🙂
This was the BEST post, Stacey. I laughed and a I learned. But guess what, I’m still using the old Brother T-Touch 80 with the M231 tapes, and they still require the magic of peeling from the corner. But mine doesn’t have much excess tape, and I rarely have to trim them for file folders unless the label is REALLY long. (I have multiple other, brand-new-in-the-package backups of more modern Brother label makers that I’ve been gifted over the years, but I dread giving up my PT80!) Stellar, funny post!
Thanks so much, Julie! I hear what you’re saying about giving up a tried and true label maker. I think I’d cry if something happened tony beloved label maker. I’ll cross my fingers and pray that your P-Touch 80 lives to be eighty!
Stacy, I’m chuckling along with the others. This post was so much fun! I still have my old brother p-touch label maker with the tape that does not split. I love it and hope it works (and they still make cartridges for it) for years to come. I do like the ‘cat’ hack. Really great tips which I intend to put to good use!
Thanks so much for your kind words–I’m glad my post made you chuckle, Diane. And since you have dogs, you can use the word ‘dog’ for your size and style hack–woof!
Those are such practical tips, Stacey! I do find it frustrating to waste so much tape. This has been a complaint for a long time, but the manufacturers make money on the tape, so they have no incentive to change it. Great idea to make all the labels at once and then just cut them. Also great to have samples on the back of your label maker – brilliant. This is the kind of stuff that we professional organizers just adore reading about, right? Thanks for sharing your terrific tips!
Wasted tape is probably my biggest label maker pet peeve–that’s why I created that hack! But, you’re right. The manufacturers make their money selling the tape. There are times when I use my hack such as when labeling my kid’s school supplies and then there are times when I print one word at a time with a smile. 🙂 So glad you liked the hacks!
These are GREAT hacks. I go through so much wasted label tape, but thanks to you, NO MORE.
Thanks, Melanie. All of those inches of wasted label maker tape add up! Do a few tests–see how many spaces in-between words gives you enough ‘white space’ for making a cut and still having a bit of white label on either side of the word/phrase. Usually, 5-6 spaces works for me. So glad I could help you save label maker tape!
Great tips. I like to use the biggest and boldest type size and style when making labels. But it’s good to know how to change this because occasionally I need other options. I think I’m going to do a label maker training for my team. Thanks for the idea.
So glad I could off you some tips and ideas to use in your training! I love the boldest type size on my label maker–so easy to see from across the room!
Stacey you have just taught this old dog some new tricks!! GREAT blog and thank you!!!
So glad you learned some ‘new tricks!’ I love that we can learn so much from each other’s blogs. As they say in kindergarten: ‘Sharing is Caring!’