Archive for the ‘
Office Products ’ Category
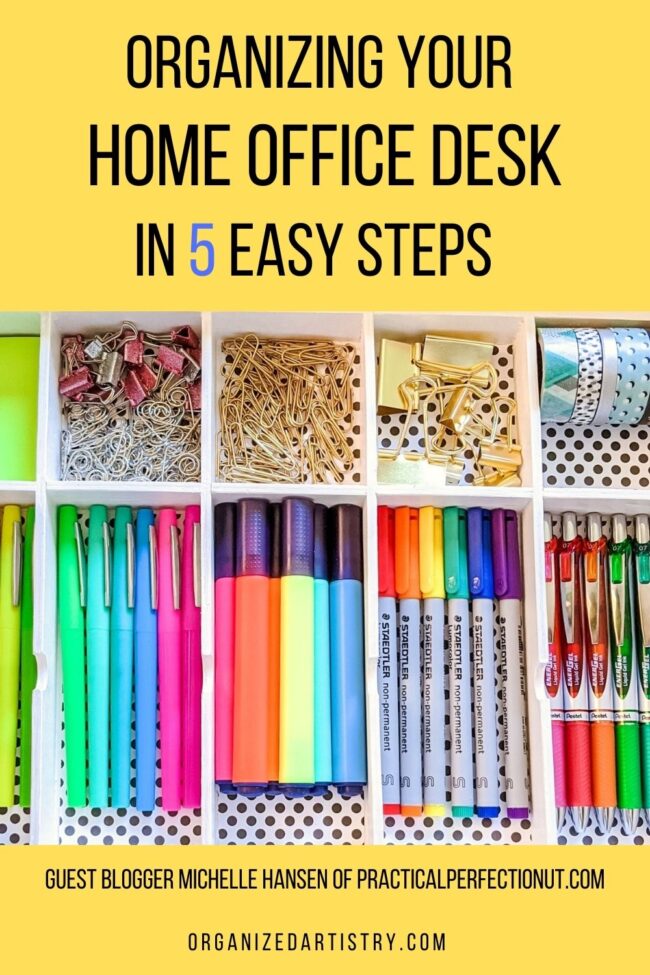
If you’ve been working from home this past year, you know how important your work area is to your productivity. Today, guest blogger, Michelle Hansen of Practical Perfection offers five easy steps to getting your home office desk organized so you can find what you need when you need it whether it be 9-5 Monday – Friday or after hours…
A home office desk sometimes feels like a disaster zone. With piles of untouched papers, a handful of broken pens, and half-used notebooks all crammed inside, it’s easy for your desk to feel untidy and chaotic. Plus, trying to find anything in those messy drawers seems impossible.
If you want to improve your home office experience (or even breathe a little easier at home), conquering that desk is a necessary evil. But, don’t worry, organizing your home office desk can be really simple!
Step 1: Declutter your desk drawers
The first step when you’re organizing anything is to declutter. Working one drawer at a time, go through every single item. With pens, markers, and highlighters, check to see if they even work. You may be surprised how many have dried out!
Be strict as you go through any planners, notebooks, and stationery. Do you have notebooks you never use? If there is any stationery you rarely use, there’s no sense in letting it take up valuable space in your desk. Donate any good notebooks or stationery you’re discarding.
Be realistic as you’re decluttering and only keep what you really use or need. If you have multiples of things like staplers, calculators, or scissors, choose your favorites and donate the rest. You probably don’t need more than 1-2 of each of these items.
Step 2: Separate your supplies into categories
Once you’ve gotten your office supplies whittled down to the ones you actually use, it’s time to separate them into categories.
Start making separate piles on your desk or the floor for writing utensils, loose-leaf paper, notebooks, binders etc. If you find one of your piles is too large, this is a good indication that you might not have decluttered enough, and you might need to reassess your supplies and purge the a bit more.
As you categorize, pay attention to what you use the most. This will help you when you start to put everything back.
Step 3: Organize your drawers strategically
Prioritize your drawer space when you’re putting everything back inside your desk. This is when it’s important to remember what you use the most.
Your top middle drawer is prime real estate, so you want to fill it with things you use all the time. It’s usually thinner than the other drawers, so it limits what you can fit, but it’s perfect for things like pens, pencils, scissors, tape, rubber bands, or paper clips. Any small items you’re always reaching for are made for your top middle drawer.
Be thoughtful as you organize the rest of your drawers. Do you tend to reach to your right side or your left side more? What feels more natural? If you reach for your right-side drawers more often, use the top drawer on that side for things you use the most. Then the drawer beneath that should be filled with your second most-used items, and so on, until you fill the desk!
I would also suggest organizing the inside of your drawer by most-used to least-used as well. In each drawer, decide what items in that category you use frequently and put those at the front. Then work your way back, so the items at the very back of the drawers are the ones you use the least.
Step 4: Use dividers and small bins to keep your supplies contained
I love putting small containers or dividers in my desk drawer. First, it keeps everything tidy. Second, you never lose anything this way! (Unless you have kids who are always stealing the scissors…I’ve been there before.)
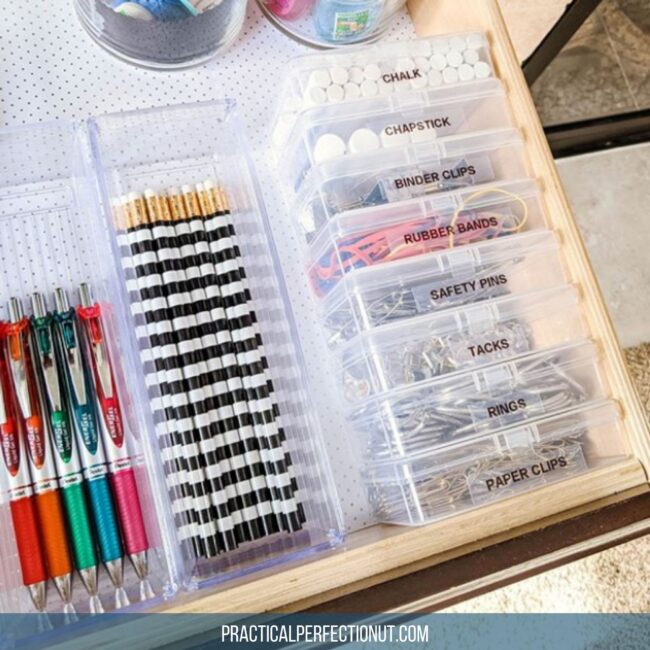
Find small, unlidded containers that fit in your desk and use them to separate as many items as you can. I keep sharpies, highlighters, and pens in separate containers, as well as safety pins, paperclips, and post-it notes.
Organizing your home office desk in this way is a game-changer. How often are you rifling through your drawer to find a paperclip or a rubberband? Keeping them in separate, contained areas means you won’t have any small items rolling around in your desk anymore and you’ll always be able to find them.
Step 5: Maintain your new organized desk with a few simple rules
After you’ve spent the afternoon organizing your home office desk, the last thing you want is for it to get untidy again, right?
Focus on maintaining your desk by implementing a few quick rules, like always putting things back where they belong. I know this sounds like common sense, but we often just throw things back in the drawer when we could take a few extra seconds to place it precisely in it’s container or zone.
I’d also suggest that you operate by the “one in, one out” rule when it comes to your desk. Home office desks have limited space, and if you’re bringing home lots of new stationery or pens when you never use the ones you already have, your desk is going to quickly get messy again. So, if you find a new notebook you just have to have, make sure you donate one you already have in your desk.
If you make it a rule to donate or discard items you already have when bringing home new items, it will either stop you from even buying that extra (and often unnecessary) stationery, or it will ensure that your desk stays organized no matter how much you buy.
Now, in five easy steps, you have an organized home office desk! All you have to do now is focus on step five, and you’ll never dread working from home again.
 Michelle Hansen is a Wife, Mom of 3, and Professional Organizer. She has a passion for showing others how being organized can transform their lives for the better on her blog, Practical Perfection.
Want to stay current and connected to Organized Artistry? Follow us on Facebook, Pinterest, YouTube, LinkedIn, Instagram, and Goodreads!
Click here to sign up for Organized Artistry’s motivating newsletter.
Good morning, class! Welcome to Label Maker Hacks 101. I’m Professor Murray and in today’s lesson we’re going to be discovering 3 label maker hacks to save you time, money, and stress.
Please take out your label maker, place it on the desk in front of you, and make sure the batteries are working. We’ll start off with some fingertip exercises, a quick review of the QWERTY keyboard, and then move on to today’s lesson.
If you have walked into my lecture hall by mistake but wish to stay and learn, please refer to my blog post: 5 Reasons Why You Should Own a Label Maker. It is required reading for the Label Maker Hacks 101 course…
No need to take any notes–I have all the label maker hack details outlined for you below. Let the learning begin!
Todays Lesson: 3 Label Maker Hacks to Save You Time, Money, and Stress
Hack #1: How to Save Tape
If you do not own a label maker you may not be aware of the fact that although a new label maker often comes with one ‘starter’ tape cartridge, in order to print more labels, you must purchase more tape cartridges. They can be purchased individually, in 4-packs, and in bulk.
When printing a label, the label maker leaves the first approximately half to three-quarters of an inch of tape blank and then starts printing the word(s) or phrase. After it has been printed, the label maker leaves another half to three-quarters of an inch blank on the right side of the word/phrase.
That’s A LOT of WASTED label tape. Wasted label tape = wasted money
For those who own label makers, you know how quickly a tape cartridge can run out of tape–usually in the middle of typing a long phrase or when you need to it to print out quickly (not that I have any experience with either of those…ahem…).
I’ve been using my label maker on the job and in my home for close to twenty years and in that time, I’ve discovered a way to save label maker tape. This works especially well when needing to print many related labels such as for folders in a file cabinet or for kid’s school supplies.
Here’s how you do it:
1-Think about your needs. What are you labeling? Spice jars? File folders? Pantry shelves?
2-On paper or on your phone, write the words or phrases you wish to create labels for.
3-Type those words/phrases into your label maker. As you type, press the space bar 5-6 times between each word/phrase. This will create a small blank space between each word/phrase.
4-Press the ‘Print’ button and watch your label maker miraculously give birth to one long label with all of your words/phrases on it.
5-Use the built-in cutting tool to separate the label from the label maker.
6-Use a scissor to cut in between each word/phrase.
Look how much label maker tape you’ve saved!
This label maker hack will eliminate a bulk of the wasted tape on both ends, saving you inches of tape and piles of money.
Hack #2: Keep Your Font Sizes and Styles on Display
Every label maker is different but most offer the user multiple font styles and font sizes to choose from.
Depending upon how old or new your label maker is determines how many font styles and font size options it has. I own a nineteen year old label maker so I only have 5 font sizes and 9 styles. Newer models have upwards of 14 fonts and 10 font styles.
When creating labels for a project, I like to be able to offer my clients some size and style options. Sometimes the nature of the project dictates what size and style font to use. Attic bins need the largest font while small objects require the use of the smallest font. But, sometimes we’re able to use any size and style–that’s when I ask my client to consider their choices.
In order to show my clients their style and size choices without printing all of them out on the spot (and repeatedly using an excessive amount of label tape), I devised a system that would save me precious time and precious label maker tape.
Here’s what I did–I advise you to do the same:
1-Select a short word (I chose cat because it’s short and hey, I like cats…)
2-Print out one label of that word for each size and style your label maker can create.
3-Stick the labels to the back of your label maker or on a large index card for easy reference. Keep the index card in the same place where you store your label maker.
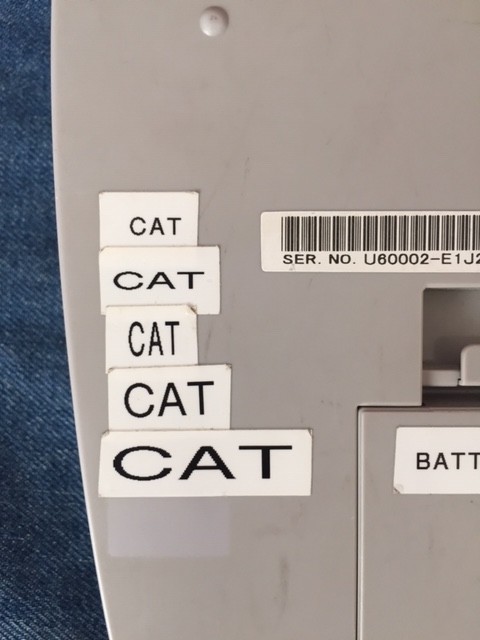
Taking time to set this up takes the work of remembering all the font styles and sizes out of your brain and onto the back of your label maker or on an index card.
After creating the font display almost two decades ago, I now just turn my label maker over, show my client the selection and say, “Pick the font you want!” Happy clients!
Hack #3: Split it Down the Middle
Label maker tape has two parts to it–the label itself and the backing that covers the stickiness.
If you’ve had a label maker for as long as I have, you may remember that label tape was not that easy to work with. When I started using a label maker almost twenty years ago, it was very challenging to get the backing off the label. And frustrating. The backing was about a hairline larger than the actual label. With a keen eye, a few long fingernails, and a lot of practice I was able to remove the backing fairly easily and look like a label maker rock star to my clients.
People must have filed complaints because Brother (the label maker company) eventually changed the backing of the label tape. Hallelujah! Now, the backing of the label splits in two horizontally allowing for MUCH EASIER removal. On the Brother website, it’s called ‘easy-to-use and easy-to-peel-off split-back’ tape.
Less stressed customers = happier customers!
No more struggling to remove the backing of the label. Here’s what to do:
1-Take the label with the words facing away from you and gently bend it in half away from you on the horizontal. You’ll notice a line that will divide the backing in two.
2-Remove both backing strips and apply the label to your surface.
Now you know how to take the backing off the label–what a time (and fingernail) saver!
I hope you enjoyed today’s class. There will be no final exam on the material. Your homework is to practice what you’ve learned and share these hacks with other label maker owners.
Now, go forth and share your new-found knowledge. Class dismissed!

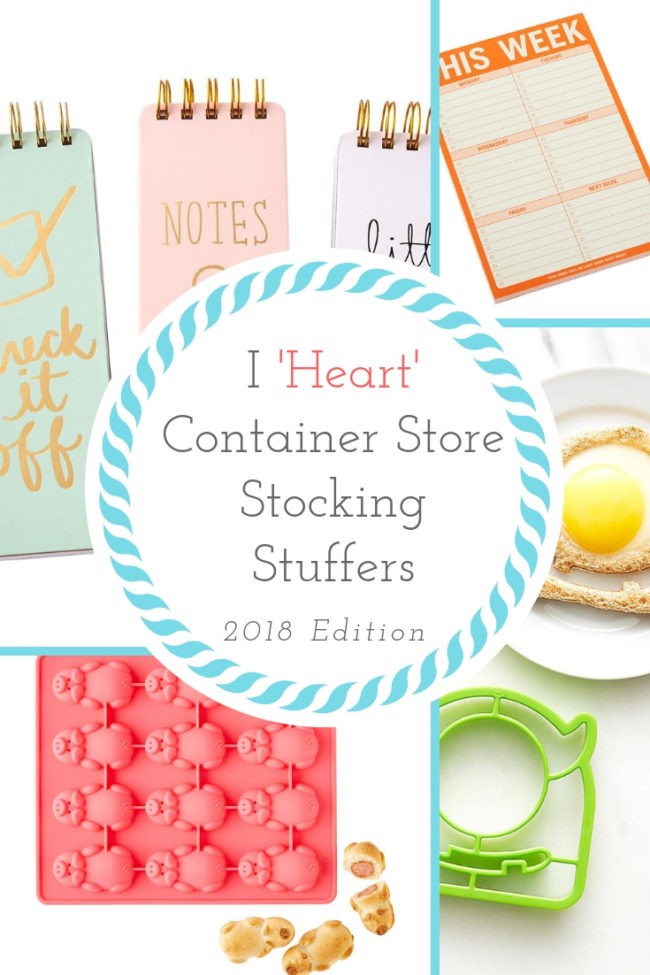
It’s that time of year! The Container Store Stocking Stuffers are here!
A few weeks ago, I headed to my local Container Store (a 10 minute drive from my house) to purchase a few Nalgene bottles for an upcoming vacation. I stepped into the store to make what I thought would be a quick purchase and there it was…the Stocking Stuffer collection of 2018. It was all there for me to see, touch, and admire. Yes, this is what brightens the day of a Professional Organizer and no, this did not end up being a quick trip to the Container Store…
Over the years, the Stocking Stuffer Collection has morphed into more of a group of fun, kitchy, somewhat functional items–most small enough to fit in a regulation holiday stocking and less of a collection of small, cool, organizing products. That’s OK. Year ’round we can shop for the ‘cool’ and the ‘functional.’ Sometimes you need a little ‘cute,’ ‘fun,’ and ‘didn’t-know-I-needed-this’ type-of-product, too.
For 2018, I’ve split up my favorites into two categories: Great for Getting Organized and Awww, That’s Cute.
GREAT FOR GETTING ORGANIZED
NanoClip Pocket & Purse Clip
$4.99
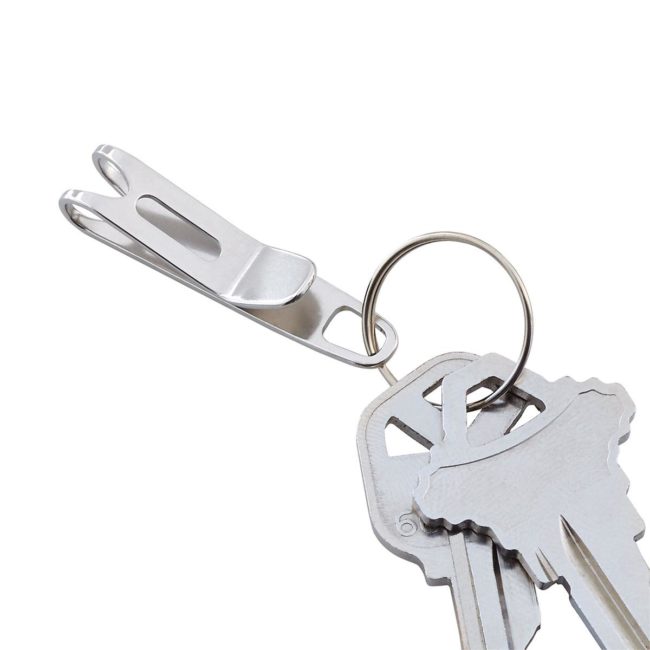
How many times have you thrown your keys in your handbag or backpack and hours later had trouble locating them? No need to search high and low when you attach your keys to the NanoClip Pocket and Purse Clip and attach the clip to the bag you’re carrying. It’s made from stainless steel so it’s strong and lightweight. Works on pants pockets, too.
This Week Notepad
$6.99
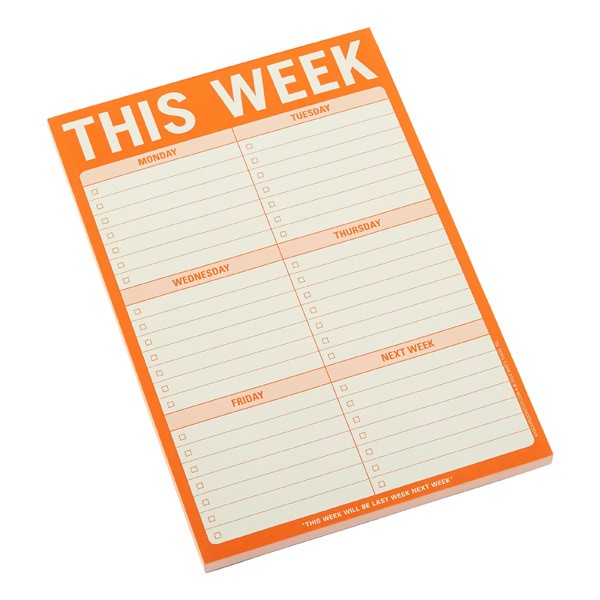
The funny and creative people at KnockKnock created this pad (and others in their collection) for the organized and disorganized alike. Get organized for the week and get a head start on next weeks’ tasks with the space at the bottom right. And it’s orange–you can’t miss it if it ends up on your counter, the bottom of your purse, or in the middle of a pile of papers!
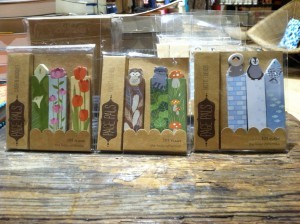
Page Markers and Tab Markers
$9.99
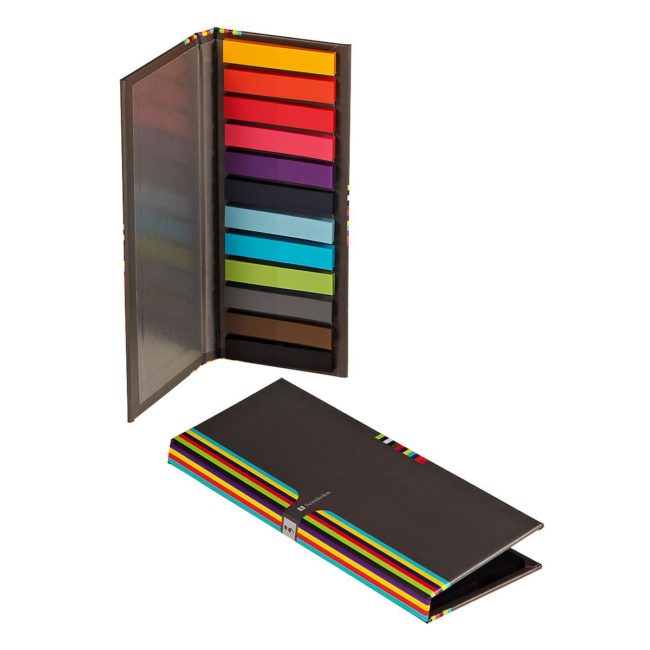
Who loves Post-its? These colorful and sticky flags will help you to color code documents and mark the spot you need to refer back to. A great visual reminder! I love reading a book and using these to highlight passages I’ll want to read again. I usually use them when reading non-fiction books and cookbooks but sometimes I use them when I’m inspired by beautifully written sentences in novels. And check out the case they come in–oh, so organized!
Sayings Notepads
$9.99
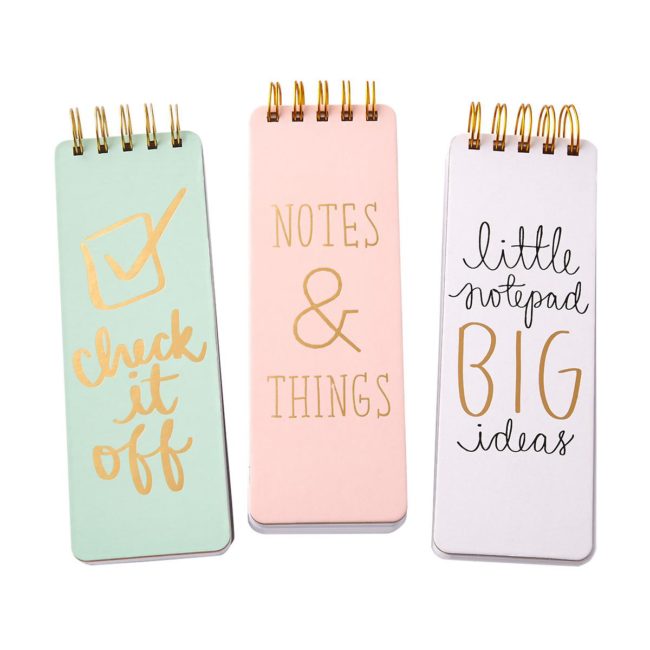 These are girly and a little pricey in my opinion but if a pretty pad motivates you to make a list and get stuff done then it’s perfect! The size looks like it would fit in the tall part of a stocking, too. Imagine what you could accomplish with 150 blank pages!
AWWW, THAT’S CUTE
Monster Bread and Egg Shaper
$7.99
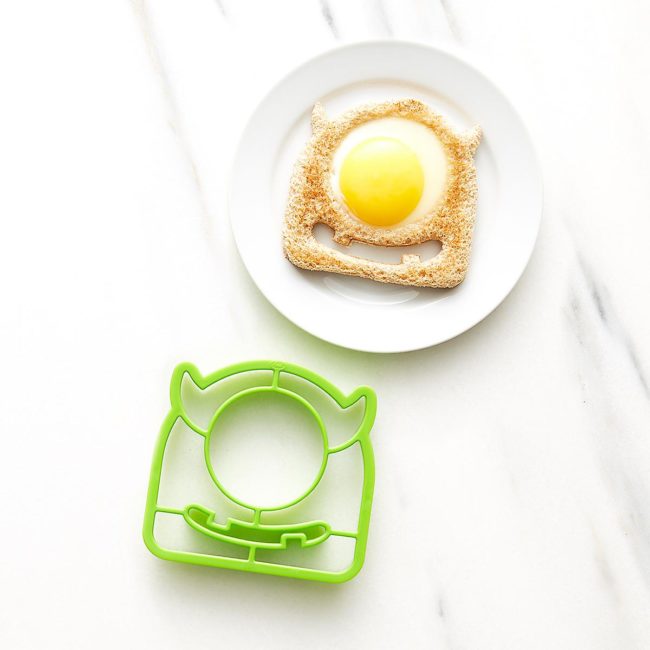
My kids love the movie Monsters, Inc. and this bread and egg shaper reminded me of the little green, one-eyed character Mike Wazowski (played by Billy Crystal). I especially like those little cut-outs for the teeth. Add two slices of bacon for legs and it would look even more like a little monster! If your child enjoys eating eggs and toast this could be a cute way to get them to indulge in a fun and healthy breakfast.
Little Pigs in Blankets Mold
$12.99
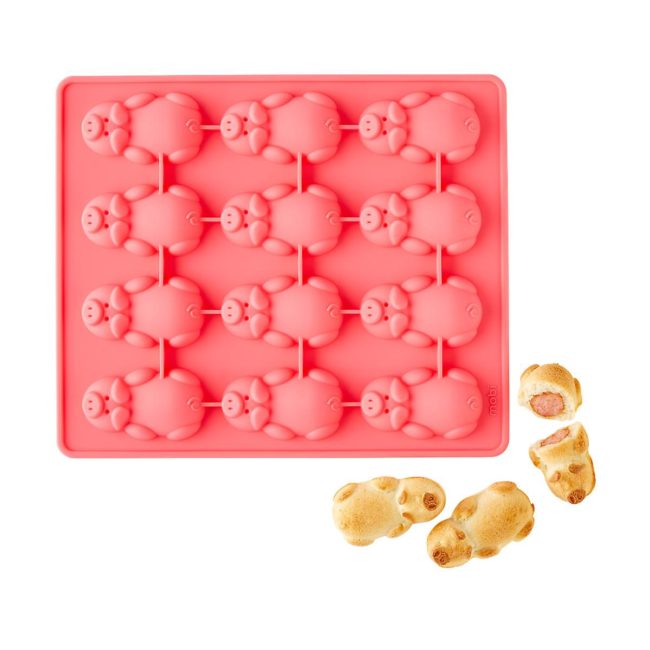 Pigs in blankets are a fan-favorite in my family. We call them ‘little hot dogs’ and no get-together is complete without a platter of these with sides of ketchup and mustard for dipping. This stocking stuffer made me laugh when I saw it. Although I usually buy my ‘little hot dogs’ pre-made, I think my family would appreciate the humor of having these ‘little piggies’ on a platter. The only problem is, I’d need about four of these or make a batch at a time and freeze them. Twelve piggies are not enough!
Would you like to see the rest of the close to one hundred products in the Container Store Stocking Stuffer collection? They’re all right here!
If I handed you a Container Store gift card, which stocking stuffer would you buy?

How many times have you gone to the supermarket with your shopping list written on a piece of paper and any of the following happens:
• you lose it
• it drops somewhere in the cart and gets trapped under your heaviest item
• you have to carry the list while pushing the cart because you think you might otherwise lose it or drop it
Your trip to the supermarket is about to get easier…
Today’s Organizing Quick Tip:
Use a large post-it for your shopping list and stick it to the
front compartment of the cart.
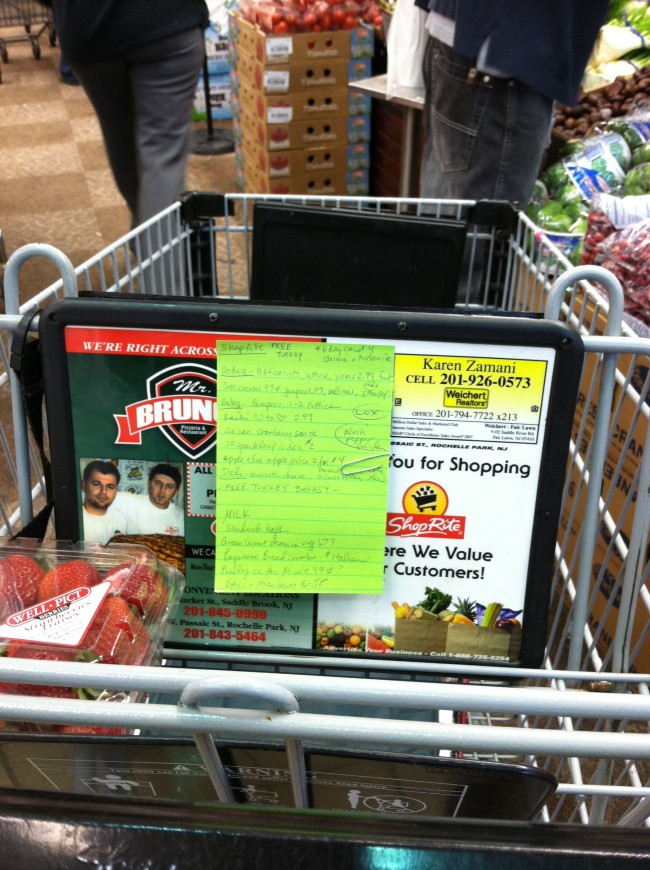
No more fumbling for your list. No more balancing your list and a bag of bananas. Your list is right in front of you making shopping easier and less stressful–that’s what organizing is all about.
I like the fact that these post-its have lines to write on, making your list easier to compose and read. By placing the list in this spot, it also makes it easier to cross items off your list with a pen. You can find these lined post-its in most office supply stores–or Amazon if you need a few extra dollars to make that free shipping limit…
You may notice the paperclip in the picture–my coupons are behind it. Clipping them behind my shopping list post-it makes it easy for me to refer to them during my shopping trip and have them ready when the cashier asks for them.
For those of you who have small children seated in that front compartment, I know you can’t stick your shopping list in the spot above–I’ve been there. My kids’ shopping cart cover had side pockets for bottles/snacks and while my sons were little and sitting in that front section of the cart, I’d put the big post-it shopping list in one of those pockets. Yes, sometimes my child would grab it and I’d have to move it around (and sometimes even stick it to myself) but that period of their lives won’t last long. Soon you will be able to stick your post-it shopping list on the shopping cart.
Who’s going shopping the organized way today?

Students from preschool to college love to use backpacks. They come in a multitude of sizes, colors and price points and can hold a ton of books and supplies. My guest blogger, Amber Kostelny of Amber’s Organizing knows that a backpack has the potential to be a black hole or bottomless pit so she’s offering some of her best tips for organizing a backpack. Read on…
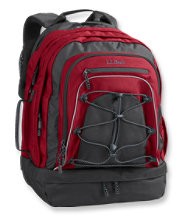 |
| LL Bean Turbo Transit Backpack |
Organizing a backpack and keeping it neat and tidy is not much different from organizing something else in your home or office. Similar principles apply. Here are my top tips! (and if you’ve got some to share- please comment! We’d love to hear them.)
• Use pouches that are colored and clear. This may sound confusing, so let me explain. Seeing through a container or pouch makes finding pencils, pens, and erasers a lot easier. If they are tinted a color, that’s even better. Over time, your child will for example associate blue for pencils and red for note cards. This makes it easier to grab a pouch out of the bag. Avoid loose crayons, highlighters and erasers. Everything should be in a pouch or small bag.
• Assign each pocket in the backpack its’ own function or use. For example, maybe the front small pocket will always contain the pencil case and the first large pocket- folders and paper, where as the second large compartment or pocket will house the books. Again, over time your student will instinctively associate certain pockets with certain contents. They’ll never have to guess where something is if everything “has a home”.
• Clean it out regularly. This step is the most important. I recommend each and every night, clean out and tidy up the backpack. This may not be realistic for your child but if you can get into this habit, it will really help. Otherwise, shoot for once a week. That will help keep the mess at bay.
• Label everything. Cases, pouches, books, folders and just about anything else you can think of- label it! Although kids like to write the label or title out themselves, encourage them to use your label maker. It will make it easier for everyone if the labels are clearly typed out.
• Color code folders, binders, and notepads. Choose one color to represent one subject. Perhaps your child’s math book has a book cover. Then stick to a blue folder or notebook to match it. All of these little changes can sometimes make a huge difference if you child identifies with colors to stay organized.
Amber has been serving the Chicago area as a professional organizer since January 2004. She is a Certified Professional Organizer® and specializes in residential and small business organizing. She especially enjoys working one on one with clients to customize the organizing solutions and systems to add efficiency to their space or business. Helping people problem solve difficult spaces and creating productive work spaces is very rewarding to her. Amber is a Golden Circle member of the National Association of Professional Organizers as well as local member of the Chicago chapter.
Links:
ambersorganizing.com
chicagoprofessionalorganizer.com
facebook.com/ambersorganizingllc
twitter.com/luvtoorganize
You’ve seen them in the store. All those little buttons. The tape cassettes. The promise of perfectly lined up words and phrases, phrases you will stick on files and bins that will keep you organized for eternity…
You’ve may be hemming and hawing and asking yourself–do I really need one?
Should you buy a label maker?
You don’t need to be a Professional Organizer to own one. I’m here to tell you…
YES! BUY A LABEL MAKER!
I’ve had my Brother P-Touch for over fifteen years. Like a Timex watch, ‘It takes a licking and keeps on ticking…’ I think I’ve changed the batteries less than five times since I’ve owned it. A doctor uses a stethoscope. A tailor uses a sewing machine. A professional organizer goes nowhere without a label maker.
There are a few different brands of label makers, but I prefer the products made by Brother.
It has been an indispensable tool in my organizer’s work bag. Clients love when I take it out of my bag and place it on their table. I’ve seen small children and animals mystified by the tape that comes out of the side of the machine.
Have I convinced you yet of their wonderfulness and that you need to own one? If you’re still reading this post then I guess you haven’t darted off to the store. OK, here are…
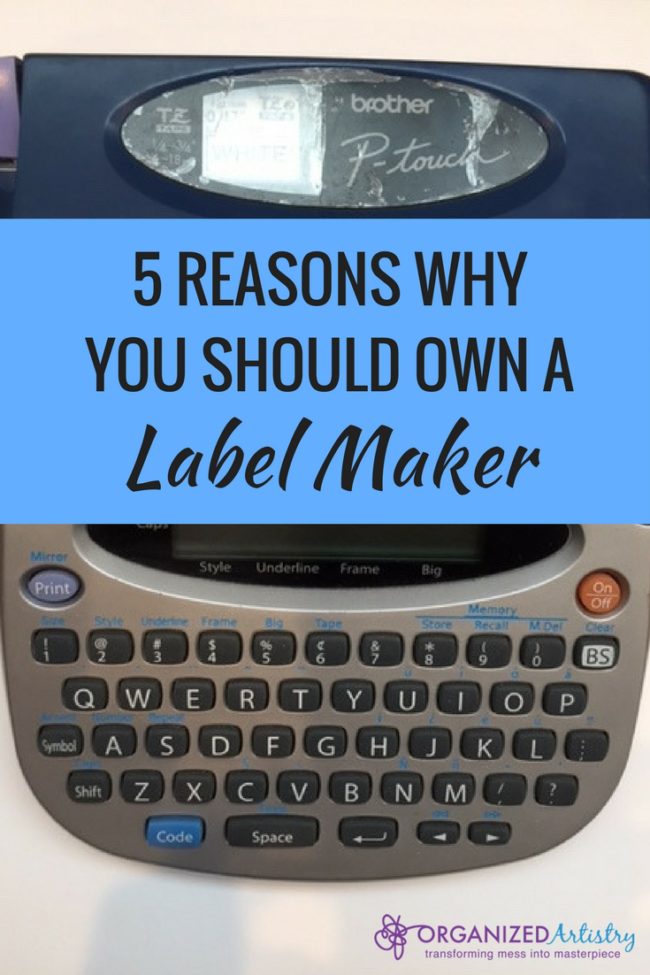
Five Reasons Why You Should Own a Label Maker
1. Label makers make our lives easier . They’re light, portable and those labels help us identify items quickly–saving us time and energy. Label makers are especially helpful to those who have illegible handwriting, too.
2. Label makers make getting organized enjoyable. Label Makers make people happy. Thus, people are happy when they are getting organized, making the process more enjoyable.
3. You can express yourself with label maker tape. Do you know the phrase, “It’s not all black and white?’ Well, neither are the label maker tape cassettes. Most often, I use black text on white tape but there are other options such as black text on clear tape, black text on yellow or black text on red tape.
4. Printed labels make you feel organized. Printed labels are easily identifiable and readable–close-up and from far away. They create order where they may be chaos.
5. You’ll be the envy of all your friends! They’re going to wish their files and bins could look as great and be as organized as yours with that labelmaker in your hand!
Did you make your decision–to buy or not to buy? If you said, ‘BUY!’ you won’t regret this purchase. Check online and in local stores for different models/features and the best price. I bought my label maker in Costco back in 2001–don’t forget to check in those type of stores, too. Buy the tapes in bulk from an office supply store or use a coupon to bring down the price.
Happy Labeling!

SaveSave
SaveSave
You’ve decided to organize your files–that’s great! I’m so proud of you.
You purchased hanging folders for this project, right? Good. You’re on your way!
Open the box of hanging folders. Somewhere in the box is a plastic baggie filled with plastic tabs and paper inserts.
Take a close look at the tabs. They’re small–only 2″ across. You can’t write much on them. I’m going to tell you right now–they’re going to frustrate you to no end as you attempt to use them for your filing project.
I’d like you to consider NOT using them.
I know you paid for them. But, I’m going to ask you to spend a little more money on your files.
The ‘Cool Product’ that will make it easier for you to locate, retrieve and store your papers is…
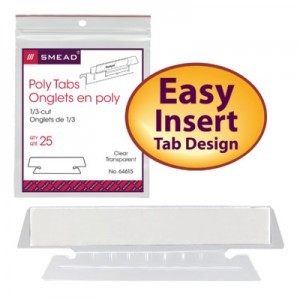
The 3.5″ Hanging File Poly Tab
 |
| Photo: SMEAD |
What are the benefits to using 3.5″ tabs?
– they have more room to write on
– larger tabs means you can write larger on them or create labels with large letters for easy readbility
– find files more quickly with a larger tab
Whenever I work with a client on getting their papers organized/setting up a file system, I always recommend they use 3.5″ tabs. I pull a pack of these out of my ‘magic’ bag of organizing supplies, and people are amazed–most have never seen the 3.5″ tabs. They only know about the 2″ tabs that come in the box of file folders. Happiness abounds. Joyful categorizing and labeling begins. Another client’s life made easier with a Cool Product…
Thinking of switching to 3.5″ tabs?
Want to stay current and connected to Organized Artistry? Follow us on Facebook, Pinterest, YouTube, LinkedIn, and Goodreads!
Click here to sign up for Organized Artistry’s motivating monthly newsletter.
Have you ever shopped at Anthropologie?
According to their website, “Anthropologie remains a destination for women wanting a curated mix of clothing, accessories, gifts and home décor that reflects their personal style and fuels their lives’ passions, from fashion to art to entertaining.”
It’s one of the most beautiful stores I’ve ever shopped in. I feel like I’m stepping into another world every time I walk inside of one. Anthropologie (or ‘Anthro’ as some shoppers like to call it) sells more than just clothing for women. It also sells shoes, accessories, books, and decorative items for the home.
Back in late December, I hit an end-of-year sale at Anthropologie (Chelsea Market, NYC) with some friends. I picked up a few beautiful tops and a dress that I can’t wait to wear. While strolling thru the home decor department, I noticed an area that had office supplies. Office supplies? Never expected to see those at Anthropologie!
I couldn’t resist and the price was right! What did I bring home with me besides clothes? I brought home…
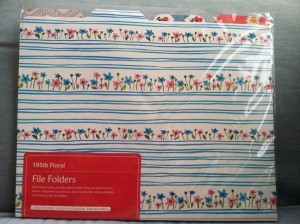
1950’s Floral File Folders
The packaging reads, ” Style before order, or order before style? Now you don’t have to choose. Paperwork is rarely fun, but it can be chic when combined with these stylish file folders.” The patterns are 1950’s-inspired British textile designs. Four designs and eight file folders in the package–labels, too by Galison New York. Can’t wait to start using them!
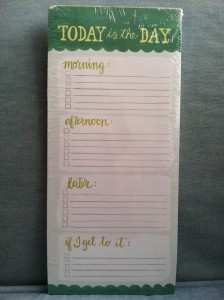
Today is the Day Notepad
I saw this pad and couldn’t believe my luck! The ‘Today is the Day’ Pad by
Onecanoetwo was made for me! This is exactly how I plan my day. I make a list of what I want to accomplish in the morning, in the afternoon before picking the kiddies up from school, and at night after they go to sleep. I’m going to have to buy more of these when I run out!
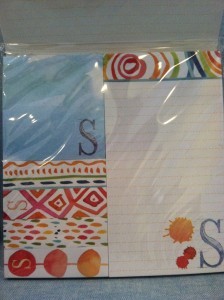
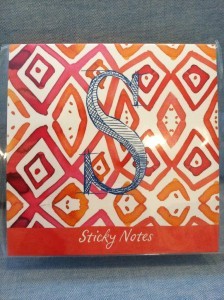
Monogrammed Sticky Notes
Post-its. With my initial on them. Couldn’t resist them. Loved the colors. Loved the case they came in. They had to come home with me and live on my desk. Also by
Galison. Artwork by
Samantha Hahn.
Did I mention that all of these organizing supplies were reduced and then an extra 30% off? Woo-hoo! Makes my heart skip a beat…
And because one
Anthoplogie was not enough for me, I felt the need to also check out the one in my backyard in Paramus, NJ. Got two more beautiful tops on sale and spotted these–animal and garden-themed post-it flags. Not on sale. May go back and buy them anyway. When I read a non-fiction book, I use flags to mark sections I’d like to refer to later. These would definitely make my bookshelves more aestheically pleasing.
So, next time you go shopping for clothes or shoes or groceries or motor oil, keep your eye out for organzing supplies. You never know what you’ll find…

Another product from SMEAD has arrived in my mailbox!
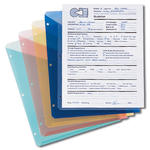
January’s product review is for the Poly Translucent Slash Jacket. It sounds like a great name for a punk rock band to me, but it’s not–it’s really the name of an office product.
The ‘Slash Jacket’ comes in ‘clear’ or a pack of assorted colors. SMEAD sent me one in a nice baby blue. It’s very pretty…
They are…
– translucent
– 3-hole punched for standard three-ring binders
– letter size
– acid free, archival quality
– closed on both sides and on the bottom
And they have pockets on both sides – great for storing lots of papers!
The ‘Slash’ part of this product is what makes it functional. Papers are kept safe and at the same time are easy to retrieve and put away. Try doing that with a full plastic sleeve–not as easy…
I wouldn’t use them for recipes but I could see using them in a binder of information that requires easy access such as...
– A Wedding binder – one side for ideas, one side for vendor contracts
– A Decorating/Adding On/Building a New Home binder – one side for each room of the house
– A binder for Students – one side for tests, the other side for important class notes
No need for a hole puncher. No little, punched-out circles all over your desk or floor. The Poly Translucent Slash Jacket is a perfect solution for organizing, storing and retrieving papers in a three-ring binder.
If you’ve read some of my past posts, you know that just about once a month, the office supply company, SMEAD sends me one of their products to review on my blog. I’m always excited to rip open the package to see what it is.
SMEAD has sent me what I think is a very efficient office/home office product–the Secure Pocket with Easy Grip.
Have you ever put a bunch of papers in a folder and had them fall out all over the floor? I think all of us at one time or another has had that happen. It’s no fun!
Enter the SMEAD Secure Pocket with Easy Grip. This pocket folder is designed to provide twice as much grip as other pocket folders. I’m not sure even a tornado could blow papers out of these folders.
These straps you see in the picture are strong! You’re going to need to eat a bowl of Wheeties or head to the gym before stretching these straps out! I tried pulling them before I had my breakfast and I had to exert more energy than I usually do when securing paper into a pocket folder…
It fits beautifully in a file cabinet and has Tyvek reinforcements on the side to make the place where you put the straps practically tear-proof. Yea–no raggedy looking edges! It also has a barely noticeable grippy material running across the top of the folder–this makes it easier to pull out of your file cabinet. Love this feature!
Just to test it out, I put some papers inside the Secure Pocket with Easy Grip. I placed the straps over the top of the folder, threw it up in the air and the papers didn’t fall out. I knocked the folder off my desk–no papers fell out.
With the SMEAD Secure Pocket with Easy Grip you’re practically guaranteed that your papers won’t fly out of the top and that you’ll get an upper body workout as well. Who could ask for more from an office product?
 Michelle Hansen is a Wife, Mom of 3, and Professional Organizer. She has a passion for showing others how being organized can transform their lives for the better on her blog, Practical Perfection.


 These are girly and a little pricey in my opinion but if a pretty pad motivates you to make a list and get stuff done then it’s perfect! The size looks like it would fit in the tall part of a stocking, too. Imagine what you could accomplish with 150 blank pages!





 Contact Stacey to Get Started!